
Finance
How To Cash An Insurance Check
Published: November 11, 2023
Learn how to cash an insurance check and manage your finances effectively with our comprehensive guide. Take control of your financial future today!
(Many of the links in this article redirect to a specific reviewed product. Your purchase of these products through affiliate links helps to generate commission for LiveWell, at no extra cost. Learn more)
Table of Contents
Introduction
When it comes to insurance claims, receiving a check for your settlement is an exciting moment. However, cashing an insurance check may not be as straightforward as depositing a regular check. There are several steps you need to follow to successfully cash an insurance check and access your funds.
Insurance checks are typically issued after a claim has been approved and settled. They can be for various reasons, such as auto accidents, property damage, or injury claims. Depending on the amount and your personal circumstances, you may have different options for cashing the check. It’s important to understand the process and any requirements in order to navigate this phase smoothly.
In this article, we will guide you through the step-by-step process of cashing an insurance check. From endorsing the check to receiving your funds, we will cover all the necessary details to ensure a hassle-free experience.
Note that the specific procedures may vary depending on the bank or financial institution you choose, as well as the type of insurance check you are cashing. Always check with your bank or consult the issuing insurance company for any additional requirements or specific instructions.
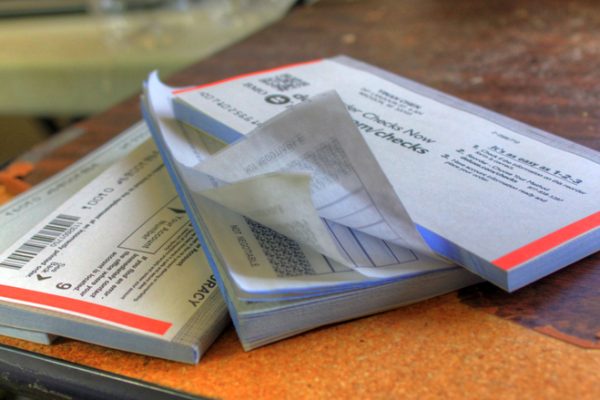
Step 1: Endorse the check
The first step in cashing an insurance check is to endorse it. When you endorse a check, you are basically signing the back of the check to indicate that you are the payee and granting authorization for the funds to be transferred to you.
To endorse the insurance check, turn it over and locate the designated endorsement area on the back. This area is usually marked with the phrase “Endorse Here” or similar instructions. Generally, you will need to sign your name exactly as it appears on the front of the check.
In addition to your signature, it’s a good practice to write “For Deposit Only” or “For [your bank’s name] Account Only” beneath your signature. This helps ensure that the check can only be deposited into your account and minimizes the risk of it being fraudulently cashed by someone else.
It’s important to note that if the insurance check is made payable to multiple parties, such as yourself and another person or entity, all parties will need to endorse the check. Therefore, it’s crucial to coordinate with all involved parties to ensure the check is properly endorsed.
Remember, before you proceed to endorse the check, double-check to ensure that all other necessary actions, such as documenting any damages or confirming the settlement amount, have been completed. This will help prevent any complications or delays in the cashing process.
Once you have endorsed the insurance check, you are ready to proceed to the next step and verify your identity.
Step 2: Verify your identity
When cashing an insurance check, it is crucial to verify your identity to ensure the legitimacy of the transaction and protect against fraud. Financial institutions have strict procedures in place to prevent unauthorized access to funds, so be prepared to provide proper identification.
The specific requirements for verifying your identity may vary depending on the bank or financial institution you choose, as well as the amount of the insurance check. However, here are some commonly accepted forms of identification:
- Government-issued photo ID: This can be a driver’s license, passport, or any other identification card issued by a government agency.
- Social Security number: You may be asked to provide your Social Security number as part of the identification process.
- Proof of address: Some financial institutions may also require proof of your current address, such as a utility bill or a lease agreement.
It’s important to have these documents readily available when you visit the bank or financial institution to cash your insurance check. Make sure the identification documents are valid and not expired.
Additionally, if the insurance check is made payable to multiple parties or if you are cashing the check on behalf of someone else, you may need to provide additional documentation to demonstrate your authority to do so. This can include a power of attorney or a letter of authorization.
Remember, the purpose of verifying your identity is to protect your financial interests and prevent fraudulent activity. By following the proper identification procedures, you can ensure a smooth cashing process and have peace of mind knowing that your funds are secure.
Once your identity has been verified, you can proceed to the next step and choose your preferred cashing option.
Step 3: Choose your cashing option
When it comes to cashing an insurance check, you have several options to choose from. The best option for you will depend on your personal preferences, convenience, and any applicable fees associated with each method. Here are some common cashing options:
- Bank deposit: One of the most straightforward options is to deposit the insurance check into your bank account. You can visit your bank’s branch or use their mobile banking app to deposit the check electronically. This is typically a convenient and secure method, especially if you already have a bank account.
- Cashier’s check: If you need immediate access to the funds, you can request a cashier’s check from the insurance company. This option allows you to receive the funds in the form of a secure check drawn from the insurance company’s account. Keep in mind that some insurance companies may charge a fee for issuing a cashier’s check.
- Third-party check cashing service: If you don’t have a bank account or prefer not to use one, you can utilize a third-party check cashing service. These services specialize in cashing checks and typically charge a percentage of the check amount as a fee. Be sure to research and choose a reputable and trustworthy service to ensure the security of your funds.
- Direct deposit to a prepaid card: Some insurance companies offer the option to deposit funds directly onto a prepaid debit card. This allows for quick and easy access to the funds without the need for a traditional bank account. However, there may be fees associated with using a prepaid card, so be sure to review the terms and conditions.
Consider your specific needs, the urgency of accessing the funds, and any associated fees when selecting the cashing option that works best for you. Additionally, keep in mind that some insurance companies may have specific guidelines or limitations regarding the cashing options available to you.
Once you have chosen your preferred cashing option, you can move on to the next step and visit the bank or financial institution to complete the process.
Step 4: Visit the bank or financial institution
After you have decided on the cashing option for your insurance check, it’s time to visit the bank or financial institution to initiate the cashing process. This step is crucial in order to convert the check into actual cash or deposit it into your chosen account.
When visiting the bank, it’s important to be prepared and organized. Here are some important things to keep in mind:
- Bring your identification: As discussed earlier, make sure to bring valid identification documents such as a government-issued photo ID, your Social Security number, and proof of address. This will be necessary for verifying your identity.
- Have the insurance check ready: Bring the insurance check with you to the bank. Keep it in a safe and secure place to avoid misplacing or losing it.
- Understand the bank’s policies: Different banks may have different policies and requirements for cashing insurance checks. Familiarize yourself with the specific guidelines of your bank to ensure a smooth experience.
- Consider appointment or wait times: Depending on the bank and the time of your visit, there may be a need to make an appointment or anticipate potential wait times. Planning accordingly can help save you time and ensure a prompt cashing process.
Once you arrive at the bank, proceed to the customer service or teller counter. Let the bank representative know that you would like to cash an insurance check. They will guide you through the necessary steps and inform you of any additional documentation or requirements.
It’s important to be patient and cooperative during this process. If you have any questions or concerns, don’t hesitate to ask the bank representative for clarification. They are there to assist you and ensure a smooth transaction.
Now that you have visited the bank or financial institution, it’s time to move on to the next step and submit the insurance check along with any required documentation.
Step 5: Submit the check and required documentation
When cashing an insurance check at a bank or financial institution, you will need to submit the check along with any required documentation. This step ensures that all necessary information is provided and allows the bank to process the transaction smoothly.
Here are the key steps to follow when submitting the insurance check:
- Hand over the insurance check: Present the insurance check to the bank representative. They will carefully inspect the check to ensure it is not altered or tampered with.
- Provide any supporting documentation: Depending on the circumstances and the bank’s policies, you may be required to provide additional documentation. This can include any claim forms, settlement agreement paperwork, or proof of your relationship to the insured individual.
- Confirm your account information: If you are depositing the insurance check into your bank account, the bank representative may ask for your account details. This can include your account number, account type, and any applicable routing numbers.
During this step, it’s important to be organized and have all the necessary paperwork readily available. Make sure to double-check that you have all the required documents and that they are properly filled out and signed.
Keep in mind that the bank may take some time to review and process the check. This can vary depending on the specific policies of the bank as well as the amount of the insurance check. Be prepared for some waiting time, and try to be patient throughout the process.
If there are any discrepancies or issues with the check or the supporting documents, the bank representative will inform you and guide you on the necessary steps to rectify the situation. It’s important to follow their instructions and provide any additional information or documentation as requested.
Once the check and required documentation have been submitted, the bank representative will proceed with reviewing and processing the transaction. This leads us to the next step – reviewing and signing any necessary forms.
Step 6: Review and sign any necessary forms
After submitting the insurance check and required documentation, the bank or financial institution may ask you to review and sign any necessary forms. These forms are designed to ensure compliance with legal and regulatory requirements and provide consent for the cashing or depositing of the insurance check.
Here are some common forms you may encounter:
- Deposit slip: If you are depositing the insurance check into your bank account, you may need to fill out a deposit slip. The deposit slip typically requires you to provide your account number, the amount of the deposit, and any other relevant details. Verify the accuracy of the information before signing the deposit slip.
- Indemnity form: In certain cases, the bank may require you to sign an indemnity form. This form states that you will indemnify, or compensate, the bank in the event of any legal issues that arise from the submission of the insurance check. Read the form carefully and ensure you understand the terms before signing.
- Declaration of endorsement: If you are cashing the insurance check on behalf of someone else, you may be asked to sign a declaration of endorsement. This document confirms that you have the authority to endorse and cash the check on their behalf. Make sure to provide accurate and truthful information when completing this form.
It’s important to carefully review the forms presented to you before signing them. If you have any questions or concerns about the content or purpose of the forms, do not hesitate to ask the bank representative for clarification.
By signing the necessary forms, you are legally acknowledging and accepting the terms and conditions of the check cashing or depositing process. Take your time to read through each form and ensure that your signatures are clear and legible.
Once you have reviewed and signed the necessary forms, the bank representative will proceed with the final steps to complete the cashing or depositing of the insurance check. This brings us to the next step – the receipt of your cash or funds.
Step 7: Receive your cash
After completing all the necessary steps, including endorsing the check, verifying your identity, choosing your cashing option, visiting the bank or financial institution, submitting the check, and reviewing and signing any required forms, it’s time to finally receive your cash or funds.
Depending on the cashing option you chose, here’s what to expect:
- Bank deposit: If you opted to deposit the insurance check into your bank account, the funds should be available in your account according to your bank’s policies. You can check your account balance online, withdraw cash from an ATM, write checks, or make purchases using your debit card.
- Cashier’s check: If you requested a cashier’s check, the bank or the insurance company will provide you with the check. This check can be cashed immediately, and you can use the funds as needed.
- Third-party check cashing service: If you used a third-party check cashing service, they will provide you with the cash or prepaid card loaded with the funds, minus any fees associated with their service.
- Direct deposit to a prepaid card: If you opted for direct deposit to a prepaid card, the funds should be available on the card according to the terms and conditions of the specific card provider.
Make sure to count your cash or review the details on any cashier’s checks or prepaid cards before leaving the bank or check cashing service. Ensure that the amount matches the value of the insurance check and that all necessary deductions, such as fees, have been accounted for.
In the case of a bank deposit, keep in mind that it may take some time for the insurance check to fully clear. This is to ensure that the check is valid and has sufficient funds. Your bank will typically provide you with information regarding the availability of funds based on their policies and the type of check.
Remember to keep a copy of the deposited insurance check, along with any receipts or records of the transaction, for your own records and for future reference.
With the completion of Step 7, you have successfully cashed your insurance check and can now enjoy your funds for the intended purpose or use.
Disclaimer: The information provided in this article is for general informational purposes only and does not constitute professional advice. Please consult with a financial professional or your bank for specific guidance on cashing insurance checks.
Conclusion
Cashing an insurance check may initially seem like a daunting task, but with the right knowledge and guidance, it can be a straightforward process. By following the step-by-step instructions outlined in this article, you can successfully cash your insurance check and access the funds you are entitled to.
Remember to carefully endorse the check, verify your identity, choose a cashing option that suits your needs, visit the bank or financial institution with the necessary documentation, review and sign any required forms, and finally receive your cash or funds.
Throughout the process, it’s important to be organized, patient, and proactive. Ensure that you have all the required documents and identification readily available, and be prepared for potential waiting times or additional requirements at the bank or financial institution.
Additionally, it’s crucial to understand and comply with the specific policies of your bank or the insurance company involved. This will help streamline the cashing process and minimize any potential complications or delays.
Always keep copies of the insurance check, receipts, and any other relevant documents for your records. This will help you track your financial transactions and serve as proof in case of any future disputes or inquiries.
If you have any questions or concerns during the cashing process, don’t hesitate to reach out to your bank or consult the issuing insurance company for guidance. They are there to assist you and ensure a smooth and secure transaction.
We hope that this article has provided you with the necessary information and guidance to confidently cash your insurance check. Remember to always prioritize your financial security and consult professionals if needed. Happy cashing!
Disclaimer: The information provided in this article is for general informational purposes only and does not constitute professional advice. Please consult with a financial professional or your bank for specific guidance on cashing insurance checks.
What's Hot
Latest Articles
Related Post

By: • Finance

By: • Finance
By: • Finance
By: • Finance
By: jac • Finance
By: • Finance
By: • Finance

By: • Finance

By: • Finance
By: • Finance

By: • Finance

By: • Finance


By: • Finance