Finance
How To Change Credit Card On Steam
Modified: February 21, 2024
Learn how to easily change your credit card on Steam and manage your finances effectively. Enhance your gaming experience with seamless payment updates.
(Many of the links in this article redirect to a specific reviewed product. Your purchase of these products through affiliate links helps to generate commission for LiveWell, at no extra cost. Learn more)
Table of Contents
Introduction
Steam, the popular digital distribution platform for video games, allows users to purchase games, DLCs, and other digital content using their credit cards. However, there may come a time when you need to update or change the credit card associated with your Steam account. Whether your old card has expired, you’ve got a new card from a different bank, or you simply want to switch to a different card for convenience, Steam makes it easy to update your payment information.
In this guide, we will walk you through the steps to change your credit card on Steam. Whether you’re a seasoned Steam user or new to the platform, rest assured that the process is simple and straightforward. By following our instructions, you’ll be able to update your payment details and continue enjoying your favorite games in no time.
Please note that it is important to keep your payment information up to date to ensure hassle-free transactions and uninterrupted access to your games and purchases. So, without further ado, let’s dive into the step-by-step process of changing your credit card on Steam.
Step 1: Accessing Your Steam Account
The first step to changing your credit card on Steam is to access your Steam account. To do this, open the Steam application on your computer or visit the official Steam website.
If you are using the Steam application, simply launch it from your desktop or start menu. If you don’t have the application installed, you can download it from the official Steam website and install it on your computer.
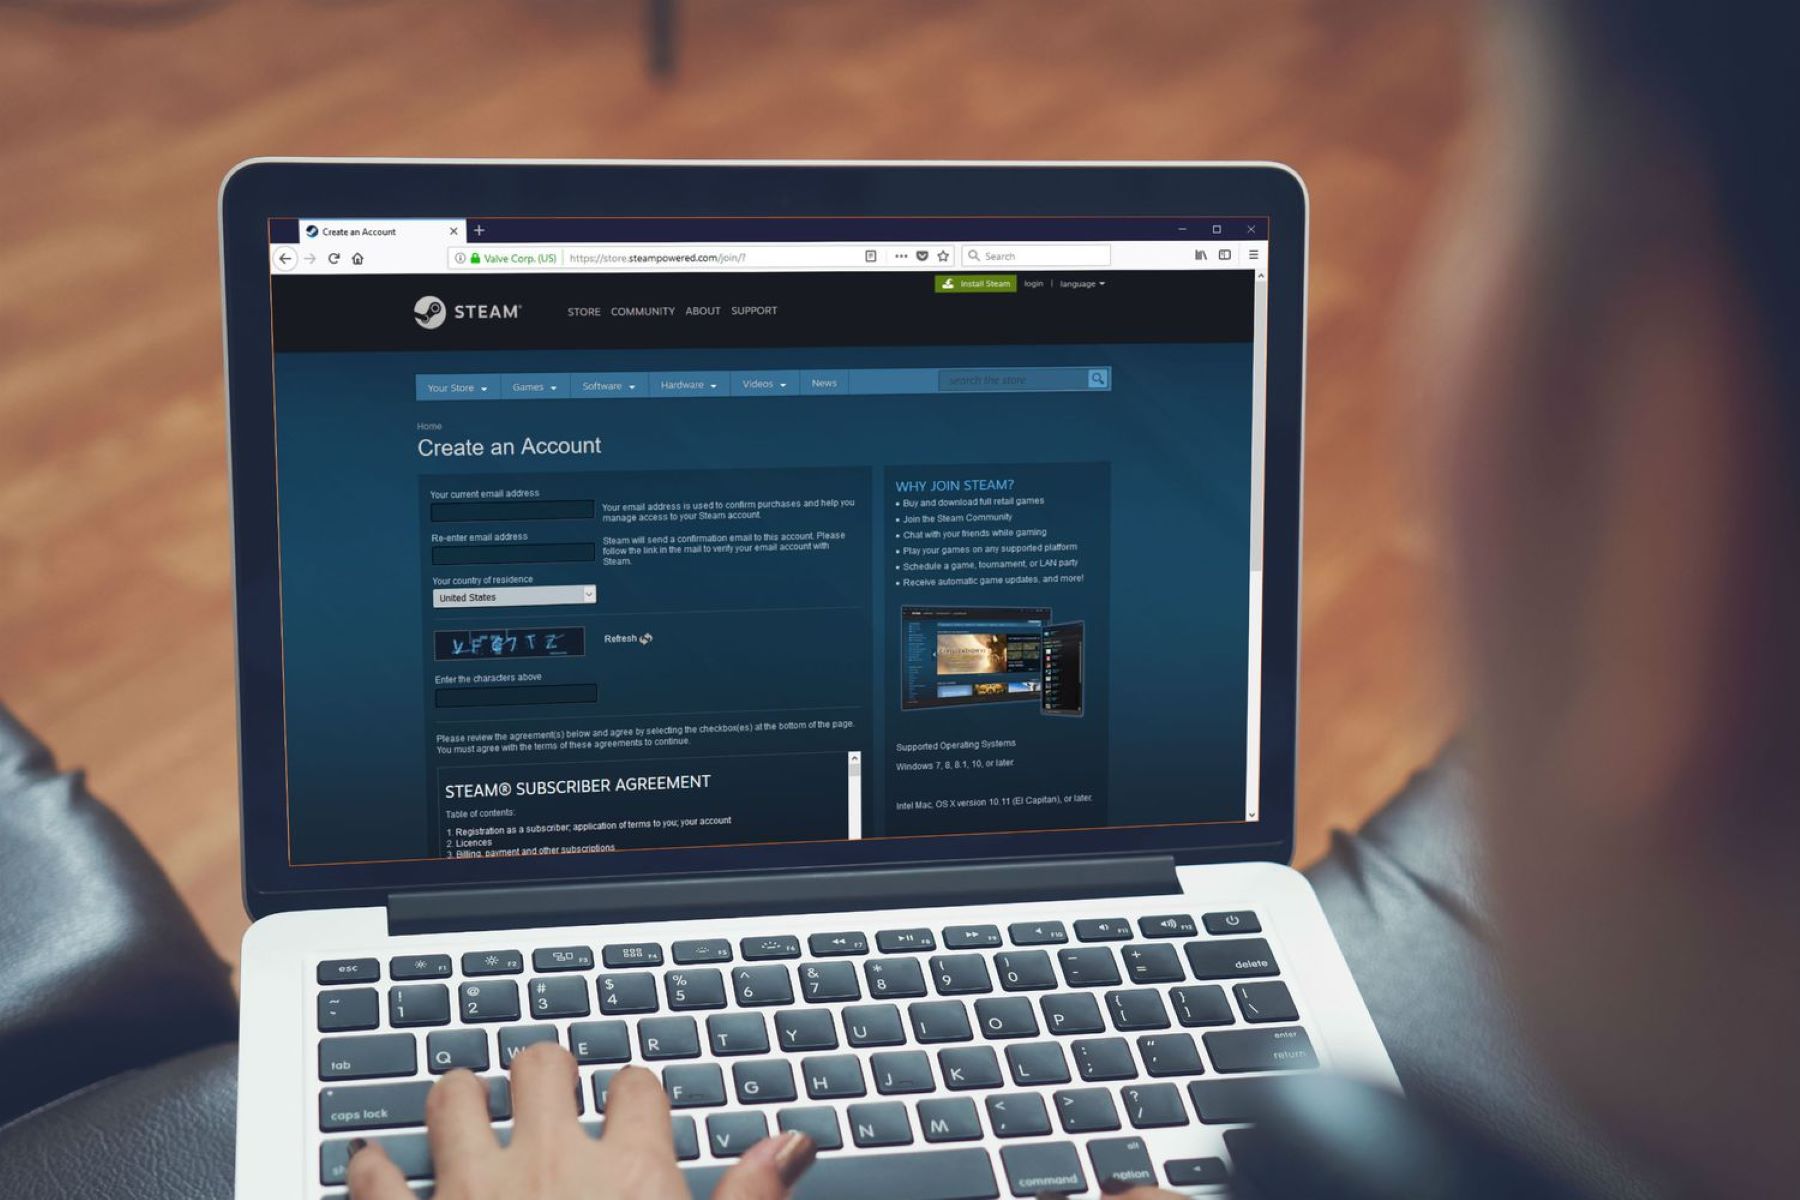
If you prefer to access your Steam account through the website, open your preferred web browser and go to https://store.steampowered.com/. Once the page has loaded, click on the “Sign in” button located at the top right corner of the screen.
Next, you will be prompted to enter your Steam account credentials. If you already have an existing Steam account, enter your username and password and click on “Sign in.” If you are new to Steam, you can create a new account by clicking on the “Join Steam” button and following the on-screen instructions.
Once you have successfully signed in to your Steam account, you are ready to proceed to the next step of changing your credit card.
Step 2: Navigating to the Account Details Page
After accessing your Steam account, you need to navigate to the account details page where you can manage your payment information. To do this, follow the steps below:
1. On the Steam application or website, locate and click on your account name or avatar in the top right corner of the screen. A drop-down menu will appear.
2. From the drop-down menu, select the “Account Details” option. This will take you to the account details page.
On the account details page, you will find various sections related to your Steam account settings. It is from this page that you can update your credit card information and make other changes to your account settings.
Take a moment to familiarize yourself with the different sections on the account details page before proceeding to the next step. Understanding the layout and options available will make it easier for you to navigate through the process of changing your credit card on Steam.
Step 3: Removing the Current Credit Card
Now that you have accessed the account details page on Steam, you can proceed to remove the current credit card associated with your account. Follow the steps below:
1. On the account details page, scroll down until you reach the “Payment Information” section. This is where you will find the details of your current credit card.
2. Look for the option to manage your payment methods or to remove the current credit card. This may be listed as “Manage Payment Methods,” “Remove Card,” or something similar. Click on this option to proceed.
3. A confirmation prompt may appear, asking you to confirm that you want to remove the current credit card. Read the prompt carefully and click on “Yes” or “Remove” to confirm the action.
4. Once you have confirmed the removal of the current credit card, the card details will be removed from your Steam account. You will no longer be able to use this card for future transactions.
By removing the current credit card, you have cleared the way to add a new credit card to your Steam account. In the next step, we will guide you on how to add a new credit card and complete the process of updating your payment information on Steam.
Step 4: Adding a New Credit Card
With the old credit card removed from your Steam account, it’s time to add a new credit card. Follow the steps below to add a new credit card:
1. On the account details page, scroll down to the “Add funds to your Steam Wallet” section. Here, you will find the option to add a new payment method. Click on the “Add a new payment method” button.
2. A new window or pop-up box will appear, depending on your browser settings. This is where you can enter the details of your new credit card.
3. Fill in the required fields with the information of your new credit card, including the card number, expiration date, and security code. Make sure to double-check the information for accuracy.
4. If you wish, you can also provide a nickname for the card to easily identify it in the future. This step is optional but can be helpful if you have multiple credit cards associated with your Steam account.
5. Once you have entered all the necessary information, click on the “Save” or “Add” button to add the new credit card to your Steam account.
Congratulations! You have now successfully added a new credit card to your Steam account. In the next step, we will guide you on how to verify and save the changes you have made.
Step 5: Verifying and Saving the Changes
After adding the new credit card to your Steam account, it’s important to verify and save the changes to ensure that the updated payment information is correctly registered. Follow the steps below to complete this final step:
1. Once you have added the new credit card details, Steam may prompt you to verify your card. This might involve a small pre-authorization charge, which will be refunded to your account shortly after verification.
2. Check your email associated with your Steam account. You may receive an email from Steam with instructions to verify your new card. Follow the instructions provided in the email to complete the verification process.
3. If you don’t receive an email to verify your card, you can manually verify it by returning to the account details page. Check the “Payment Information” section to ensure that your new credit card is listed as the active payment method.
4. Test the new payment method by making a small purchase or adding funds to your Steam wallet. This will verify that the new credit card is working correctly and has been successfully added to your account.
5. Once you have verified that the new credit card is functioning properly, you need to save the changes. Scroll to the bottom of the account details page and click on the “Save” or “Update” button to save the updated payment information.
By following these steps, you have successfully changed your credit card on Steam. Your new credit card is now the default payment method for any future transactions. It is always a good idea to periodically review and update your payment information to ensure smooth and secure transactions on the platform.
With your updated credit card information securely in place, you can continue to enjoy gaming on Steam without any interruptions. Happy gaming!
Conclusion
Changing your credit card on Steam is a simple process that can be completed in just a few steps. By following the step-by-step guide we’ve provided, you can easily update your payment information and ensure seamless transactions on the platform.
Remember, it is important to keep your payment information up to date to avoid any issues with purchases, subscriptions, or accessing your favorite games. Whether you need to update an expired card, switch to a new bank, or simply want to use a different credit card, Steam makes it easy to make these changes.
We started by accessing your Steam account, either through the application or the website. Then, we navigated to the account details page, where we removed the current credit card and added a new one. Finally, we verified and saved the changes to ensure they were successfully updated.
By following these steps, you can ensure that your payment information is kept secure and that your gaming experience on Steam remains uninterrupted.
So, next time you find yourself needing to change your credit card on Steam, just refer back to this guide for a hassle-free process. And remember, while Steam offers a convenient platform for gaming, always be cautious when entering your payment information and make sure you are on the official Steam website to avoid any phishing attempts.
Now go ahead and enjoy your favorite games on Steam with the peace of mind that your payment details are up to date. Happy gaming!
What's Hot
Latest Articles
Related Post
By: • Finance

By: • Finance

By: • Finance

By: • Finance

By: • Finance

By: • Finance

By: • Finance

By: • Finance

By: • Finance

By: • Finance

By: • Finance


By: • Finance