Finance
How To Clean An EMV Chip
Published: March 6, 2024
Learn how to clean an EMV chip to ensure the security of your finance. Follow our step-by-step guide for effective chip maintenance. Keep your card safe and secure!
(Many of the links in this article redirect to a specific reviewed product. Your purchase of these products through affiliate links helps to generate commission for LiveWell, at no extra cost. Learn more)
Table of Contents
Introduction
Welcome to our guide on cleaning EMV chips! EMV, which stands for Europay, Mastercard, and Visa, refers to the global standard for credit and debit payment cards based on chip card technology. These chips are designed to enhance security and reduce the risk of fraud during in-person transactions. However, over time, the EMV chip on your card may accumulate dirt, dust, or other particles, potentially leading to card reading issues.
In this comprehensive guide, we will walk you through the step-by-step process of cleaning an EMV chip to ensure the optimal functionality of your card. By following these simple yet effective methods, you can maintain the performance and longevity of your EMV-equipped cards. Whether you're a business owner with card terminals or an individual cardholder, understanding how to properly clean an EMV chip is essential for ensuring seamless transactions and preventing potential payment disruptions.
So, let's dive into the details and learn how to keep your EMV chip in top condition, allowing for smooth and secure card transactions.
Understanding EMV Chips
EMV chips, also known as chip-and-PIN or chip-and-signature cards, are the small, metallic squares embedded in credit and debit cards. Unlike traditional magnetic stripe cards, which store static data that can be easily replicated, EMV chips generate a unique transaction code for each purchase, making them significantly more secure. This dynamic data authentication helps prevent counterfeit card fraud, offering heightened protection for both consumers and businesses.
When an EMV card is inserted into a chip-enabled card reader, the chip creates a unique encrypted transaction code that cannot be used again, adding a layer of security that magnetic stripe cards lack. Additionally, EMV technology supports various cardholder verification methods, including PIN entry and signature verification, further reducing the risk of unauthorized transactions.
One of the key advantages of EMV technology is its ability to combat card-present fraud, such as counterfeit card usage and lost or stolen card transactions. By leveraging advanced cryptographic techniques, EMV chips are designed to thwart unauthorized access and safeguard sensitive payment data, promoting a more secure payment ecosystem.
As the global standard for secure card payments, EMV technology has become increasingly prevalent in the financial industry, with many countries mandating the adoption of EMV-compliant cards and terminals. This widespread implementation underscores the importance of understanding how to properly maintain and care for EMV chips to ensure their continued reliability and security.
Now that we have a solid grasp of the significance of EMV chips and their role in enhancing payment security, let’s delve into the practical steps for cleaning and maintaining these crucial components of modern payment cards.
Tools and Materials Needed
Before embarking on the process of cleaning an EMV chip, it’s essential to gather the necessary tools and materials to ensure a thorough and effective cleaning. Here’s what you’ll need:
- Clean, soft microfiber cloth: Opt for a lint-free cloth to avoid leaving any residue on the chip’s surface.
- Isopropyl alcohol: Choose a high-purity alcohol solution, preferably 90% or higher, for effective cleaning without leaving behind any moisture.
- Cotton swabs: These are ideal for reaching and cleaning the edges and crevices around the chip.
- Compressed air (optional): If available, compressed air can help remove stubborn particles lodged around the chip’s perimeter.
By having these tools and materials at your disposal, you can ensure that the cleaning process is carried out with precision and care, minimizing the risk of damaging the EMV chip while effectively removing any accumulated debris. Now that we’ve covered the essential items needed for cleaning, let’s proceed to the step-by-step process of preparing the card reader for the cleaning procedure.
Step 1: Preparing the Card Reader
Prior to cleaning the EMV chip, it’s crucial to prepare the card reader to ensure a safe and efficient cleaning process. Follow these steps to properly prepare the card reader:
- Power Off the Card Reader: Begin by turning off the card reader to prevent any potential electrical hazards during the cleaning process. Ensure that the reader is completely powered down before proceeding.
- Remove Any Connected Cables: If the card reader is connected to a power source or any other devices, carefully disconnect all cables and cords to avoid interference and ensure a clear workspace for cleaning.
- Clean the Exterior: Use a separate clean microfiber cloth to gently wipe the exterior surfaces of the card reader, removing any dust or debris that may have accumulated. This step helps maintain the overall cleanliness of the reader and prevents external particles from affecting the EMV chip cleaning process.
- Verify the Reader’s Status: Before proceeding, double-check that the card reader is powered off and that no residual electrical charge remains. This precautionary measure is essential for the safety of both the user and the card reader.
By diligently following these preparatory steps, you can create a secure and conducive environment for cleaning the EMV chip without risking damage to the card reader or compromising the effectiveness of the cleaning procedure. With the card reader properly prepared, we can now move on to the next crucial phase: cleaning the EMV chip itself.
Step 2: Cleaning the EMV Chip
Now that the card reader is safely prepared, it’s time to focus on the meticulous cleaning of the EMV chip. Follow these essential steps to effectively clean the chip and maintain its optimal functionality:
- Inspect the EMV Chip: Carefully examine the EMV chip to identify any visible debris, dirt, or residue that may be affecting its performance. This initial inspection helps pinpoint areas that require focused cleaning attention.
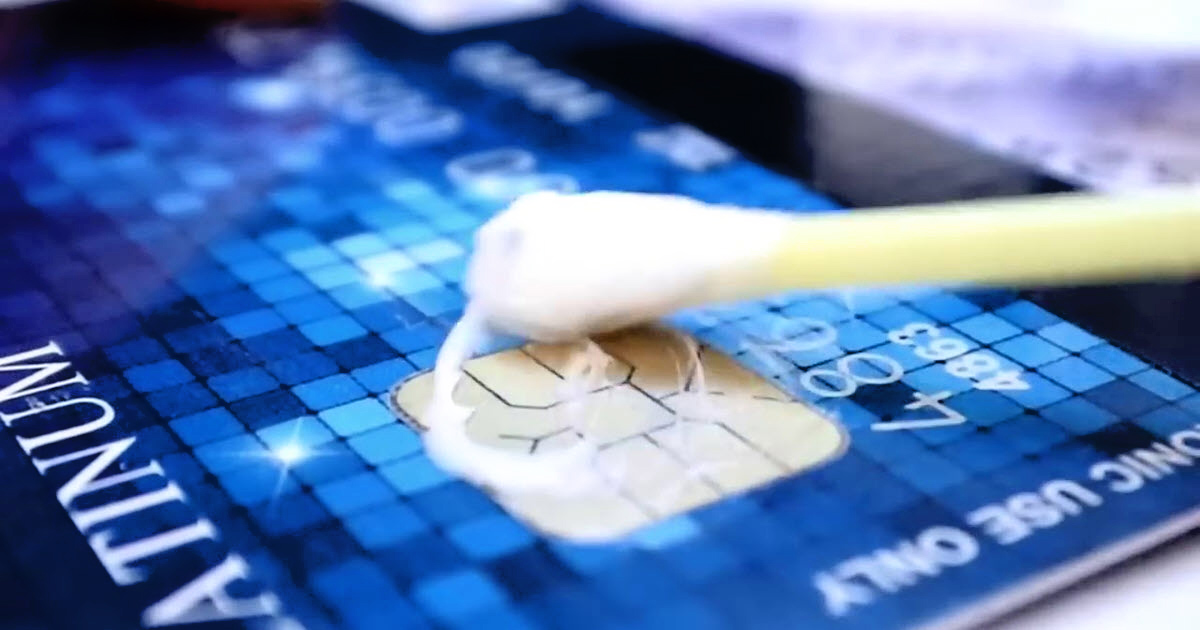
- Dampen the Cloth: Moisten a clean, soft microfiber cloth with isopropyl alcohol. Ensure that the cloth is not dripping wet, as excessive moisture can potentially damage the chip. The use of high-purity alcohol aids in effectively removing stubborn particles without leaving behind residue.
- Gently Wipe the Chip: With the dampened cloth, gently but firmly wipe the surface of the EMV chip in a consistent motion. Pay close attention to the edges and corners of the chip to remove any accumulated grime or debris. Avoid using excessive force to prevent damage to the chip.
- Utilize Cotton Swabs: For hard-to-reach areas and crevices around the chip, use a cotton swab lightly moistened with isopropyl alcohol to meticulously clean these intricate spaces. This targeted approach ensures thorough cleaning without the risk of damaging the chip.
- Remove Stubborn Debris: If persistent particles remain lodged around the chip, carefully employ compressed air to dislodge and remove any stubborn debris. Exercise caution to maintain a safe distance from the chip and avoid applying excessive air pressure.
- Allow for Drying: After cleaning, allow the EMV chip to air dry completely before reinserting the card into the reader. This step ensures that any residual moisture evaporates, leaving the chip clean and dry for optimal functionality.
By meticulously following these steps, you can effectively clean the EMV chip, ensuring that it remains free from contaminants that could potentially hinder its performance during card transactions. With the chip now cleaned and dried, the final phase involves testing the card reader to verify the successful cleaning process.
Step 3: Testing the Card Reader
After completing the cleaning process for the EMV chip, it’s essential to verify the functionality of the card reader to ensure that the cleaning has been successful. Follow these steps to test the card reader after cleaning the EMV chip:
- Power On the Card Reader: Turn on the card reader and allow it to initialize properly. Ensure that all connections are securely reestablished, and the reader is ready for use.
- Insert the Cleaned Card: Carefully insert the card with the cleaned EMV chip into the card reader, ensuring that it is properly aligned and fully inserted into the designated slot.
- Initiate a Test Transaction: Conduct a test transaction using the card to verify that the reader successfully reads the EMV chip and processes the transaction without any issues. Follow the prompts on the reader’s display and complete the test transaction as you would during a typical purchase.
- Observe Transaction Response: Pay close attention to the reader’s response and the transaction outcome. Ensure that the reader accurately reads the EMV chip and processes the transaction without any errors or disruptions.
- Repeat the Test (if Necessary): If the initial test indicates any irregularities or issues with the card reader’s functionality, repeat the test transaction with the cleaned card to confirm the consistency of the reader’s performance.
By conducting a thorough test of the card reader after cleaning the EMV chip, you can confidently verify that the cleaning process has restored the reader’s ability to accurately read and process transactions without any impediments. This final step ensures that the EMV chip is functioning optimally and that the card reader is ready for seamless, secure transactions.
Conclusion
Congratulations! By following the comprehensive steps outlined in this guide, you have successfully learned how to clean and maintain an EMV chip, ensuring the continued reliability and security of your payment cards. Properly maintaining the EMV chip is vital for preserving its functionality and safeguarding against potential transaction issues due to dirt or debris accumulation. By incorporating regular cleaning into your card care routine, you can optimize the performance of your EMV-equipped cards and contribute to a seamless payment experience.
Remember, the meticulous cleaning process involves preparing the card reader, inspecting and cleaning the EMV chip with the appropriate tools and materials, and testing the card reader to confirm the successful restoration of functionality. By adhering to these steps, you can uphold the integrity of the EMV chip and promote secure, efficient transactions in both personal and business settings.
Additionally, maintaining a clean EMV chip aligns with best practices for card care and security, underscoring your commitment to protecting sensitive payment data and preventing potential card reading issues. Whether you’re a business owner managing card terminals or an individual cardholder, prioritizing the cleanliness and maintenance of EMV chips is an essential aspect of responsible card ownership and operation.
By integrating these cleaning practices into your routine, you can contribute to the longevity and optimal performance of your EMV-equipped cards, ensuring that they remain a reliable and secure payment method for your everyday transactions. Embrace the proactive approach to EMV chip care, and enjoy the peace of mind that comes with knowing your cards are well-maintained and primed for secure, hassle-free payments.
Thank you for taking the time to learn the valuable process of cleaning and maintaining EMV chips. By embracing these practices, you are actively contributing to a safer and more efficient payment environment, one transaction at a time.
What's Hot
Latest Articles
Related Post
By: • Finance

By: • Finance

By: • Finance

By: • Finance

By: • Finance

By: • Finance

By: • Finance

By: • Finance

By: • Finance

By: • Finance

By: • Finance


By: • Finance

By: • Finance

By: • Finance