Finance
How To Link A Credit Card To Magic Band
Published: October 24, 2023
Learn how to link your credit card to your Magic Band for convenient and secure finance transactions. Enhance your Disney experience with this step-by-step guide.
(Many of the links in this article redirect to a specific reviewed product. Your purchase of these products through affiliate links helps to generate commission for LiveWell, at no extra cost. Learn more)
Table of Contents
Introduction
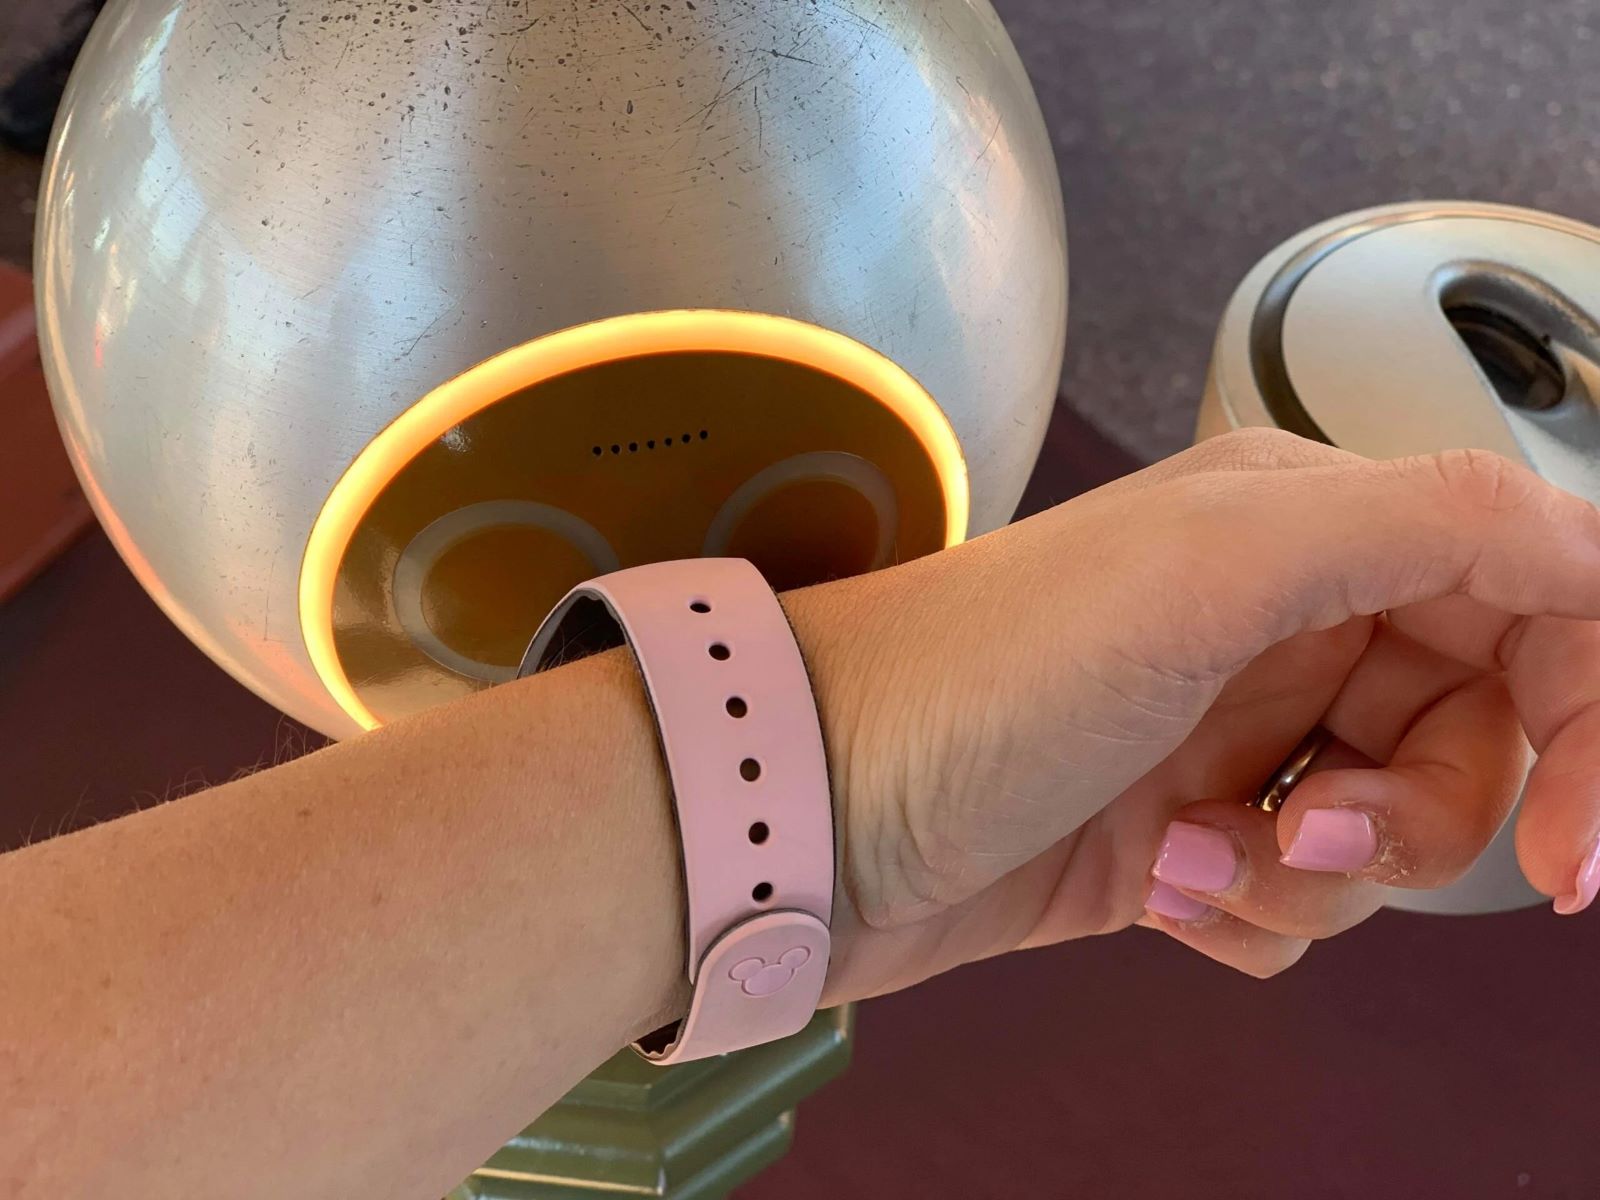
Linking a credit card to your Magic Band at Disney World can be a convenient way to pay for purchases throughout the park. With this feature, you don’t have to carry around cash or dig through your wallet every time you want to buy something. Plus, it allows for a seamless and magical experience during your visit.
If you’re not familiar with it, a Magic Band is a wearable device that serves as your all-in-one key to the park. It can hold your park ticket, store FastPass+ reservations, and even allow you to make convenient purchases at various Disney locations. By linking your credit card to your Magic Band, you can easily make secure transactions with just a simple tap.
In this guide, we will walk you through the process of linking a credit card to your Magic Band. Whether you’re a first-time visitor or a seasoned Disney-goer, this step-by-step tutorial will ensure that you can take full advantage of the payment options available during your stay at the Happiest Place on Earth.
Step 1: Accessing the Disney Account
To begin linking your credit card to your Magic Band, you’ll need to access your Disney account. If you don’t already have one, you can easily create one on the official Disney World website.
Once you’re logged into your Disney account, navigate to the My Disney Experience tab. This is where you can manage various aspects of your park visit, including your Magic Band settings.
If you’re using a computer or laptop, you’ll find the My Disney Experience tab at the top right-hand corner of the website. It should be in the main navigation menu alongside other important options such as Park Tickets, Park Hours, and My Plans.
If you’re using a mobile device, you can access the menu by tapping on the three horizontal lines in the top left-hand corner of the screen. This will reveal a side menu where you can find the My Disney Experience option.
Once you’ve located the My Disney Experience tab, click or tap on it to proceed to the next step.
Step 2: Navigating to the Magic Band section
After accessing your Disney account, the next step is to navigate to the Magic Band section. This is where you can manage all settings related to your Magic Band, including adding a credit card for payment.
In the My Disney Experience tab, you will find a menu on the left-hand side of the screen. Look for the “Magic Bands and Cards” option and click or tap on it.
On the Magic Bands and Cards page, you will see a list of all the Magic Bands associated with your account. If you already have a Magic Band linked, it will be displayed here. If not, it will show that no Magic Bands are currently linked.
Underneath the list of Magic Bands, you should see an option to “Add a Card” or “Link a Card.” Click or tap on this option to proceed to the next step.
It’s important to note that if you have multiple Magic Bands linked to your account, you’ll need to link the credit card separately to each individual Magic Band. This allows each band to have its own payment method and ensures convenience for everyone in your party.
Step 3: Adding a credit card
Once you’ve reached the “Add a Card” or “Link a Card” section in your Magic Band settings, you’re ready to add your credit card information. Follow the prompts to enter the necessary details and ensure a secure connection.
First, you will be asked to select the type of card you wish to add. The options typically include Visa, Mastercard, American Express, and Discover. Choose the appropriate card type from the drop-down menu.
Next, enter the cardholder’s name exactly as it appears on the credit card. This ensures that the information matches and prevents any issues when making purchases with your Magic Band.
Proceed to enter your credit card number. Take care to input the correct number without any spaces or dashes. The system will typically verify the card number as you type, ensuring accuracy.
You will then be asked for the card’s expiration date. Use the drop-down menus to select the month and year of expiration. Double-check to make sure the date is correct before moving on to the next step.
Finally, provide the security code (CVV) for your credit card. This 3-digit number is usually found on the back of the card. Enter it carefully, as it serves as an additional layer of security to protect your card information.
Once all the required fields are completed, review your information to ensure accuracy. If everything looks correct, proceed to the next step to finalize the addition of your credit card.
Step 4: Entering credit card details
Now that you have reached the section for entering your credit card details, it’s important to carefully provide the required information to ensure a successful link between your card and your Magic Band.
Start by typing in your credit card number. Ensure that each digit is entered correctly without any spaces or dashes. Keep in mind that the system may automatically format the numbers for easier readability.
Next, you will be asked to provide the expiration date of your credit card. Use the designated drop-down menus to select the month and year. Double-check that the expiration date is accurate to avoid any issues during transactions.
After entering the expiration date, you will need to fill in the CVV (Card Verification Value) number. This is the three-digit code located on the back of your credit card. It serves as an additional security measure to protect against unauthorized usage.
Once you have entered all the required information, take a moment to review it for accuracy. Make sure that your credit card details are correct and match the physical card you are linking to your Magic Band.
If everything looks in order, proceed to the next step to complete the process of linking your credit card to your Magic Band. If you encounter any errors or discrepancies, double-check your input and make any necessary corrections before proceeding.
By ensuring that your credit card details are accurately entered, you can enjoy the convenience of using your Magic Band to make secure and hassle-free transactions during your visit to Disney World.
Step 5: Completing the process
Congratulations! You’re almost done linking your credit card to your Magic Band. The final step involves reviewing your entered information and confirming the completion of the process.
Before finalizing the link, take a moment to verify that all the details you provided are accurate. Check that your credit card number, expiration date, and CVV are correctly entered and match the physical card you are linking.
If everything looks correct, click or tap on the “Submit” or “Finish” button to complete the process. The system will then process your request and establish the connection between your credit card and your Magic Band.
After you have successfully linked your credit card, you can start enjoying the convenience of using your Magic Band to make purchases throughout the park. Simply tap your band at the designated payment terminals and enter your PIN if prompted.
It’s important to note that while your Magic Band provides a convenient payment option, it’s always a good idea to keep track of your expenses. Take note of your purchases and periodically check your statements to ensure that everything is accurate.
Additionally, keep your Magic Band secure and report any loss or theft immediately to Disney World’s Guest Services. They can assist you in deactivating the band and preventing unauthorized use.
By completing the process of linking your credit card to your Magic Band, you have unlocked a convenient and hassle-free way to make purchases during your visit to Disney World. Enjoy the magic of the park and let your Magic Band handle the payments!
Conclusion
Linking your credit card to your Magic Band at Disney World opens up a world of convenience and simplicity during your park visit. By following the steps outlined in this guide, you can seamlessly connect your credit card to your Magic Band and enjoy the ease of making purchases throughout the park.
With just a simple tap of your Magic Band, you can pay for meals, merchandise, and experiences without the hassle of carrying around cash or credit cards. It’s a secure and efficient way to handle transactions, allowing you to fully immerse yourself in the magic of Disney World.
Remember to double-check your credit card details for accuracy and ensure that they match the information on your physical card. Reviewing your entered information before finalizing the link will help prevent any issues or delays in making purchases with your Magic Band.
Once you have successfully linked your credit card, don’t forget to keep track of your expenses and periodically check your statements. As with any type of payment, it’s essential to stay informed about your transactions to ensure accuracy and prevent any unauthorized use.
Finally, if you encounter any problems or have any questions along the way, don’t hesitate to reach out to Disney World’s knowledgeable Guest Services team. They are there to assist you and provide any necessary guidance.
Now that you know how to link a credit card to your Magic Band, you can make the most out of your visit to Disney World. Enjoy a seamless and magical experience as you explore the park and use your Magic Band to easily make purchases at various locations throughout the park.
Embrace the convenience and simplicity of the Magic Band payment system and let the magic unfold!
What's Hot
Latest Articles
Related Post


By: • Finance

By: • Finance
By: • Finance

By: • Finance

By: • Finance

By: • Finance

By: • Finance
By: • Finance

By: • Finance


By: • Finance
By: • Finance
By: • Finance