Finance
How Do I Set Up An IRS Account?
Modified: February 21, 2024
Learn how to set up an IRS account for your finance needs. Step-by-step guide to ensure a seamless process and easy access to important financial resources.
(Many of the links in this article redirect to a specific reviewed product. Your purchase of these products through affiliate links helps to generate commission for LiveWell, at no extra cost. Learn more)
Table of Contents
- Introduction
- Step 1: Gather Required Information
- Step 2: Access the IRS Website
- Step 3: Click on “Create Account”
- Step 4: Choose Account Type
- Step 5: Authentication Process
- Step 6: Verify Identity
- Step 7: Set Up Security Questions
- Step 8: Create Username and Password
- Step 9: Establish Account Agreement
- Step 10: Complete the Registration Process
- Conclusion
Introduction
Welcome to the world of finance, where understanding and managing your money is key to achieving financial stability and success. The first step in taking control of your finances is to establish an IRS account. The IRS, or Internal Revenue Service, is the government agency responsible for collecting taxes and enforcing tax laws. By setting up an IRS account, you’ll have access to various IRS services, tools, and resources that will help you stay compliant and stay on top of your tax obligations.
Whether you’re an individual taxpayer, a small business owner, or a tax professional, having an IRS account is essential. It allows you to file your taxes electronically, track your tax refunds, make payments, and communicate with the IRS securely and conveniently. In this article, we’ll guide you through the step-by-step process of setting up an IRS account, ensuring that you have all the necessary information at your fingertips.
Before we dive into the details, it’s important to note that setting up an IRS account is free, secure, and can be done entirely online. You don’t need any special technical skills or expertise to get started. By following the simple instructions provided by the IRS, you’ll be up and running in no time.
So, without further ado, let’s get started on the journey to setting up your IRS account and taking control of your finances.
Step 1: Gather Required Information
Before you begin setting up your IRS account, it’s important to gather all the necessary information and documents. This will ensure a smooth and efficient registration process. Here are some key pieces of information you’ll need:
- Your Social Security number (SSN) or Individual Taxpayer Identification Number (ITIN): The SSN is a nine-digit number issued to U.S. citizens, permanent residents, and some temporary residents. The ITIN is a nine-digit number issued to individuals who are required to have a U.S. taxpayer identification number but are not eligible for an SSN.
- Your filing status: This refers to your marital status on the last day of the tax year (e.g., single, married filing jointly, head of household).
- Your mailing address: Provide the address where you receive your mail. This can be different from your physical address.
- Your email address: Make sure you have a valid email address to receive important notifications and communication from the IRS.
- A phone number: Provide a phone number where you can be reached in case the IRS needs to contact you.
- Identity verification documents: Depending on your situation, you may be asked to provide documents such as a passport, driver’s license, or state-issued ID to verify your identity.
- Prior year tax return: If you’re setting up an account for a previous tax year, you may need to provide information from your prior year tax return.
Organizing these documents beforehand will save you time and ensure that you have everything you need to complete the registration process. It’s important to have accurate and up-to-date information, as any errors or discrepancies may lead to delays or issues with your IRS account setup.
Once you have gathered all the required information, you’re ready to move on to the next step: accessing the IRS website and creating your account.
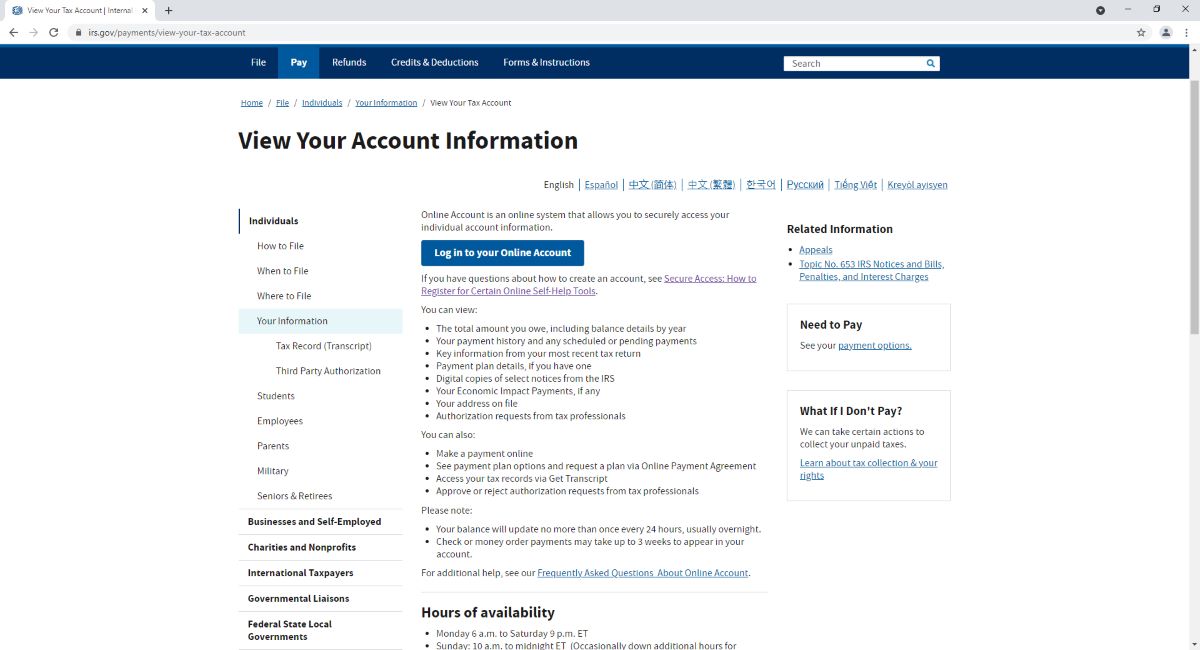
Step 2: Access the IRS Website
Now that you have all the necessary information, it’s time to access the IRS website. The website is the gateway to creating your IRS account and gaining access to a wide range of services and resources provided by the IRS.
To access the IRS website, follow these simple steps:
- Open your preferred web browser on your computer or mobile device.
- Type www.irs.gov in the address bar and press Enter.
You will be taken to the official website of the Internal Revenue Service, where you can find valuable information and resources related to taxes, forms, publications, and more.
Once you’re on the IRS website, take a moment to familiarize yourself with the navigation and layout. The website is designed to be user-friendly, with clear menu options and search functionality to help you find the information you need quickly and efficiently.
Before proceeding to create your IRS account, make sure you are on the official IRS website. Be cautious of any suspicious websites or scam attempts that may try to impersonate the IRS. The official IRS website will have a secure connection (look for “https://” at the beginning of the URL) and display the official IRS logo.
Now that you’re on the IRS website, it’s time to move on to the next step and create your account. This will allow you to securely access your IRS services and manage your tax-related information online.
Step 3: Click on “Create Account”
Once you’re on the official IRS website, it’s time to begin the process of creating your IRS account. Here’s how you can do it:
- Look for the “Account” or “Sign In” option on the IRS website. The specific wording may vary, but it should be prominently displayed on the homepage.
- Click on the “Create Account” or similar option. This will typically be found next to the login options.
By clicking on “Create Account,” you’ll be directed to the account creation page where you can start the registration process.
It’s important to note that if you’ve already created an account in the past, you may be directed to log in instead of creating a new account. In that case, make sure to use your existing login credentials. If you’ve forgotten your login information, you can use the appropriate account recovery options provided on the IRS website.
After clicking on “Create Account,” you may be prompted to read and accept the IRS Privacy Act Statement, which outlines how your personal information will be handled and protected by the IRS. It’s essential to review and understand this statement before continuing with the registration process.
Once you have reviewed and accepted the Privacy Act Statement, you’ll be ready to proceed to the next step: choosing your account type.
By following these simple steps, you’ll be well on your way to creating your IRS account and accessing the wide range of services provided by the IRS. Now, let’s move on to the next step: choosing your account type.
Step 4: Choose Account Type
After clicking on “Create Account,” you will be prompted to choose the type of account you want to create. The IRS offers different account options depending on your individual needs and circumstances. Here are the common account types:
- Individual: This account type is suitable for individuals who need to file their personal income taxes. It allows you to access your tax information, make payments, and track your tax refunds.
- Business: If you own a business and need to file business tax returns, you will select the business account type. This account provides access to various business-related tax tools and resources.
- Practitioner: Tax professionals or practitioners who assist others with tax-related matters can select the practitioner account type. With this account, you can manage your clients’ tax information securely.
- Third-Party: This account type is designed for individuals or organizations who need to access tax information on behalf of someone else. Examples include employers, payroll service providers, or tax software providers.
Choose the account type that best suits your needs and select it in the account creation process. If you’re unsure which account type to select, you can find more information and guidance on the IRS website or consult with a tax professional.
It’s important to note that each account type may have specific requirements and features. For example, business accounts may require additional documentation to prove the existence and legitimacy of the business. Take the time to review the details and ensure you choose the correct account type.
Once you have selected the appropriate account type, you can proceed to the next step: the authentication process.
By following these steps, you’ll be one step closer to creating your IRS account and gaining access to the valuable tax resources and services offered by the IRS. Let’s move on to the next step: the authentication process.
Step 5: Authentication Process
After choosing your account type, you will enter the authentication process. The purpose of this step is to verify your identity to ensure the security and integrity of your IRS account. The authentication process may vary depending on the account type and your individual circumstances. Here are the general steps involved:
- Provide your personal information: You will be asked to input your full name, date of birth, and Social Security number (or Individual Taxpayer Identification Number) to verify your identity.
- Answer security questions: The IRS uses security questions to further verify your identity. These questions may include information related to your personal life, such as past addresses or financial details.
- Submit additional documentation: In some cases, additional documentation may be required to verify your identity. This could include uploading copies of identification documents, such as a passport or driver’s license.
It’s essential to provide accurate information during the authentication process. Any discrepancies or incorrect information may lead to delays or issues with setting up your IRS account.
During this step, it’s crucial to ensure that you are using a secure internet connection and a trusted device. This will help protect your personal information from potential fraud or identity theft.
Once you have successfully completed the authentication process and your identity has been verified, you can proceed to the next step: setting up security questions.
By following these steps, you’ll be one step closer to creating your IRS account and gaining access to the valuable tax resources and services offered by the IRS. Let’s move on to the next step: setting up security questions.
Step 6: Verify Identity
After providing your personal information and answering security questions in the authentication process, the next step is to verify your identity. This step ensures that you are the rightful owner of the account and helps safeguard against identity theft and fraudulent activities. Here’s what you need to know about verifying your identity:
- Email verification: One common method of identity verification is through email. The IRS may send a verification email to the email address you provided during the account setup process. You will need to access your email inbox and click on the verification link to confirm your identity.
- Mobile phone verification: Alternatively, the IRS may send a verification code to your mobile phone via text message. You will need to enter this code on the IRS website to complete the identity verification process.
- Identity proofing: In some cases, the IRS may require additional proof of identity, especially for sensitive accounts or situations where the provided information is insufficient. This could involve submitting copies of official identification documents, such as a passport or driver’s license.
It’s important to carefully follow the instructions provided by the IRS for identity verification. Failing to complete this step may result in a delay or rejection of your account setup.
During the identity verification process, it’s crucial to ensure the security and privacy of your personal information. Only provide information to trusted sources and avoid sharing any sensitive data with unknown or suspicious entities claiming to be from the IRS.
Once your identity has been successfully verified, you can proceed to the next step: setting up security questions.
By following these steps, you’ll be one step closer to creating your IRS account and gaining access to the valuable tax resources and services offered by the IRS. Let’s move on to the next step: setting up security questions.
Step 7: Set Up Security Questions
Setting up security questions adds an extra layer of protection to your IRS account. These questions are designed to verify your identity in case you forget your password or need to recover your account. Here’s how you can set up your security questions:
- Choose your security questions: The IRS will provide a list of predefined security questions. Select questions that you can easily remember but are not easily guessed by others. Examples of common security questions include “What is your mother’s maiden name?” or “What was the name of your first pet?”
- Provide answers: Once you’ve selected your security questions, provide the corresponding answers. Make sure your answers are accurate and memorable to you, but not obvious to others. Avoid using common or easily accessible information.
Remember to choose answers that are consistent and won’t change over time. These security questions will be used to verify your identity, so it’s crucial to select questions and answers that you’ll remember.
In addition to setting up security questions, you may also have the option to provide an email address or phone number for account recovery purposes. This allows the IRS to send you a verification code or reset your password in case you need to regain access to your account.
It’s essential to keep your security questions and answers confidential and not share them with others. These questions are designed to protect your account, and revealing them could potentially compromise the security of your IRS account.
Once you have set up your security questions and answers, you’re one step closer to completing the IRS account setup process. The next step is to create your username and password.
By following these steps, you’re making great progress in setting up your IRS account and gaining access to the various tax services and resources provided by the IRS. Let’s move on to the next step: creating your username and password.
Step 8: Create Username and Password
In this step, you will create a unique username and password for your IRS account. These credentials will serve as the login information to securely access and manage your account. Follow these guidelines to create a strong and secure username and password:
Creating a Username:
- Choose a username that is memorable to you but not easily guessable by others.
- Avoid using personal information, such as your name, birthdate, or Social Security number, as part of your username.
- Include a combination of letters, numbers, and special characters to enhance security.
Creating a Password:
- Choose a strong password that is unique to your IRS account.
- Make sure your password is at least eight characters long, although longer passwords are generally more secure.
- Include a combination of uppercase and lowercase letters, numbers, and special characters.
- Avoid using commonly used passwords, such as “password” or “123456,” as these are easily compromised.
- Regularly update your password and avoid reusing passwords across multiple accounts.
When creating your username and password, it’s crucial to keep them confidential and not share them with anyone. The IRS will never ask you to provide your login details through email or phone. If you receive any suspicious requests or attempts to gather your IRS account information, report them to the IRS immediately.
By setting up a strong and unique username and password, you’re ensuring the security and protection of your IRS account. This will give you peace of mind when accessing your tax-related information and conducting transactions with the IRS.
Once you have created a username and password that meets the security requirements, you’re ready to move on to the next step: establishing the account agreement.
By following these steps, you’re making great progress in setting up your IRS account and gaining access to the various tax services and resources provided by the IRS. Let’s move on to the next step: establishing the account agreement.
Step 9: Establish Account Agreement
As you near the completion of setting up your IRS account, it’s important to establish the account agreement. This step involves reviewing and agreeing to the terms and conditions set forth by the IRS for using their online services. Here’s what you need to know:
When setting up your account, the IRS will present you with an account agreement that outlines the rights and responsibilities of both the user (you) and the IRS. It’s crucial to carefully review the terms and conditions before proceeding. Some key points to consider include:
- Data privacy: The agreement will provide details on how your personal information will be collected, used, and protected by the IRS. It’s important to understand the privacy measures put in place to safeguard your data.
- Responsibilities: The agreement may outline your responsibilities as an IRS account holder, such as accurately reporting tax information and promptly updating your account details when necessary.
- Authorized use: The agreement may specify that the account is for personal use only and cannot be used for unauthorized or illegal activities.
- Service availability: The agreement may provide information about the availability and accessibility of IRS online services and any potential disruptions or scheduled maintenance.
By accepting the account agreement, you acknowledge that you understand and agree to abide by the terms and conditions set forth by the IRS. It’s important to note that failure to comply with the agreement may result in penalties or the suspension of your account.
Take the time to read the account agreement thoroughly and ensure that you have a clear understanding of your rights and responsibilities as an IRS account holder. If you have any questions or concerns, you can seek clarification from the IRS or consult with a tax professional.
Once you have reviewed and accepted the account agreement, you’re almost done with the IRS account setup process. The final step is to complete the registration process.
By following these steps, you’re nearing the completion of setting up your IRS account and gaining access to the various tax services and resources provided by the IRS. Let’s move on to the final step: completing the registration process.
Step 10: Complete the Registration Process
Congratulations! You’ve reached the final step in setting up your IRS account: completing the registration process. At this stage, you’ll finalize the necessary details and submit your information to officially create your account. Follow these steps to successfully complete the registration process:
- Review your information: Take a moment to carefully review the information you’ve entered so far. Ensure that all details are accurate and up to date. If you notice any errors, go back and correct them before proceeding.
- Submit your information: Once you’ve verified that all the information is correct, click on the “Submit” or similar button to officially submit your information for account creation.
After submitting your information, you may receive a confirmation message indicating that your account registration was successful. This message may provide you with additional instructions or information regarding the next steps you need to take.
It’s crucial to keep a record of your account credentials, including your username and password, in a secure place. This will allow you to access your IRS account whenever you need to file taxes, make payments, or access other IRS services.
Now that you’ve completed the registration process, you have successfully set up your IRS account. You can now take advantage of the various services and resources provided by the IRS for tax-related matters.
Remember to regularly review and update your account information as needed, especially if there are any changes in your personal or financial circumstances. This will ensure that your account remains accurate and up to date.
By following these steps, you have successfully set up your IRS account and gained access to the valuable tax services and resources offered by the IRS. Congratulations on taking this important step towards managing your finances effectively and staying compliant with tax obligations!
Conclusion
Setting up an IRS account is a crucial step towards managing your finances and staying on top of your tax obligations. By following the step-by-step process outlined in this guide, you have successfully created your IRS account and gained access to a wide range of services and resources provided by the IRS.
Having an IRS account allows you to file your taxes electronically, track your tax refunds, make payments, and communicate with the IRS securely and conveniently. It empowers you to take control of your financial well-being and ensures that you meet your tax responsibilities in a timely and efficient manner.
Throughout the account setup process, it’s important to protect your personal information and follow the security guidelines provided by the IRS. Choose strong passwords, keep your login details confidential, and be cautious of any suspicious requests or attempts to gather your IRS account information.
As you continue to use your IRS account, make sure to keep it up to date by regularly reviewing and updating your account details. Report any changes in your personal or financial circumstances to the IRS to ensure accurate tax filings and compliance.
Remember, if you encounter any issues or have questions regarding your IRS account, you can always reach out to the IRS directly or consult with a tax professional for guidance and assistance.
By setting up your IRS account, you have taken an important step towards financial stability and success. Use the resources and services provided by the IRS to make informed financial decisions, stay compliant with tax laws, and pave the way for a secure and prosperous financial future.
What's Hot
Latest Articles
Related Post


By: • Finance
By: • Finance

By: • Finance

By: • Finance

By: • Finance

By: • Finance

By: • Finance

By: • Finance

By: • Finance

By: • Finance

By: • Finance


By: • Finance

By: • Finance