
Finance
How To A Download Transcript From The IRS
Published: October 30, 2023
Learn how to download your IRS transcript for your finance needs. Follow these steps to easily access your financial records.
(Many of the links in this article redirect to a specific reviewed product. Your purchase of these products through affiliate links helps to generate commission for LiveWell, at no extra cost. Learn more)
Table of Contents
Introduction
Imagine you need to access your past tax information for a loan application or to resolve a tax-related issue. The Internal Revenue Service, commonly known as the IRS, keeps detailed records of your tax returns, including all the financial information you submitted. Getting access to these records can be crucial, but it can also seem like a daunting task.
Fortunately, the IRS has made it easier than ever to access your tax transcripts by providing an online service called “Get Transcript”. With this service, you can conveniently download and view your tax transcripts directly from the IRS website.
In this article, we will guide you through the step-by-step process of downloading a tax transcript from the IRS. Whether you need a transcript for personal or financial reasons, such as applying for a mortgage or resolving a tax dispute, this guide will help you navigate the IRS website and obtain the necessary documentation.
Before we delve into the step-by-step instructions, it’s important to note that the IRS offers several types of tax transcripts. These include the tax return transcript, the tax account transcript, and the record of account transcript. Each serves a different purpose, so it’s essential to choose the correct transcript type based on your specific needs. Don’t worry; we’ll explain the differences and help you select the appropriate transcript type along the way.
So, let’s put any hesitation aside and dive into the first step: accessing the IRS website.
Step 1: Accessing the IRS Website
To start the process of downloading your tax transcript, you need to visit the official website of the Internal Revenue Service. You can access the IRS website by typing “www.irs.gov” into the address bar of your preferred internet browser.
Once you reach the IRS website, you will find a variety of options and menus. The website is designed to provide easy navigation for taxpayers seeking information or assistance on various topics. To proceed with downloading your tax transcript, you will need to locate the “Get Your Tax Record” section on the homepage.
The “Get Your Tax Record” section is generally found on the upper right-hand side of the IRS homepage. It may be displayed as a button, a link, or as part of a dropdown menu. Look for phrases like “Get Transcript” or “Order a Transcript” to find the appropriate section.
Once you have located the “Get Your Tax Record” section, click or tap on the corresponding link or button to proceed. This will direct you to the next step in the process: navigating to the “Get Transcript” page.
It’s important to note that the IRS website is regularly updated and redesigned. The exact location or appearance of the “Get Your Tax Record” section may vary slightly. If you’re having trouble finding it, try using the search function on the website and enter keywords like “tax transcript” or “download transcript” to find the relevant section.
Now that you know how to access the IRS website and locate the “Get Your Tax Record” section, let’s move on to the next step: navigating to the “Get Transcript” page.
Step 2: Navigating to the “Get Transcript” Page
After accessing the IRS website and locating the “Get Your Tax Record” section, it’s time to navigate to the “Get Transcript” page. This page is where you will find the options to request and download your tax transcripts.
Once you click or tap on the “Get Your Tax Record” section, you will be directed to a new page containing several options. Look for the option that says “Get Transcript Online” or something similar. This option allows you to access your tax transcripts electronically without having to wait for them to be mailed to you.
Clicking or tapping on the “Get Transcript Online” option will lead you to the “Get Transcript” page. Here, you will have different options to choose from depending on your specific needs. You may see options such as “Get Transcript by Mail,” “Get Transcript Online,” or “Get Transcript by Fax.”
For the purpose of this guide, we will focus on the “Get Transcript Online” option, as it allows for immediate access and download of your tax transcripts. Click or tap on this option to proceed.
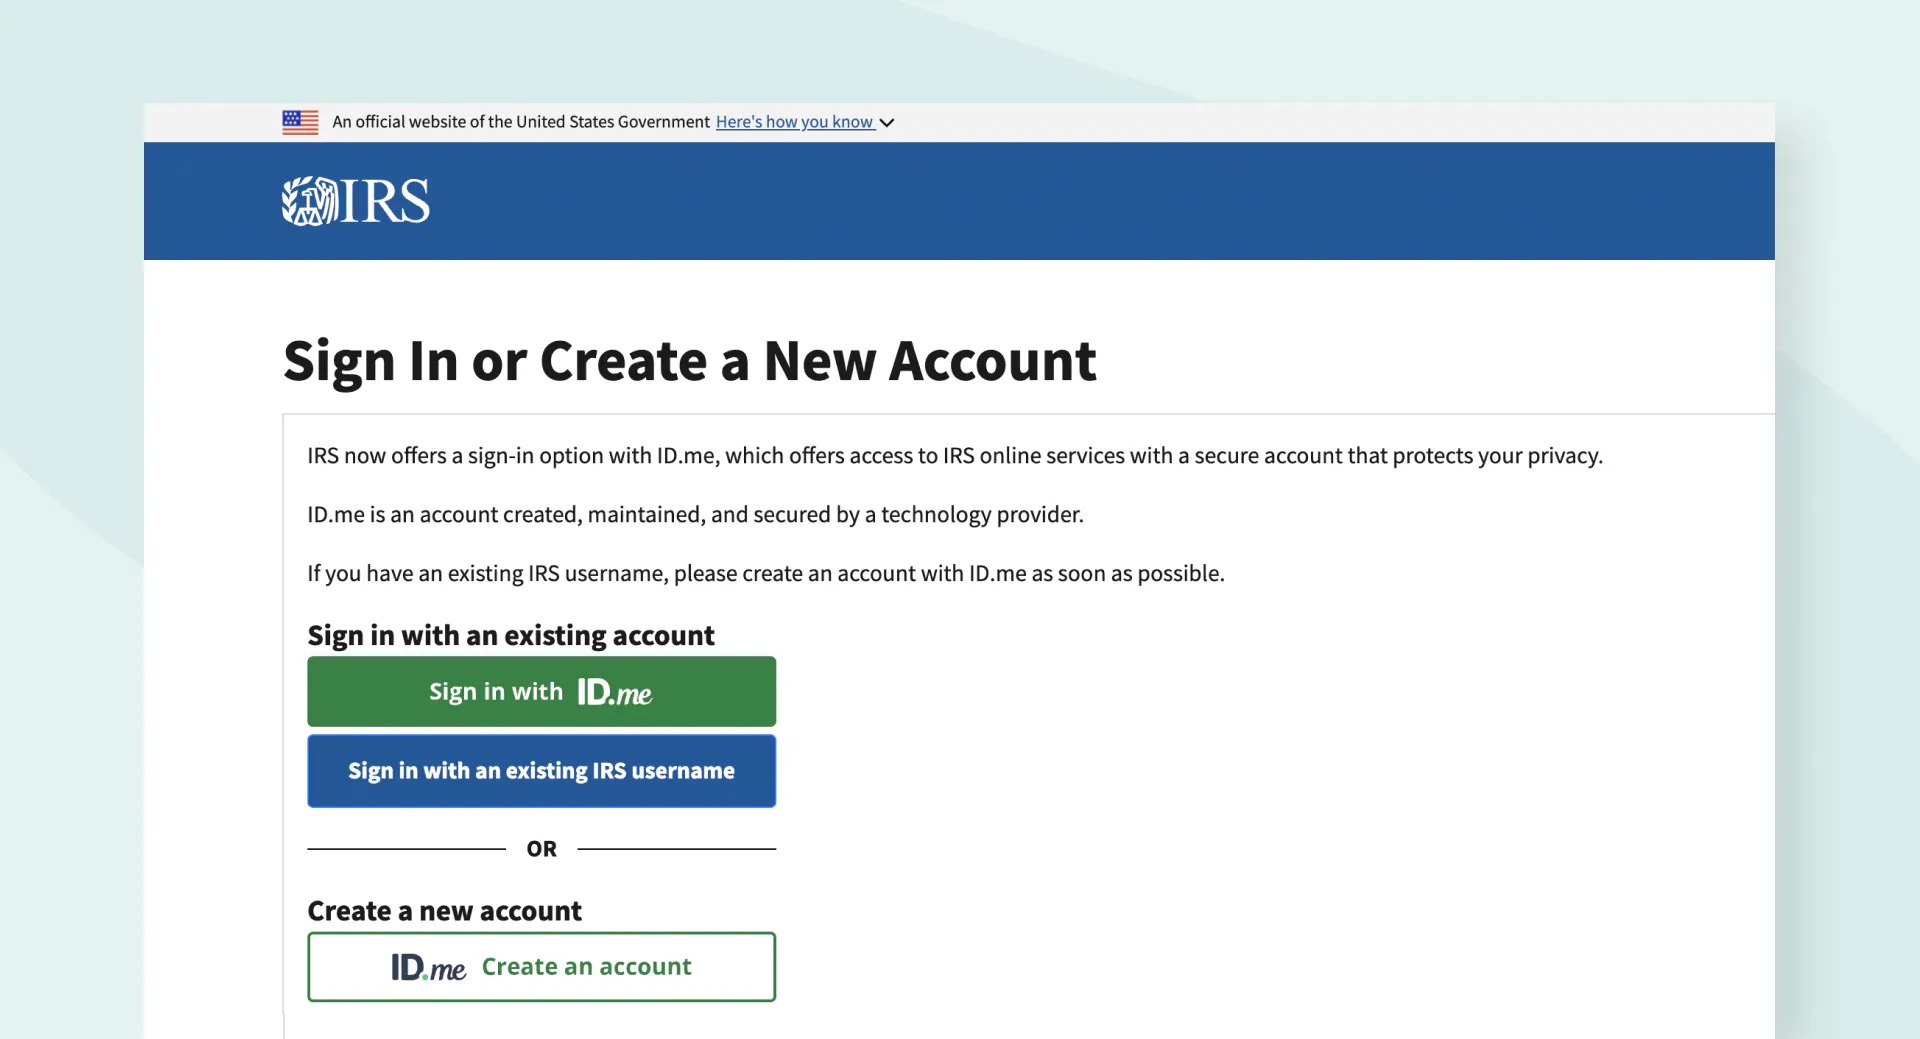
It’s worth noting that to use the “Get Transcript Online” service, you will need to have an IRS account. If you already have an account, simply log in using your credentials and proceed to the next step. If you don’t have an account, you will have the option to create one during the login process.
Creating an IRS account is a straightforward process that requires providing some personal information and verifying your identity. This step is crucial to ensure the security and confidentiality of your tax information. Follow the instructions provided on the website to create your account and log in.
Once you have successfully logged in to your IRS account, you are now ready to move on to the next step: choosing the appropriate transcript type.
Step 3: Choosing the Appropriate Transcript Type
Now that you have successfully logged in to your IRS account and reached the “Get Transcript” page, it’s time to choose the appropriate transcript type that best suits your needs.
The IRS provides three main types of transcripts:
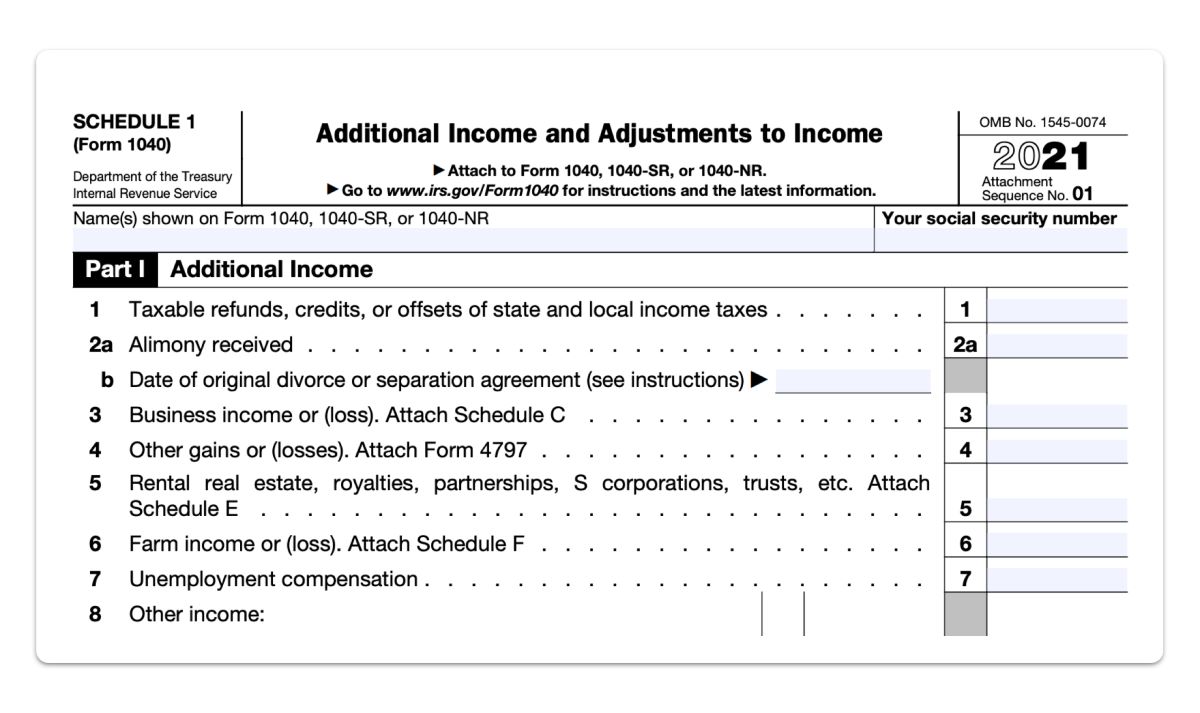
- Tax Return Transcript: This transcript provides a summary of your tax return as originally filed, including any accompanying forms and schedules. It displays the information exactly as you entered it on your tax return.
- Tax Account Transcript: This transcript provides a detailed overview of your tax account activity, including any adjustments made, payments made, and penalties accrued. It is useful if you want to review the history of your tax account.
- Record of Account Transcript: This transcript combines elements of both the tax return and tax account transcripts. It provides a comprehensive view of your tax return information, including any changes or updates made to your tax account over time.
It is essential to choose the correct transcript type based on your specific needs. If you are applying for a mortgage, for example, lenders often require a tax return transcript to verify your income. On the other hand, if you need to resolve a tax dispute or review any adjustments made to your account, a tax account transcript or record of account transcript might be more appropriate.
To make your selection, carefully consider why you need the transcript and what information you are looking for. Once you have determined the appropriate transcript type, click or tap on the corresponding option to proceed.
Keep in mind that the availability of certain transcript types may vary, depending on your tax filing status and the time frame for which the information is needed. If a specific transcript type is not available for your situation, consider selecting an alternative option or consulting with a tax professional for guidance.
Now that you have selected the appropriate transcript type, it’s time to move on to the next step: verifying your identity.
Step 4: Verifying Your Identity
After choosing the appropriate transcript type, the next step is to verify your identity. The IRS takes the security of taxpayer information seriously and requires identity verification to ensure that only authorized individuals can access tax transcripts.
To verify your identity, the IRS utilizes a multi-factor authentication process. This process typically involves providing personal information such as your Social Security number, date of birth, and filing status. Additionally, the IRS may ask for specific details related to your past tax returns, such as the amount of your refund or adjusted gross income.
On the verification page, carefully enter the requested information accurately and completely. Take your time to ensure that the information matches the details on your tax returns. Accuracy is crucial for a successful identity verification process.
It’s important to note that the IRS employs robust security measures to protect taxpayer information. The identity verification process is in place to safeguard your data from unauthorized access. Your personal information is encrypted and securely transmitted to ensure confidentiality.
If you encounter any issues during the identity verification process, such as not being able to answer the security questions correctly, there are alternative verification options available. These options may include downloading and submitting Form 4506-T, a request for a transcript of a tax return, by mail or utilizing the IRS’s phone verification system.
Once you have successfully verified your identity, you are now ready to proceed to the next step: downloading the tax transcript.
It’s important to note that the IRS may limit the number of attempts for identity verification. Therefore, it is crucial to ensure accuracy and double-check the information you provide.
Now that you have completed the identity verification process, let’s move on to the next step: downloading the tax transcript.
Step 5: Downloading the Transcript
Now that you have successfully verified your identity, it’s time to proceed with downloading your tax transcript from the IRS website.
After completing the identity verification process, you will be directed to the page where you can access and download your tax transcript. Depending on the transcript type you selected earlier, you will see different options available for download.
Click or tap on the appropriate link to initiate the download process. The transcript will generally be available in PDF format, which is compatible with most devices and can be easily viewed using Adobe Acrobat Reader or other PDF readers.
It’s important to note that the download process may take a few moments, depending on the size of the transcript and the speed of your internet connection. Be patient, and do not close the browser or navigate away from the page before the download is complete.
Once the download is finished, locate the downloaded file on your device. By default, it will be saved in your computer’s “Downloads” folder or in the designated folder on your smartphone or tablet.
Before proceeding, it’s crucial to ensure that the downloaded transcript file is intact and not corrupted. Open the file and check that all the pages are accessible and readable. If you encounter any issues, such as missing pages or illegible text, you may need to download the transcript again or contact the IRS for assistance.
Now that you have successfully downloaded your tax transcript, it’s important to proceed to the final step: saving the transcript file.
Note: It’s a good practice to save a copy of the downloaded transcript in a secure location, such as a folder specifically designated for tax-related documents or on an external storage device. This ensures that you have a backup copy in case you need to access the information in the future.
With the tax transcript downloaded and checked for accuracy, you have completed the primary goal of accessing your tax information from the IRS. Congratulations! Now you have the necessary documentation at your fingertips for various purposes, such as applying for a loan or resolving any tax-related inquiries.
Now that you are familiar with the process of downloading a tax transcript from the IRS, let’s conclude this guide.
Step 6: Saving the Transcript File
After successfully downloading your tax transcript from the IRS website, it’s crucial to save the file properly to ensure easy access and preservation of the information. Saving the transcript file securely will allow you to refer to it whenever needed and keep it as an essential record of your tax history.
When saving the transcript file, consider the following steps:
- Choose a Folder: Select a specific folder on your computer, smartphone, or other device where you want to store your tax transcript. It’s recommended to create a dedicated folder for tax-related documents to keep them organized and easily accessible.
- Create a Descriptive File Name: Give the transcript file a clear and descriptive name. Including the tax year and transcript type in the file name can be helpful for future reference. For example, “2020 Tax Return Transcript”.
- File Format: Ensure that you save the transcript file as a PDF. PDF files are widely compatible and preserve the formatting, making it easier to view and print if needed.
- Backup: Consider backing up your transcript file in a secondary location. You can save a copy on an external hard drive, cloud storage service, or a secure online platform. This extra step provides an added layer of protection against accidental loss or damage.
By following these steps, you can ensure that your tax transcript is properly saved and easily accessible whenever you need it. It’s also a good idea to keep a record of the folder location and any backup methods you’ve employed, so you can easily retrieve the transcript in the future.
Remember, tax transcripts contain sensitive and personal information, so it’s essential to keep them secure. If you saved a copy of the transcript on a physical device, make sure it’s stored in a safe and secure place, such as a locked drawer or a secure storage box.
With the tax transcript file safely saved, you have completed all the steps necessary to download, access, and preserve your tax information from the IRS. By following this guide, you have successfully navigated the IRS website, verified your identity, and obtained the required documentation.
It’s important to stay informed about the various resources and services provided by the IRS to make the tax process easier for taxpayers. Being aware of these resources can help you navigate future tax-related situations effectively.
Finally, don’t hesitate to reach out to a tax professional if you have any questions or require further guidance. They can provide personalized assistance based on your specific tax circumstances.
Congratulations! You are now equipped with the knowledge and confidence to access your tax transcripts from the IRS website.
Conclusion
Obtaining your tax transcript from the IRS can seem like a complex and intimidating process, but with the right guidance, it becomes a straightforward and convenient task. In this comprehensive guide, we have walked you through the step-by-step process of downloading your tax transcript from the IRS website.
Beginning with accessing the IRS website and navigating to the “Get Transcript” page, we discussed the importance of choosing the appropriate transcript type based on your specific needs. We then covered the vital step of verifying your identity to ensure the security and confidentiality of your tax information.
Moving forward, we explained how to download the tax transcript file and provided tips for saving the file securely. By organizing and preserving your tax transcript, you can easily refer to it in the future for various purposes, such as loan applications, tax disputes, or simply reviewing your tax history.
Remember, the IRS offers multiple types of tax transcripts, including the tax return transcript, tax account transcript, and record of account transcript. Each serves a different purpose, so it’s important to select the appropriate one based on your specific needs.
Throughout the process, we emphasized the importance of accuracy and attention to detail, as well as the necessity of protecting your sensitive tax information. By following the steps outlined in this guide, you can confidently navigate the IRS website, download your tax transcript, and ensure its safekeeping for future reference.
As always, if you have any questions or encounter any difficulties during the process, don’t hesitate to reach out to a tax professional for guidance. They can provide personalized support and assistance tailored to your specific tax situation.
Congratulations on successfully completing the process of downloading your tax transcript! By taking control of your tax information, you are better equipped to manage your finances and navigate any tax-related situations that may arise.
Stay informed about updates and resources provided by the IRS, as they continuously strive to make the tax process more convenient and accessible for all taxpayers.
Thank you for choosing this guide as your resource for downloading your tax transcript from the IRS. We hope that it has been helpful and will serve you well in your future endeavors.
What's Hot
Latest Articles
Related Post

By: • Finance

By: • Finance

By: • Finance
By: • Finance

By: • Finance

By: • Finance
By: • Finance

By: • Finance
By: • Finance

By: • Finance

By: • Finance


By: • Finance

By: • Finance