Finance
How To Change Autofill Credit Card On IPhone
Modified: February 21, 2024
Learn how to easily change your autofill credit card information on iPhone and manage your finances more efficiently.
(Many of the links in this article redirect to a specific reviewed product. Your purchase of these products through affiliate links helps to generate commission for LiveWell, at no extra cost. Learn more)
Table of Contents
Introduction
Welcome to a step-by-step guide on how to change the autofill credit card on your iPhone. Autofill is a handy feature that saves you time and effort by automatically filling in your credit card information when making online purchases or filling out forms. However, there may be times when you need to update your credit card details or add a new card to your iPhone’s autofill settings. In this article, we will walk you through the process of managing, adding, editing, and deleting saved credit card information on your iPhone.
With the increasing popularity of online shopping and the convenience offered by mobile devices, having the ability to easily manage your autofill credit card information is crucial. Whether you want to replace an expired card, update your billing address, or simply switch to a different credit card, knowing how to navigate your iPhone’s settings will allow you to make these changes efficiently and securely.
Before we begin, it is important to note that the steps outlined in this article assume you are running the latest version of iOS on your iPhone. If you have not updated your device, we recommend doing so before proceeding. Additionally, please ensure that you have all the necessary information readily available, such as the new credit card details or the login credentials for your financial accounts.
Now, let’s dive into the world of iPhone autofill credit card management and discover how to easily update and modify your saved credit card information.
Understanding Autofill Credit Card on iPhone
Autofill credit card is a built-in feature on iPhones that securely stores your credit card information and fills it in automatically when making online purchases or filling out payment forms. This feature eliminates the need for manually entering your credit card details every time you make a transaction, saving you time and reducing the risk of errors.
With the autofill credit card feature, you can securely store multiple credit cards on your iPhone. This allows you to choose the desired card at checkout without having to manually enter the card details each time. It also provides a convenient way to manage and update your credit card information, making it easier to keep your payment methods up to date.
It’s important to note that the autofill credit card feature on your iPhone is linked to the iCloud Keychain, which securely stores your sensitive data. This means that your credit card information is encrypted and protected with your iCloud account credentials, ensuring that only you can access and use it.
When you save a credit card to the autofill settings on your iPhone, it stores the card number, expiration date, and the cardholder’s name. However, it does not save the card’s security code (CVV), ensuring an added layer of security.
Furthermore, the autofill credit card feature integrates with Safari, the default web browser on iPhones. This means that when you visit a website with a payment form, Safari will automatically recognize the fields that require credit card information and offer to fill them in using the saved credit cards in your iPhone’s autofill settings.
By understanding how the autofill credit card feature works on your iPhone, you can take full advantage of its convenience while maintaining the security of your payment information. Now, let’s move on to the steps for managing and updating your saved credit card details on your iPhone.
Step 1: Accessing the Settings
To begin managing your autofill credit card on your iPhone, you need to access the device settings. Follow these steps to do so:
- Unlock your iPhone and navigate to the home screen.
- Locate the “Settings” app, which is represented by a gear icon.
- Tap on the “Settings” app to open it. This will take you to the main settings menu.
Once you have successfully accessed the settings menu, you can proceed to the next step to navigate to the Safari settings where you can manage your autofill credit card information.
Note: The steps for accessing settings may slightly vary depending on the version of iOS running on your iPhone.
Now that you have accessed the settings menu, let’s move on to the next step in managing your autofill credit card on your iPhone.
Step 2: Opening the Safari Settings
After accessing the main settings menu on your iPhone, you need to navigate to the Safari settings to manage your autofill credit card information. Follow these steps to open the Safari settings:
- From the main settings menu, scroll down and tap on “Safari.” The Safari settings menu will now open.
- Within the Safari settings, you will find various options related to your browsing experience on your iPhone.
- Scroll down the Safari settings menu until you find the “Autofill” section.
- Tap on the “Autofill” option. This will bring you to the Autofill settings page.
- On the Autofill settings page, you will see options to manage your saved credit card information, as well as other autofill data like contact information and passwords.
By following these steps, you can easily access the Safari settings on your iPhone and proceed to manage your autofill credit card information.
Note: The location of the Safari settings may vary depending on the version of iOS running on your iPhone. If you’re having trouble finding it, you can use the search functionality within the settings app by swiping down and typing “Safari” in the search bar.
Now that you have opened the Safari settings, let’s move on to the next step in managing your autofill credit card on your iPhone.
Step 3: Managing Saved Credit Cards
Once you have accessed the Autofill settings page within the Safari settings on your iPhone, you can proceed to manage your saved credit cards. Follow these steps to manage your credit card information:
- On the Autofill settings page, you will see a section labeled “Saved Credit Cards”. Tap on this section to view the list of credit cards that are currently saved on your iPhone.
- You will be prompted to authenticate yourself using Touch ID, Face ID, or your device passcode for security purposes. This ensures that only authorized users can access and modify saved credit card information.
- After authenticating, you will see a list of your saved credit cards. Each entry will display the card’s last four digits, the cardholder’s name, and the expiration date.
- From this list, you can select the credit card you wish to update or delete by tapping on it.
By following these steps, you can easily manage your saved credit cards on your iPhone. Now, let’s proceed to the next step, where we will learn how to add a new credit card to your autofill settings.
Step 4: Adding a New Credit Card
If you need to add a new credit card to your iPhone’s autofill settings, follow these steps:
- On the Autofill settings page, within the Safari settings, tap on the “Saved Credit Cards” section.
- Authenticate yourself using Touch ID, Face ID, or your device passcode.
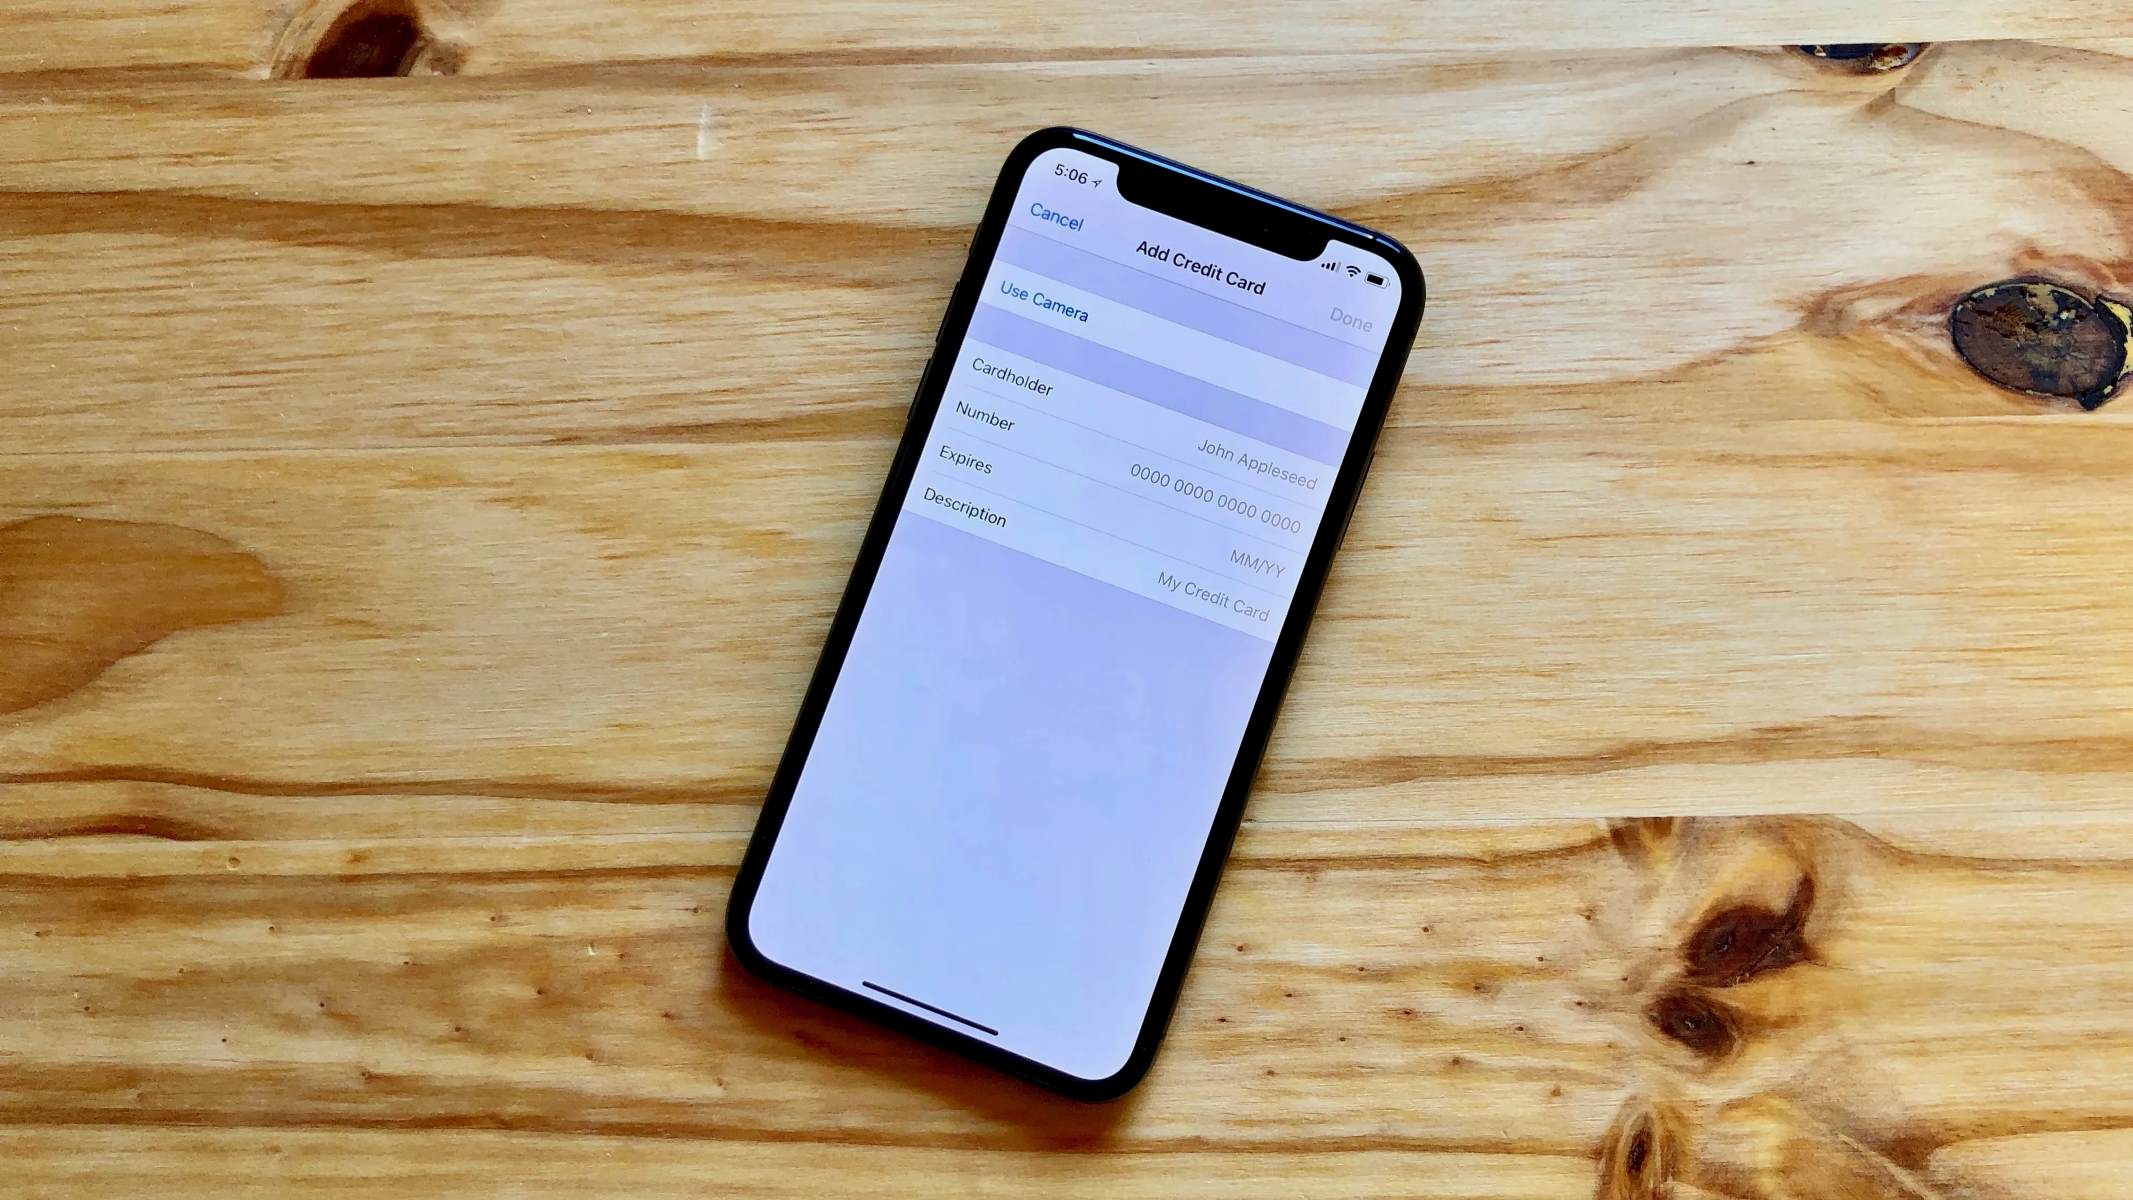
- Once on the list of saved credit cards, tap on the “Add Credit Card” option.
- You will be prompted to manually enter the credit card details. Start by typing the card number, expiration date, and cardholder’s name.
- Optionally, you can provide additional details like the card’s security code (CVV) or billing address for convenience.
- Tap on the “Next” button once you have entered the required information.
- Review the entered details and make sure they are accurate. If necessary, you can make edits by tapping on the corresponding field.
- Tap on the “Done” button to save the new credit card to your autofill settings.
By following these steps, you can easily add a new credit card to your iPhone’s autofill settings. Now, let’s move on to the next step, where we will learn how to edit or delete existing credit card information.
Step 5: Editing or Deleting Existing Credit Card Information
If you need to make changes to an existing credit card or delete it from your iPhone’s autofill settings, follow these steps:
- On the Autofill settings page, within the Safari settings, tap on the “Saved Credit Cards” section.
- Authenticate yourself using Touch ID, Face ID, or your device passcode.
- From the list of saved credit cards, locate the card that you want to edit or delete.
- To edit the card details, tap on the card entry. This will open a new page displaying the card information.
- Make the necessary changes to the card number, expiration date, cardholder’s name, or any additional details.
- Tap on the “Done” button to save the changes.
- To delete the card, swipe left on the card entry. A “Delete” button will appear.
- Tap on the “Delete” button to remove the credit card from your autofill settings.
- Confirm the deletion by tapping on “Delete” again in the confirmation prompt.
By following these steps, you can easily edit or delete existing credit card information within your iPhone’s autofill settings. Now, let’s move on to the final step, where we will learn how to set the default credit card for autofill purposes.
Step 6: Setting the Default Credit Card
If you have multiple credit cards saved in your iPhone’s autofill settings, you have the option to designate a default credit card. This default card will be automatically selected for autofill purposes when making online purchases or filling out payment forms. Follow these steps to set the default credit card:
- On the Autofill settings page, within the Safari settings, tap on the “Saved Credit Cards” section.
- Authenticate yourself using Touch ID, Face ID, or your device passcode.
- From the list of saved credit cards, locate the card that you want to set as the default.
- Tap and hold on the card entry until a contextual menu appears.
- In the contextual menu, tap on the “Set as Default Card” option.
- The selected card will now be set as the default credit card for autofill purposes.
By following these steps, you can easily set the default credit card for autofill on your iPhone. This ensures that the chosen card will be automatically filled in whenever you encounter a payment form online. Now that you have successfully managed your autofill credit card on your iPhone, it’s time to wrap up our guide.
Conclusion
Managing autofill credit card information on your iPhone can greatly improve your online shopping and form-filling experience. By following the step-by-step guide outlined in this article, you now have the knowledge and tools to easily update, add, edit, delete, and set default credit cards within your iPhone’s autofill settings.
Remember, accessing the settings, opening the Safari settings, and navigating to the Autofill section are the initial steps to managing your credit card information. From there, you can add new cards by manually entering the details or edit existing cards to ensure accuracy. You can also remove any unnecessary or expired cards to keep your autofill settings up to date.
Additionally, setting a default credit card allows for seamless autofill functionality during online transactions. It ensures that the designated card is automatically selected, saving you time and effort when making purchases or filling out payment forms.
It’s crucial to note that as you go about managing your autofill credit card information, security should remain a priority. Ensure your iPhone is updated to the latest iOS version and only enter sensitive information on secured websites. Furthermore, protect access to your device and consider enabling Touch ID or Face ID authentication for added security.
By understanding and utilizing the autofill credit card feature on your iPhone, you can enjoy the convenience of quickly and securely completing online transactions while keeping your financial information up to date.
Now that you have learned how to manage your autofill credit card on your iPhone, go ahead and make the necessary changes to ensure a seamless and secure online shopping experience at your fingertips.
What's Hot
Latest Articles
Related Post

By: • Finance
By: • Finance
By: • Finance

By: • Finance

By: • Finance

By: • Finance

By: • Finance

By: • Finance

By: • Finance

By: • Finance

By: • Finance

By: • Finance

By: • Finance

By: • Finance