Finance
How To Take Credit Card Payments On IPhone
Published: November 11, 2023
Learn how to easily process credit card payments on your iPhone with our step-by-step guide. Simplify your finance management and boost your business on-the-go.
(Many of the links in this article redirect to a specific reviewed product. Your purchase of these products through affiliate links helps to generate commission for LiveWell, at no extra cost. Learn more)
Table of Contents
Introduction
Welcome to the digital age, where smartphones have become an integral part of our lives. Not only do they keep us connected, but they also offer a myriad of functionalities, including the ability to accept credit card payments on the go. If you’re a small business owner or a freelancer, being able to securely process transactions through your iPhone can revolutionize the way you do business.
Gone are the days of clunky cash registers and manual credit card imprinters. With advancements in technology, accepting credit card payments has become convenient and seamless. By utilizing the power of your iPhone, you can now turn it into a portable payment terminal.
In this article, we will guide you through the process of setting up your iPhone to accept credit card payments. We will discuss the steps involved in choosing a payment processing app, creating a merchant account, connecting a card reader to your iPhone, and finally, accepting credit card payments. We will also address common troubleshooting issues and offer tips on ensuring security and privacy.
With the rapid growth of e-commerce and the increasing reliance on digital transactions, being able to accept credit card payments on your iPhone can give you a competitive edge. It allows you to cater to the needs of customers who prefer the convenience and security of card payments, while also providing you with a streamlined and efficient way to manage your finances.
Whether you run a small retail store, offer freelance services, or operate an online business, having the capability to accept credit card payments on your iPhone opens up a world of opportunities. It allows you to accept payments wherever you are, whether you’re attending a trade show, meeting a client at a coffee shop, or delivering products to a customer’s doorstep.
So, get ready to unlock the potential of your iPhone and empower your business. Let’s dive into the world of mobile payments and discover how to seamlessly process credit card transactions through your iPhone.
Setting Up Your iPhone for Credit Card Payments
Before you can start accepting credit card payments on your iPhone, you need to set it up properly. Follow these steps to ensure a smooth and hassle-free process:
- Ensure your iPhone is updated: It’s crucial to have the latest version of iOS installed on your iPhone. This ensures compatibility with payment processing apps and provides the latest security features.
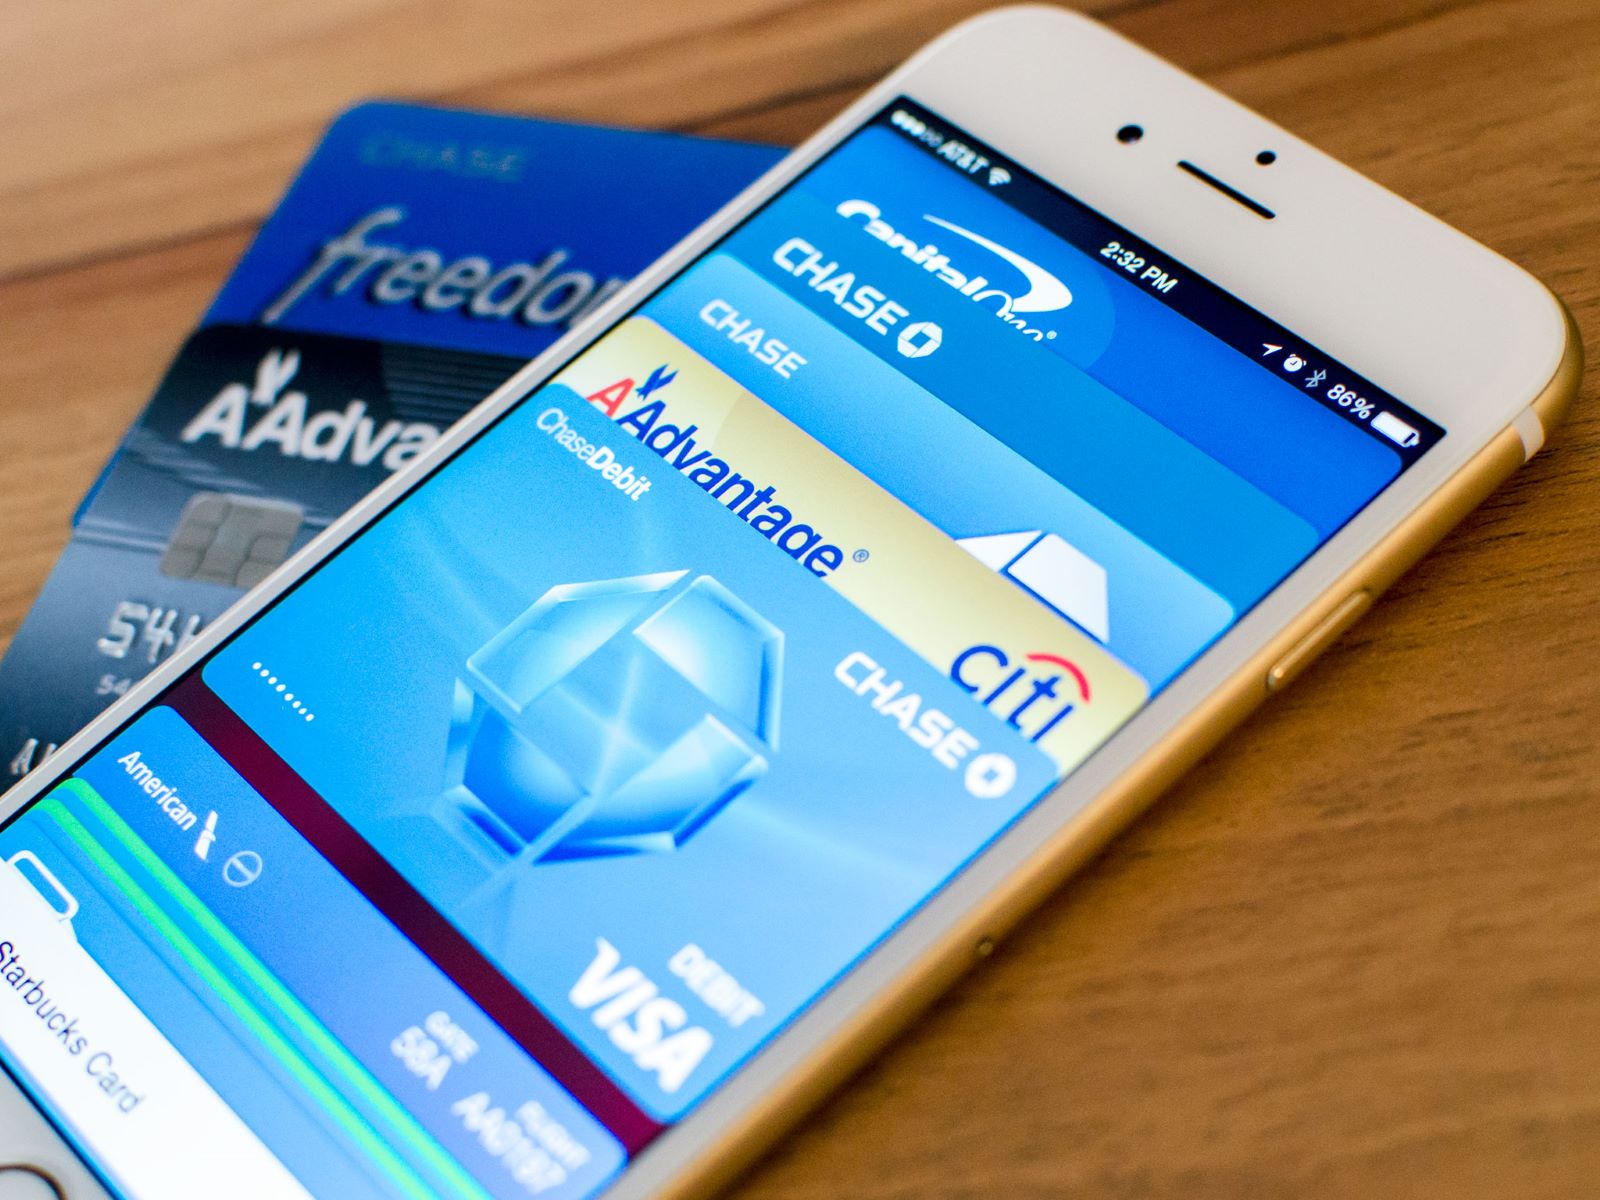
- Choose a payment processing app: There are various payment processing apps available in the App Store, each offering different features and pricing structures. Research and compare the options to find the one that best suits your business needs.
- Download and install the chosen app: Once you’ve selected a payment processing app, simply download and install it from the App Store. Follow the prompts to set up your account within the app.
- Provide necessary information: During the app setup process, you will need to provide important information such as your business name, address, contact details, and bank account information. Make sure to have this information readily available.
- Link your bank account: To receive payments, you need to link your bank account to the payment processing app. Follow the instructions provided by the app to securely connect your bank account.
- Configure payment settings: Most payment processing apps allow you to customize payment settings, such as tax calculations and tipping options. Take the time to configure these settings according to your business requirements.
- Enable card reader compatibility: If you plan to accept in-person payments using a card reader, ensure that the payment processing app you’ve chosen supports your preferred card reader device.
- Test the payment process: Before actively accepting credit card payments, it’s essential to test the payment process. Run a test transaction to ensure everything is functioning correctly and that you can successfully process payments.
Once you’ve completed these steps, your iPhone will be ready to accept credit card payments. Whether you operate an online business, offer services on-site, or have a physical store, having the ability to accept credit card payments on your iPhone provides convenience and flexibility for both you and your customers.
Note: It’s important to check the terms and conditions, as well as the fees associated with the payment processing app you choose. Some apps may have transaction fees or additional charges that could impact your overall costs.
Choosing a Payment Processing App
With countless payment processing apps available in the market, selecting the right one for your business can seem daunting. However, by considering a few key factors, you can find an app that suits your needs. Here are some things to consider when choosing a payment processing app for your iPhone:
- Features and functionality: Look for an app that offers the features you require. It should provide seamless payment processing, inventory management, sales analytics, and the ability to send digital receipts. Consider additional functionalities such as tipping options, loyalty programs, and integration with other business tools like accounting software.
- User-friendly interface: The app should be intuitive and easy to navigate, both for you as the business owner and for your customers. Look for an app with a clean and user-friendly interface that simplifies the payment process and reduces the chances of human error.
- Compatibility with card readers: If you plan to accept in-person payments, ensure that the app you choose is compatible with popular card reader devices. This allows you to securely process payments and provide a seamless experience for your customers.
- Pricing structure: Consider the pricing model of the payment processing app. Some apps charge a flat rate per transaction, while others have a tiered pricing structure or a monthly subscription fee. Evaluate your sales volume and transaction frequency to determine which pricing model is most cost-effective for your business.
- Security measures: Protecting your customers’ sensitive payment information is of utmost importance. Choose an app that utilizes strong encryption and security protocols to ensure the safety of transactions. Look for apps that are PCI compliant, which means they meet the industry standards for data security.
- Customer support: Evaluate the level of customer support provided by the payment processing app. You may encounter technical issues or have questions about the app’s functionalities, so it’s crucial to have prompt and helpful support available.
- Online reviews and reputation: Read reviews from other users to gauge their experiences with the payment processing app. Pay attention to feedback regarding reliability, customer support, and overall satisfaction. Additionally, consider the reputation and track record of the app provider.
By considering these factors and evaluating your specific business needs, you can make an informed decision when choosing a payment processing app for your iPhone. Remember, selecting the right app can streamline your payment process and enhance your overall business operations, allowing you to focus on what you do best: serving your customers and growing your business.
Creating a Merchant Account
In order to accept credit card payments on your iPhone, you will need to create a merchant account. A merchant account is a type of bank account that allows businesses to accept and process credit card payments.
Here are the steps to create a merchant account:
- Choose a payment processor: Research and select a reputable payment processor that suits your business needs. A payment processor acts as the intermediary between your business, the customer’s credit card issuer, and your bank.
- Complete the application: Visit the payment processor’s website and complete the merchant account application. You will typically be asked to provide information about your business, such as its legal name, contact details, industry type, and estimated monthly sales volume.
- Provide supporting documents: Depending on the requirements of the payment processor, you may be asked to provide certain supporting documents. This can include your business license, identification documents, bank statements, and any relevant legal paperwork.
- Undergo a credit check: As part of the application process, the payment processor may conduct a credit check on your business or on the business owner. This helps determine your eligibility for a merchant account and to assess the level of risk associated with processing credit card payments for your business.
- Review and agree to the terms: Carefully review the terms and conditions of the merchant account agreement. Pay close attention to the fees, processing rates, and any contractual obligations.
- Activate your account: Once your application is approved, you will receive information on how to activate your merchant account. This may involve logging into an online portal or downloading a specific app to manage your account and process payments.
- Integrate the merchant account with your payment processing app: Link your newly created merchant account with the payment processing app you have chosen for your iPhone. This allows seamless communication between the app, your merchant account, and your bank.
It’s important to note that the application process and requirements may vary depending on the payment processor you choose. Be sure to thoroughly review the instructions provided by the payment processor to ensure a smooth account setup.
Creating a merchant account is a crucial step in accepting credit card payments on your iPhone. It enables you to securely process transactions and ensures that funds are transferred between the customer’s credit card issuer and your business bank account. By following the necessary steps and providing the required information, you will be on your way to accepting credit card payments and expanding your business’s reach.
Connecting a Card Reader to Your iPhone
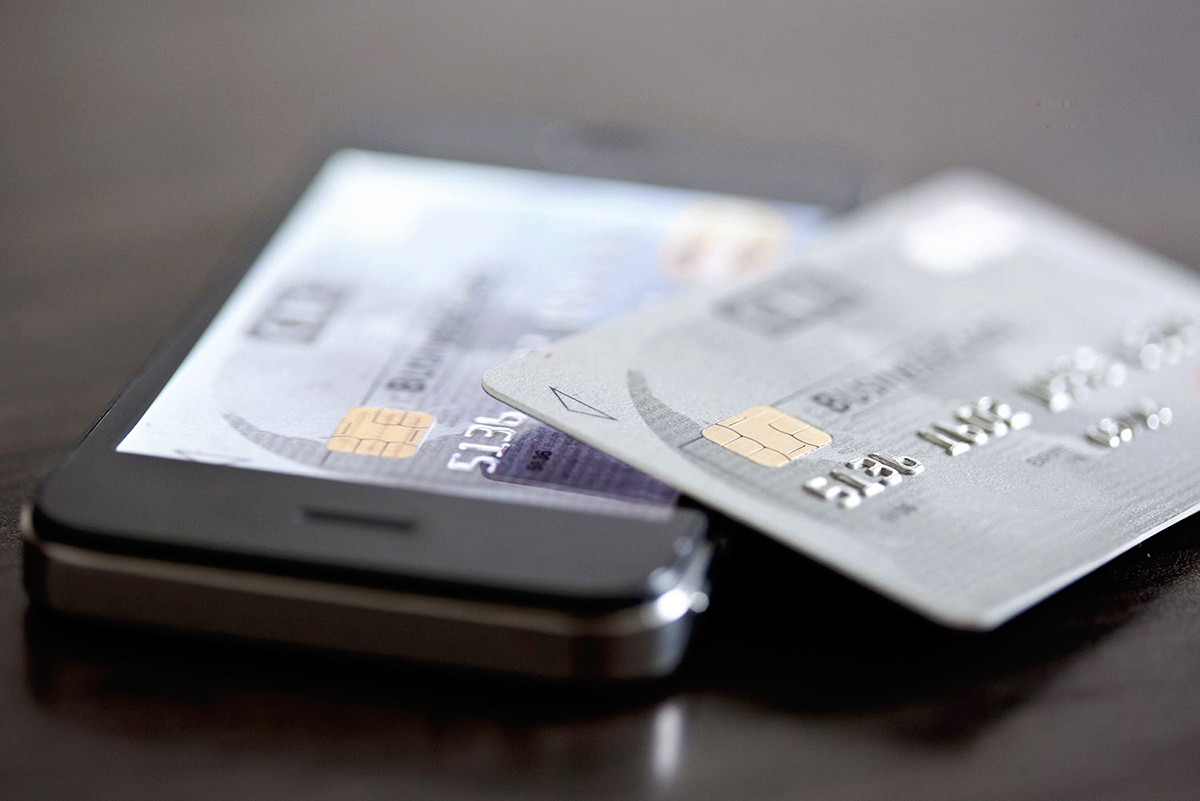
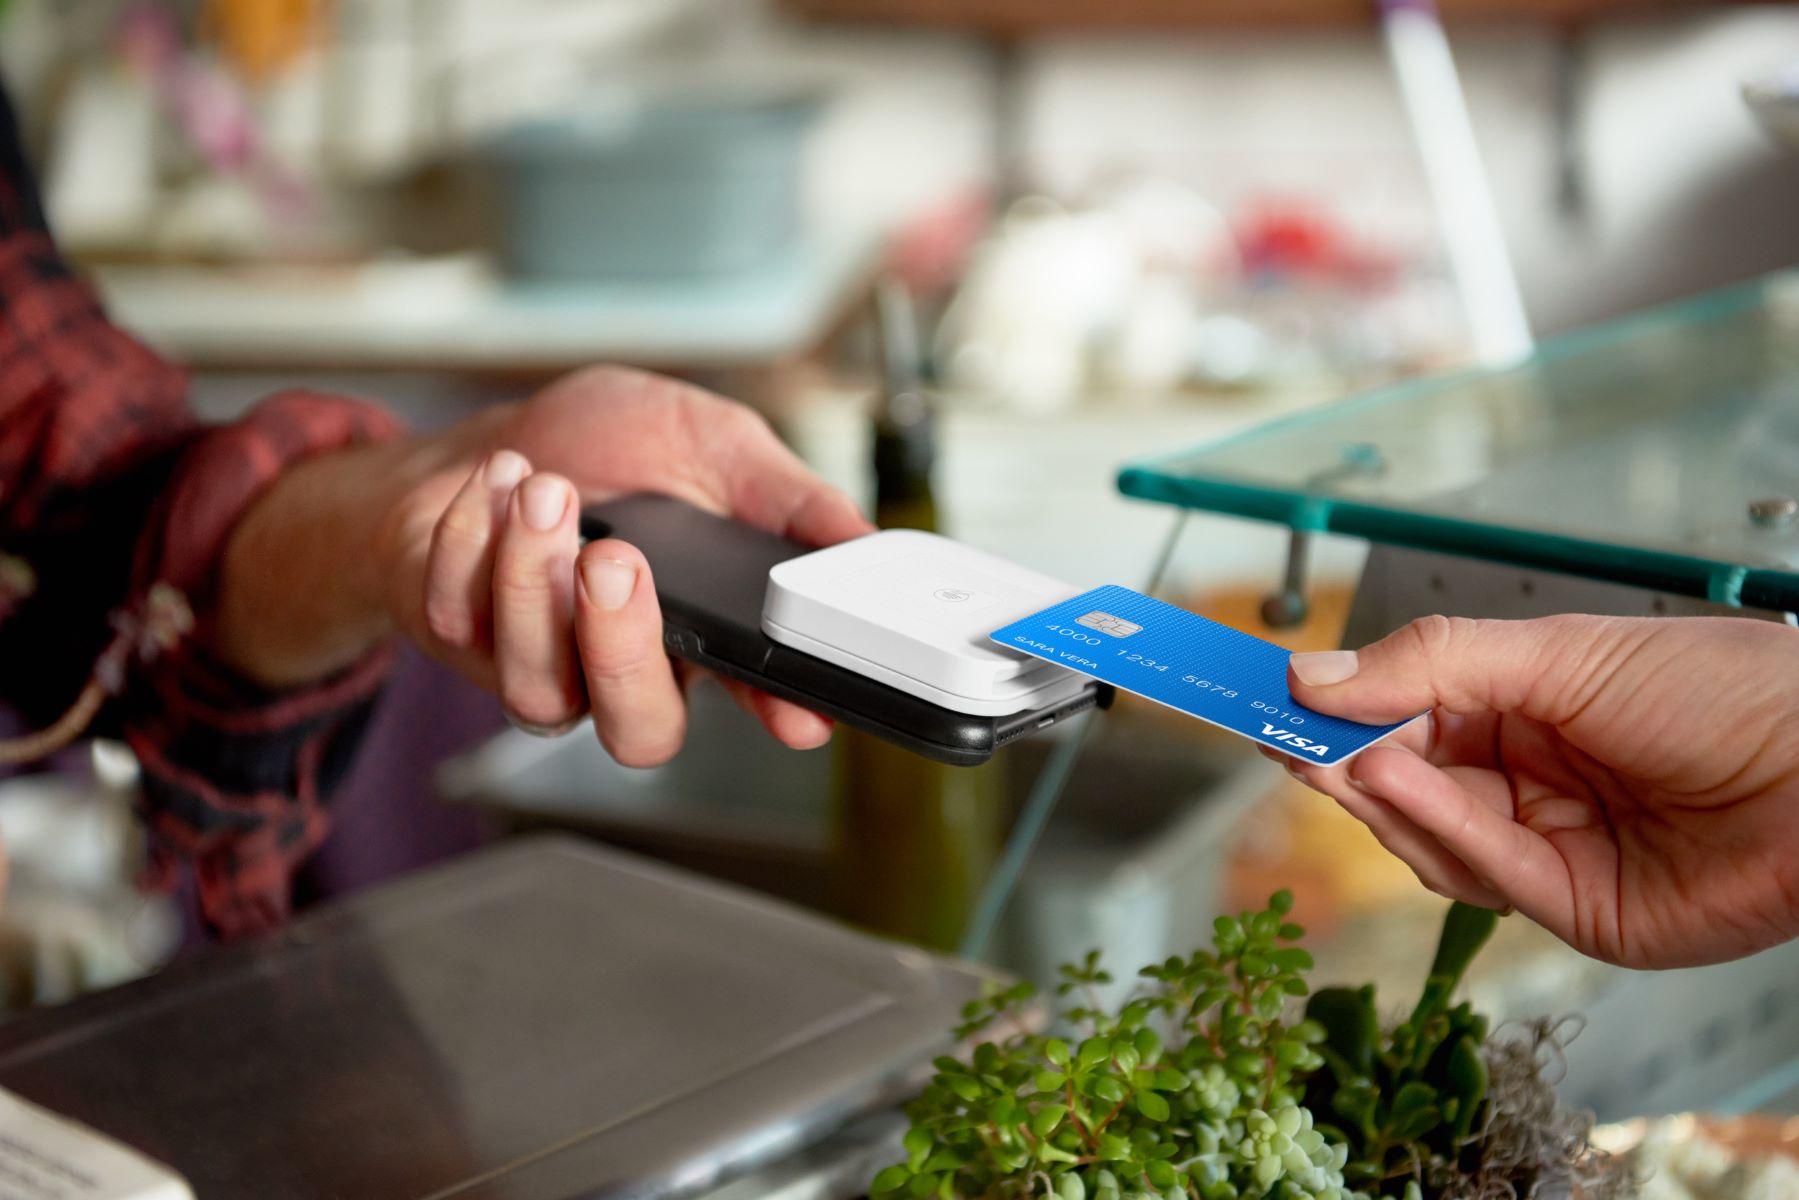
If you plan to accept in-person credit card payments using your iPhone, you will need to connect a card reader to your device. A card reader is a small device that plugs into your iPhone’s charging port and allows you to swipe or insert credit cards for payment processing. Here’s how you can connect a card reader to your iPhone:
- Choose a compatible card reader: There are several card reader options available in the market, each with its own features and compatibility. Make sure to choose a card reader that is compatible with your iPhone model and the payment processing app you have selected.
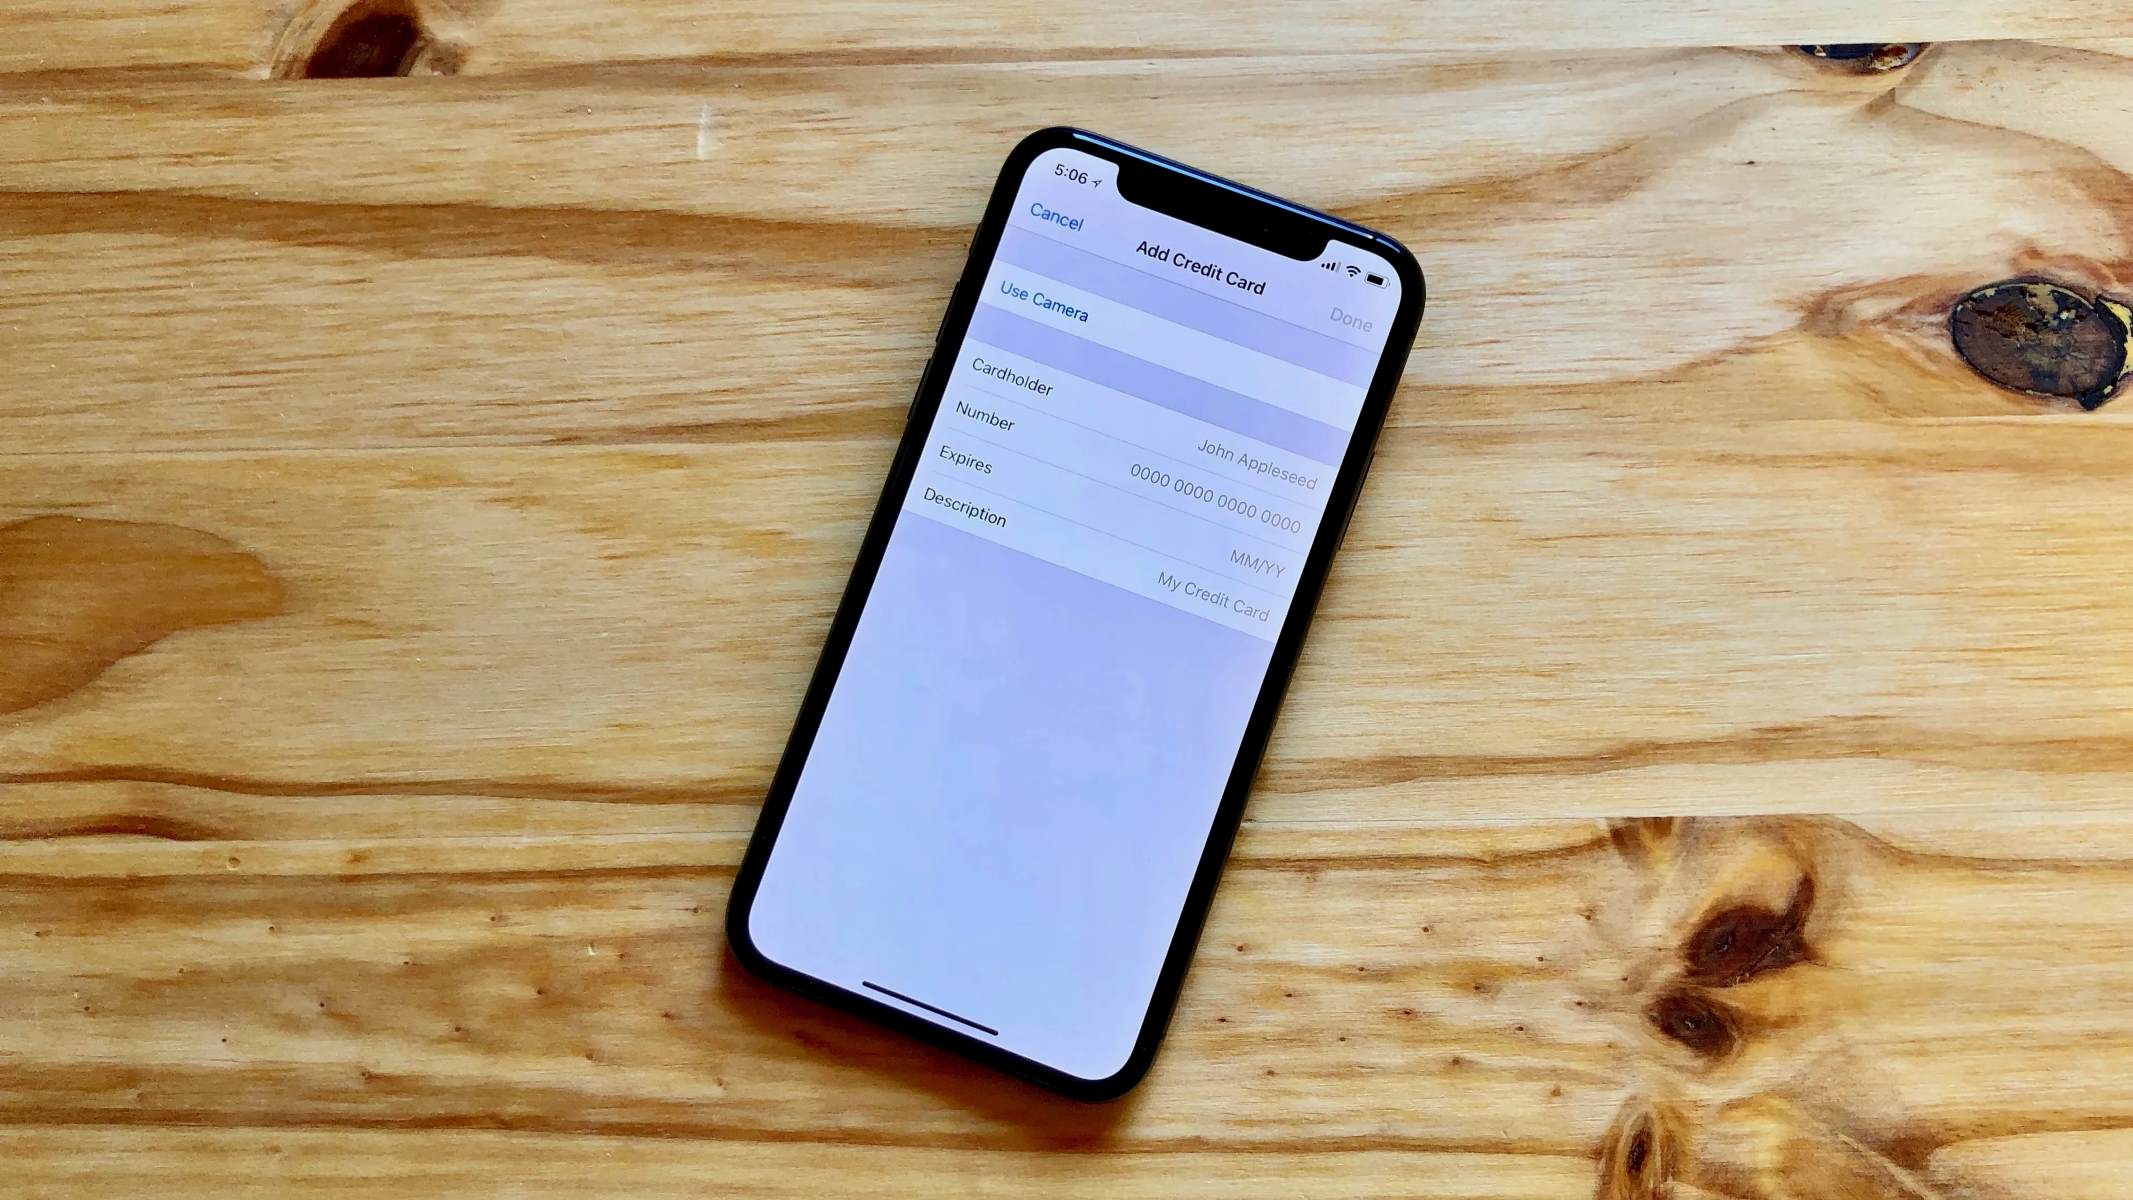
- Download the card reader app: In most cases, the card reader will come with its own app. Download and install the app from the App Store before connecting the card reader to your iPhone.
- Connect the card reader: Insert the card reader into the charging port of your iPhone. Ensure that it is securely connected and aligned properly. Once connected, your iPhone should recognize the card reader and prompt you to open the associated app.
- Launch the card reader app: Open the card reader app on your iPhone. It should automatically detect the connected card reader and provide you with the interface to initiate payment processing.
- Follow the instructions on the app: Each card reader app may have slightly different instructions for processing payments. Typically, you will need to select the payment type (swipe or chip), enter the sale amount, and follow prompts to swipe or insert the customer’s credit card.
- Wait for the authorization: After swiping or inserting the credit card, the card reader app will communicate with your payment processing app and the customer’s bank to authorize the transaction. Wait for the app to display the result of the authorization, which is usually either approved or declined.
- Provide a receipt: Once the transaction is authorized, you can choose to provide a digital or paper receipt to the customer. Many card reader apps allow you to send digital receipts via email or text message directly from the app.
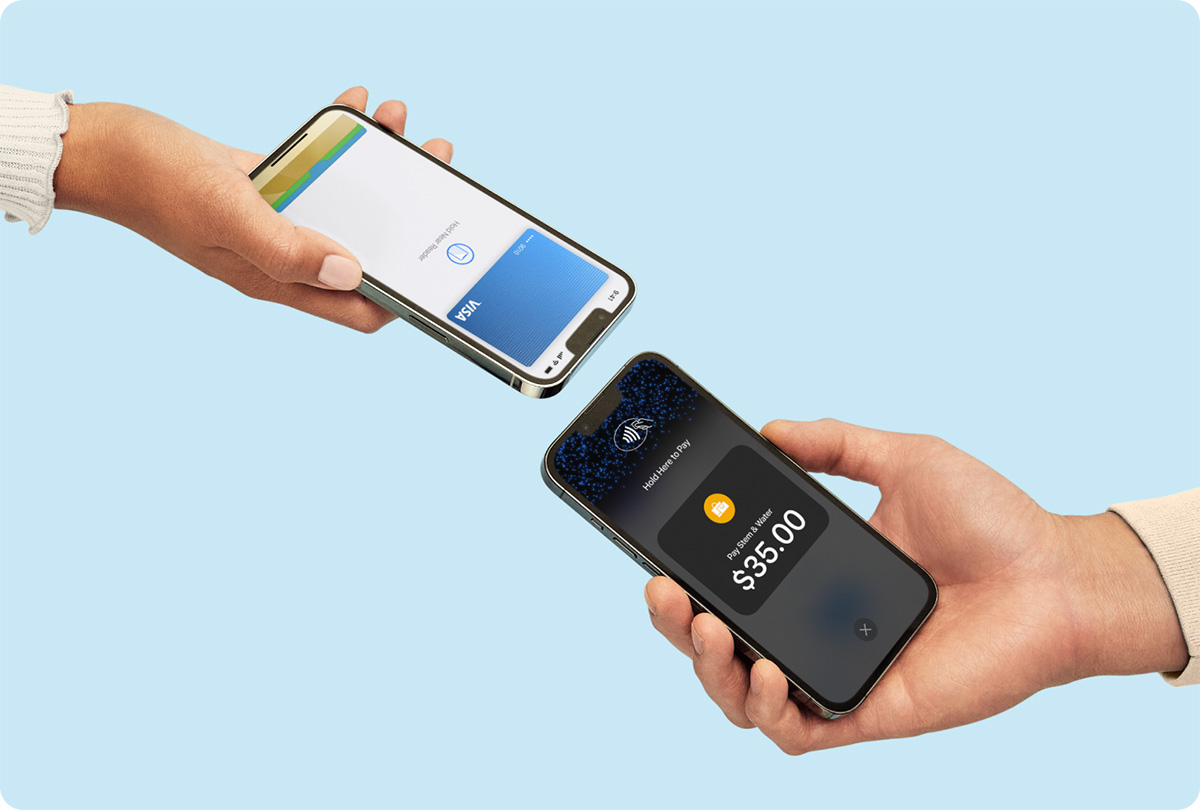
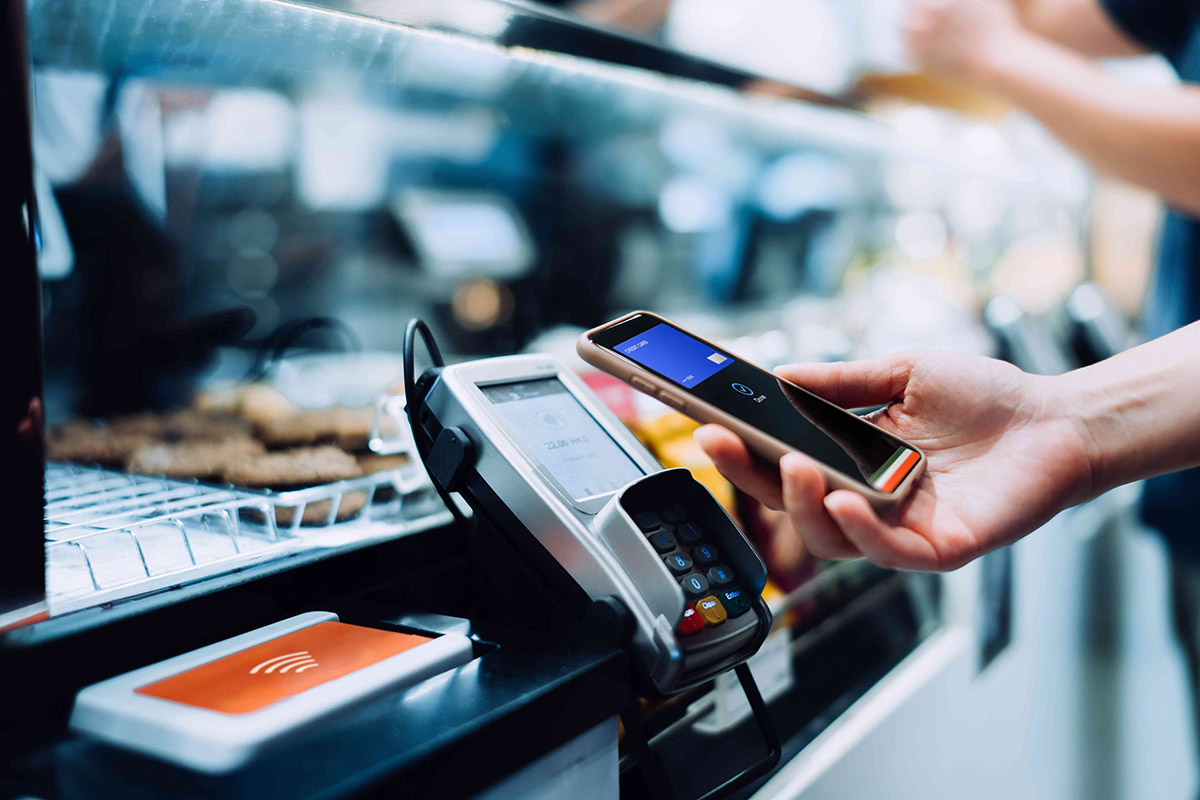
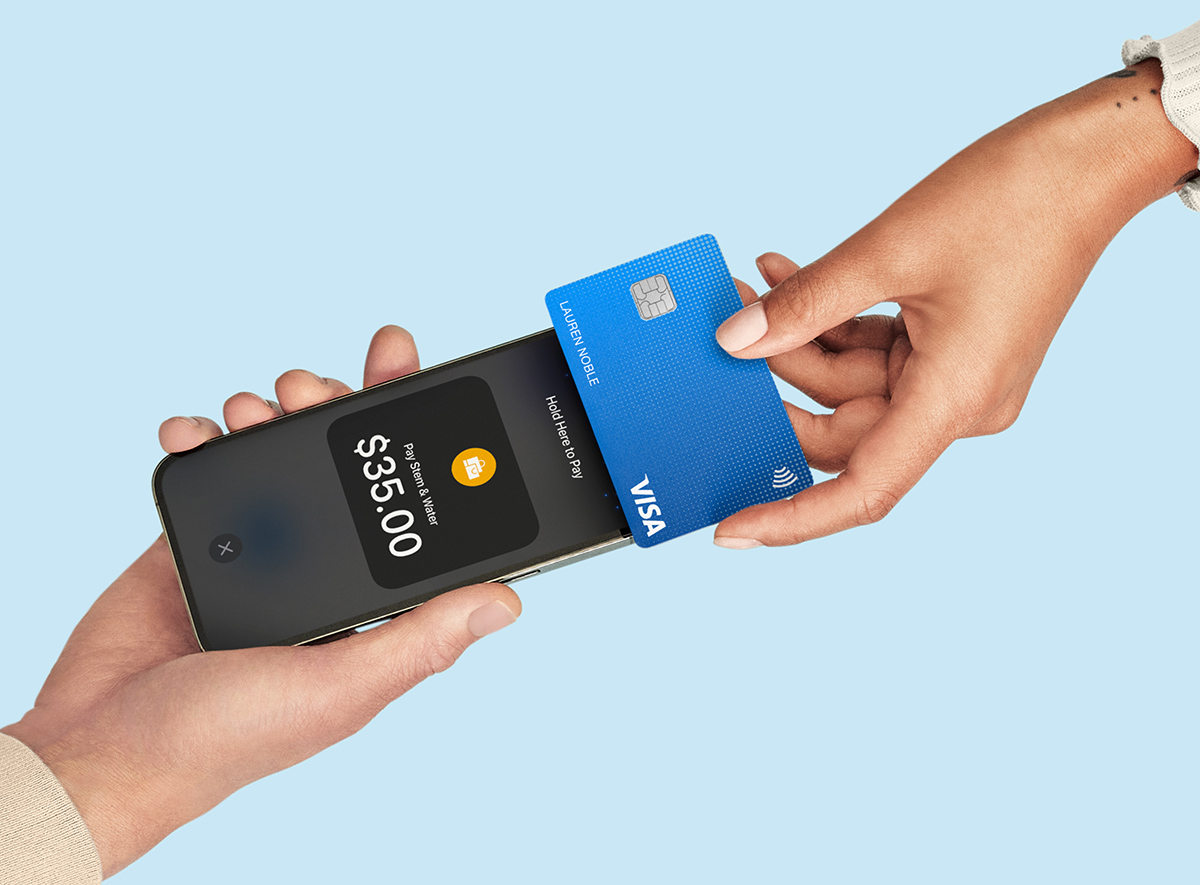
Note that some card readers also support contactless payments, such as Apple Pay or Google Pay. If your card reader and payment processing app are equipped with this feature, you can accept payments from customers using their digital wallets on their smartphones.
By connecting a card reader to your iPhone, you can expand your payment options and provide a seamless in-person payment experience for your customers. It eliminates the need for dedicated payment terminals and makes it easier for you to accept credit card payments on the go.
Accepting Credit Card Payments on Your iPhone
Once you have set up your iPhone and connected a card reader, you are now ready to start accepting credit card payments. Here are the steps to accept credit card payments on your iPhone:
- Open the payment processing app: Launch the payment processing app on your iPhone. You will typically be prompted to enter your login credentials or use biometric authentication to access your account.
- Select the payment type: Choose the type of payment you want to process, such as “Sale” or “Charge.” This will initiate the transaction process and prepare the app to accept the credit card payment.
- Enter the sale amount: Enter the amount that the customer needs to pay. This can be done manually or by selecting items from your product or service catalog, if available within the app.
- Swipe, insert, or tap the card: Depending on the capabilities of your card reader and the customer’s preferences, either swipe the credit card through the card reader, insert it into the chip reader, or accept contactless payments by tapping the card on the designated area of the card reader or your iPhone.
- Verify the transaction: The payment processing app will communicate with the customer’s credit card issuer to authorize the transaction. You may need to wait a few moments for the result to be confirmed. If the transaction is approved, you will proceed to the next step.
- Obtain a signature (if required): In some cases, you may need to collect the customer’s signature for verification purposes. The app will provide instructions for capturing the signature using the touchscreen of your iPhone.
- Provide a receipt: After the transaction is successfully completed, you can offer a receipt to the customer. The payment processing app may allow you to send a receipt via email or text message, or you can print a physical receipt if you have a compatible printer.
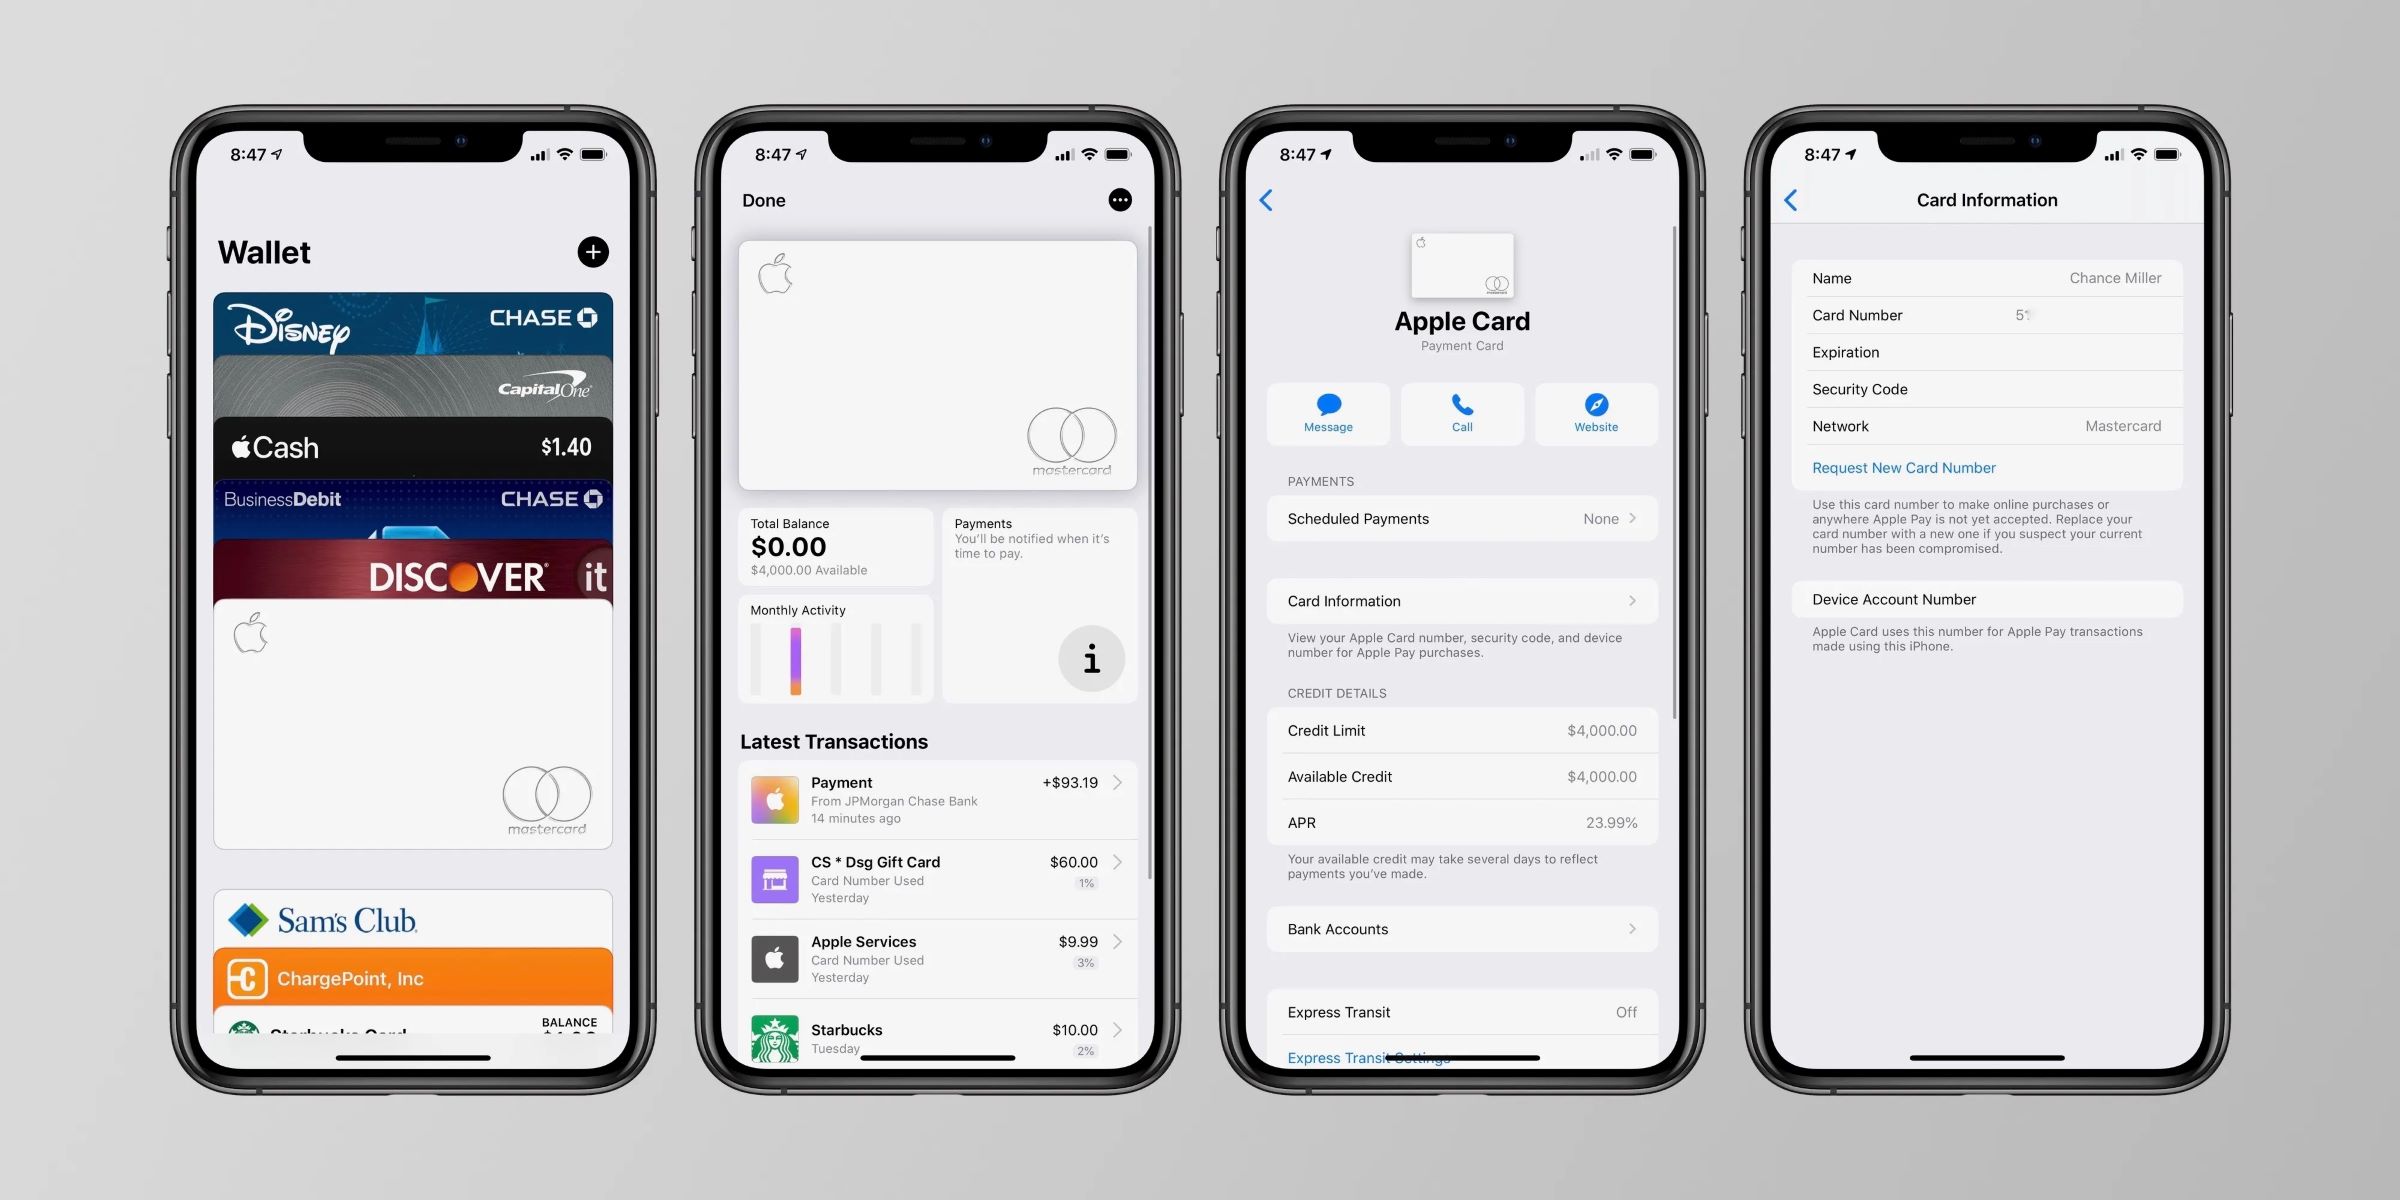
- Record the transaction: It’s important to maintain accurate records of your transactions for accounting and reconciliation purposes. Your payment processing app should have a transaction history feature that allows you to review and export transaction details as necessary.
Remember to always maintain the privacy and security of your customers’ payment information. Follow any additional security measures recommended by your payment processing app, such as using encryption and ensuring the physical security of your iPhone and card reader.
By accepting credit card payments on your iPhone, you provide a convenient and flexible payment option for your customers. Whether you’re running a brick-and-mortar store, providing on-site services, or selling products online, accepting credit card payments through your iPhone streamlines your business operations and enhances the overall customer experience.
Troubleshooting Common Issues
While accepting credit card payments on your iPhone can be convenient, there may be times when you encounter technical issues or face challenges during the payment process. Here are some common issues you may encounter and troubleshooting steps to help resolve them:
1. Connectivity problems: If you experience connectivity issues with your card reader or payment processing app, try the following:
- Ensure that your iPhone’s Bluetooth or Wi-Fi is turned on and connected to a stable network.
- Restart your iPhone and the card reader, then attempt the payment process again.
- Verify that the card reader is securely connected to the charging port of your iPhone.
2. Card reader not recognized: If your iPhone does not recognize the card reader, try these steps:
- Ensure that the card reader you are using is compatible with your iPhone model.
- Clean the charging port and the card reader’s connector to ensure a clean and secure connection.
- Update the card reader app and the payment processing app to the latest versions available in the App Store.
3. Declined transactions: If a transaction is declined, consider the following:
- Confirm that the card information has been entered correctly and that the customer’s card is valid and not expired.
- Ask the customer to verify with their bank if there is any issue with their card or account.
- Ensure that the transaction amount does not exceed any preset limits imposed by the customer’s bank.
4. Slow transaction processing: If transactions are taking an unusually long time to process, try these steps:
- Ensure that your iPhone has a stable internet connection for seamless communication with the payment processing app and the customer’s bank.
- Close any unnecessary background apps on your iPhone to free up system resources.
- Consider upgrading your payment processing app or card reader to newer models that offer faster transaction processing speeds.
If you encounter persistent issues that cannot be resolved through troubleshooting, consult the support resources provided by your payment processor or reach out to their customer service for further assistance. They will have specialized knowledge and tools to help you diagnose and resolve specific issues.
Remember, while technical issues can be frustrating, remain patient and provide clear communication to your customers. Regularly update your payment processing app and card reader software to ensure you are utilizing the latest features and bug fixes.
By effectively troubleshooting and addressing common issues, you can minimize disruptions to your payment process and maintain a smooth and seamless experience for both you and your customers.
Ensuring Security and Privacy
When accepting credit card payments on your iPhone, it is essential to prioritize the security and privacy of your customers’ information. By implementing proper measures and best practices, you can create a safe and trustworthy payment environment. Here are some steps to ensure security and privacy:
- Choose a reputable payment processing app: Use a reliable and trusted payment processing app that has a proven track record in protecting customer data and follows industry-standard security practices.
- Use encryption and tokenization: Ensure that your payment processing app and associated systems use encryption to protect sensitive information during transmission. Tokenization can be used to replace cardholder data with unique identifiers for an added layer of security.
- Follow PCI DSS compliance: The Payment Card Industry Data Security Standard (PCI DSS) provides guidelines for securely handling cardholder data. Ensure that your payment processing app and card reader comply with these standards to minimize the risk of data breaches.
- Enable two-factor authentication: Take advantage of two-factor authentication methods provided by your payment processing app. This adds an extra layer of security by requiring a second form of verification, such as a unique code sent to your phone, before accessing sensitive information.
- Maintain strong passwords: Use unique, complex passwords for your payment processing app, merchant accounts, and associated accounts. Change passwords periodically and avoid using easily guessable information.
- Educate employees: Train your employees on the importance of security and privacy when handling customer payments. Make sure they understand best practices for securing sensitive information and recognizing potential threats like phishing attempts.
- Regularly update software: Keep your iPhone’s operating system, payment processing app, and card reader software up to date to ensure that you have the latest security patches and bug fixes.
- Secure device and card reader physically: Be mindful of your iPhone and card reader’s physical security. Avoid leaving your devices unattended or exposed to potential theft. Securely store card reader accessories and replace them if damaged or compromised.
- Monitor transactions and accounts: Regularly review transaction records and account statements to spot any unauthorized or suspicious activity. Report any issues promptly to your payment processor and card issuer.
- Implement data backup and recovery: Regularly back up your transaction data to secure external storage or cloud-based services. This ensures that you can recover critical information in case of device loss or failure.
By implementing these security measures, you can instill customer confidence, protect sensitive information, and mitigate the risk of data breaches or fraudulent activities. Prioritizing security and privacy not only protects your customers but also safeguards the reputation and credibility of your business.
Remember to stay updated on the latest security practices and regulations in the payment industry. Regularly review and enforce security policies within your organization and adapt to emerging threats and technologies as necessary.
Conclusion
Accepting credit card payments on your iPhone opens up new possibilities for your business. With the right setup, you can conveniently and securely process transactions on the go, providing a seamless payment experience for your customers. By following the steps outlined in this guide, you can successfully set up your iPhone, choose a payment processing app, create a merchant account, connect a card reader, and start accepting credit card payments.
Remember to consider important factors such as features, pricing, security measures, and customer support when selecting a payment processing app. Connect a compatible card reader to your iPhone to offer in-person payment options. Troubleshoot common issues that may arise during the payment process and implement security measures to protect your customers’ information.
As technology continues to advance, it’s crucial to stay informed about the evolving payment landscape. Keep up with the latest security practices, regulations, and industry trends to ensure that your payment process remains secure and meets the needs of your customers.
With the power of your iPhone, you have the flexibility to accept credit card payments whenever and wherever you do business. Embrace this opportunity to enhance customer satisfaction, increase sales, and improve the overall efficiency of your operations. Whether you’re a small business owner, a freelancer, or an entrepreneur, accepting credit card payments on your iPhone can give you a competitive edge and contribute to the growth and success of your business.
What's Hot
Latest Articles
Related Post
By: • Finance

By: • Finance
By: • Finance

By: • Finance

By: • Finance
By: • Finance
By: • Finance
By: • Finance
By: • Finance
By: • Finance


By: • Finance

By: • Finance

By: • Finance
By: • Finance