Home>Finance>How To Set Up A Kindle Fire Without A Credit Card
Finance
How To Set Up A Kindle Fire Without A Credit Card
Published: November 4, 2023
Learn how to set up your Kindle Fire without needing a credit card. Discover alternative options for financing your Kindle Fire purchase.
(Many of the links in this article redirect to a specific reviewed product. Your purchase of these products through affiliate links helps to generate commission for LiveWell, at no extra cost. Learn more)
Table of Contents
- Introduction
- Step 1: Powering on your Kindle Fire
- Step 2: Connecting to Wi-Fi
- Step 3: Creating an Amazon Account
- Step 4: Setting Up Payment Methods Without a Credit Card
- Step 5: Registering your Kindle Fire
- Step 6: Customizing your device settings
- Step 7: Adding Content and Apps to your Kindle Fire
- Step 8: Enjoying Your Kindle Fire Without a Credit Card
- Conclusion
Introduction
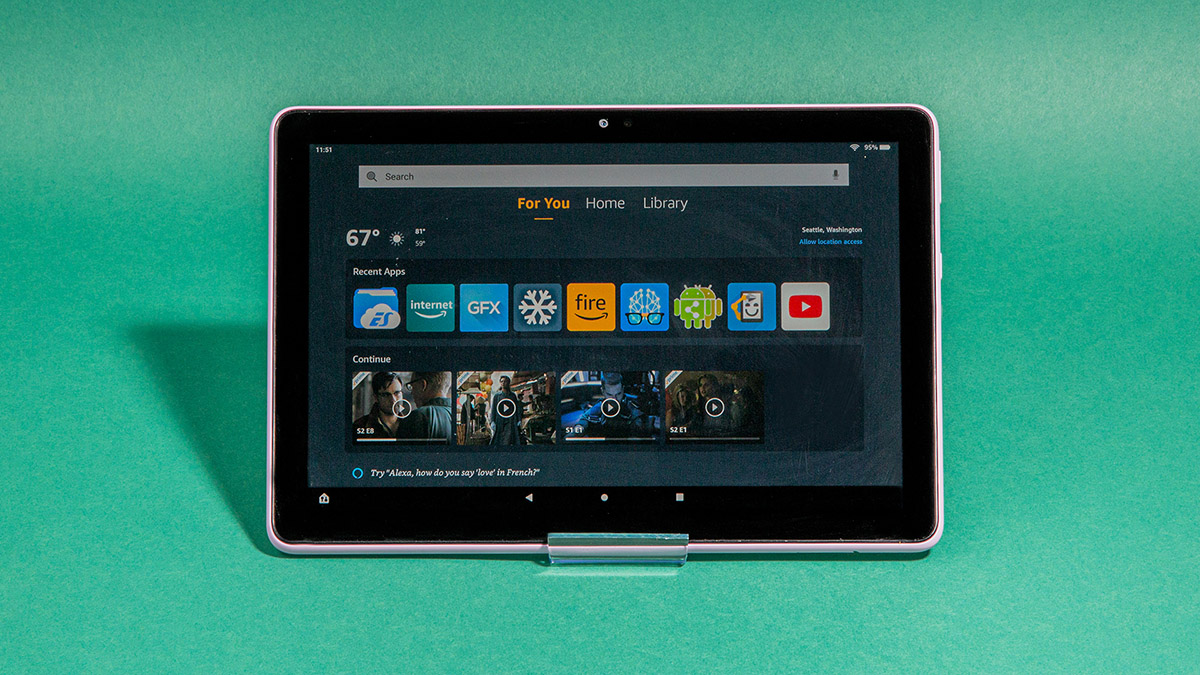
Welcome to the world of Kindle Fire, a versatile and powerful tablet that offers a wealth of entertainment and productivity features. If you’re eager to dive into your new Kindle Fire but don’t have a credit card, don’t worry! In this article, we will guide you through the process of setting up your Kindle Fire without the need for a credit card.
Many people hesitate to set up their Kindle Fire due to concerns about providing credit card information or simply not owning a credit card. However, you can still enjoy all the amazing features of your Kindle Fire without having to input credit card details.
By following the step-by-step instructions outlined in this guide, you’ll be able to create an Amazon account, connect to Wi-Fi, and set up payment methods that don’t require a credit card. You’ll be up and running in no time, ready to explore the vast world of digital books, movies, music, and apps available on the Kindle Fire.
Whether you’re a bookworm looking forward to indulging in a vast library of e-books or a tech enthusiast excited about accessing popular apps and games, this guide will enable you to set up your Kindle Fire effortlessly.
So, let’s get started with the initial steps to power on your device and connect it to Wi-Fi.
Step 1: Powering on your Kindle Fire
The first step to setting up your Kindle Fire is to power it on. Locate the power button, which is typically located on the top or side edge of the device. Press and hold the button for a few seconds until the screen lights up with the Kindle logo.
Once your Kindle Fire is powered on, you will be prompted to select your preferred language. Use the touchscreen to navigate and select your desired language from the options provided. After selecting the language, tap “Continue” to proceed.
Next, you will see the “Connect to Wi-Fi” screen. If you already have a Wi-Fi network available, tap on the network name to connect. You may be prompted to enter the Wi-Fi password if the network is secured. If you don’t have access to Wi-Fi at the moment, you can skip this step for now and connect to Wi-Fi later.
After selecting or skipping the Wi-Fi connection, your Kindle Fire will attempt to connect and check for software updates. It is essential to have the latest software version for optimal performance and access to all features.
Once the software update check is complete, your Kindle Fire will be ready for the next step: creating an Amazon account.
Note: It is recommended to connect to Wi-Fi during the initial setup process to ensure a smooth and seamless experience. However, you can still set up your Kindle Fire without Wi-Fi and connect later for software updates and content downloads.
Step 2: Connecting to Wi-Fi
Connecting your Kindle Fire to Wi-Fi is crucial for accessing online content, downloading apps, and staying connected to the digital world. Here’s how you can connect your device to a Wi-Fi network:
- On the Wi-Fi setup screen, tap on the network you want to join. If the network is password-protected, you will be prompted to enter the Wi-Fi password. Use the on-screen keyboard to input the password correctly. Remember that Wi-Fi passwords are case-sensitive, so ensure you enter uppercase and lowercase letters accurately.
- If the Wi-Fi network you want to join is not appearing on the list, tap on “Other Networks” and manually enter the network name (SSID) and password, if applicable.
- Once you’ve entered the Wi-Fi network details, tap on “Connect” to establish a connection to the network.
- If the connection is successful, your Kindle Fire will display a message indicating that you are connected to the Wi-Fi network.
- If you are experiencing difficulty in connecting to Wi-Fi or the network is not appearing on the list, ensure that you are within range of the Wi-Fi network and that the network is functioning correctly. You may need to restart your router or contact your Internet service provider for assistance.
It’s important to note that connecting your Kindle Fire to Wi-Fi is essential for various tasks, such as downloading books, movies, apps, and software updates. Additionally, some apps and features may require an active internet connection to function properly.
Once your Kindle Fire is connected to Wi-Fi, you’re ready to move on to the next step: creating an Amazon account.
Step 3: Creating an Amazon Account
In order to fully utilize your Kindle Fire and access its library of digital content, you’ll need to create an Amazon account. Here’s how you can create an account:
- On the setup screen, tap on “Create a new Amazon account.”
- Enter your name, email address, and create a secure password for your Amazon account. Make sure to choose a password that is unique and not easily guessed.
- Agree to the Amazon Conditions of Use and Privacy Notice by checking the boxes next to each statement.
- Tap on “Create your Amazon account” to proceed.
After clicking the “Create your Amazon account” button, Amazon will send a verification email to the email address you provided during the registration process. Open your email inbox and locate the email from Amazon. Click on the verification link within the email to activate your Amazon account.
Once your account is verified, you will be directed back to your Kindle Fire to continue the setup process. You may be prompted to sign in using the newly created account credentials.
It’s important to note that your Amazon account will be associated with your Kindle Fire, allowing you to purchase and download content directly to your device. Having an Amazon account also enables you to access other Amazon services and features, such as Amazon Prime, Kindle Unlimited, and personalized recommendations based on your preferences.
With your Amazon account set up, you’re now ready to proceed to the next step: setting up payment methods without a credit card.
Step 4: Setting Up Payment Methods Without a Credit Card
Setting up payment methods is an important step in order to make purchases on your Kindle Fire. However, if you don’t have a credit card or prefer not to use one, there are alternative payment methods available. Here’s how you can set up payment methods without a credit card:
- From the home screen of your Kindle Fire, tap on the “Amazon” app to open it.
- Sign in with your Amazon account credentials if you haven’t already.
- In the Amazon app, tap on the menu icon (usually three lines) in the top-left corner of the screen to open the side menu.
- Scroll down and select “Your Account” from the menu options.
- Within the Account menu, tap on “Payment Options.”
- On the Payment Options screen, select “Add a checking account” or “Add a savings account” as your payment method.
- Follow the on-screen instructions to provide the necessary bank account information, such as your account number and routing number, to link your bank account to your Amazon account.
- Once your bank account is successfully linked, you will be able to make purchases using your bank account as the payment method.
Using a bank account as a payment method allows you to make purchases on your Kindle Fire without the need for a credit card. It provides a convenient and secure alternative for those who prefer not to use credit cards or do not own one.
It’s important to note that after adding a bank account, you may be required to verify it by following additional instructions provided by Amazon. This is a security measure to ensure the accuracy and validity of the bank account information provided.
With your payment method set up, you’re now ready to register your Kindle Fire and start customizing your device to your preferences.
Step 5: Registering your Kindle Fire
Registering your Kindle Fire is an important step that allows you to access additional features and benefits. Registering your device also enables Amazon to provide personalized recommendations, sync your content across devices, and provide support if needed. Here’s how you can register your Kindle Fire:
- From the home screen of your Kindle Fire, tap on the “Settings” icon, which looks like a gear.
- In the settings menu, tap on “My Account.”
- Select the “Register” option to begin the registration process.
- Sign in with your Amazon account credentials if prompted.
- Follow the on-screen instructions to complete the registration process.
During the registration process, you may be asked to provide additional information, such as your name, location, and contact details. This information helps Amazon personalize your experience and ensure you receive relevant updates and recommendations.
Once your Kindle Fire is successfully registered, you’ll have access to a range of features, including the ability to sync your e-books, audiobooks, and apps across devices, access to cloud storage for your content, and the ability to take advantage of special offers and promotions.
Registration also enables you to receive important software updates for your device, ensuring that you have the latest features and security enhancements.
With your Kindle Fire registered, you’re now ready to move on to the next step: customizing your device settings to suit your preferences.
Step 6: Customizing your device settings
Now that your Kindle Fire is registered, it’s time to customize the device settings to personalize your user experience. Here are some key settings you can adjust:
- Display Settings: Tap on “Settings” and select “Display & Brightness” to adjust the screen brightness, font size, and display sleep timer. You can also enable features like Night Shift to reduce the blue light emitted by the screen in the evening.
- Sound Settings: In the Settings menu, select “Sounds & Haptics” to adjust volume levels, set system sounds, and enable or disable haptic feedback.
- Language and Keyboard: Tap on “Settings” and select “Language & Keyboard” to change the device language, keyboard layout, and input settings.
- Accessibility: For users with specific accessibility needs, the Accessibility settings allow you to customize options such as screen magnification, font style, color inversion, and more. You can access these settings by tapping on “Settings” and selecting “Accessibility.”
- Privacy and Security: Protect your device and personal information by setting up security features like lock screen passcodes and fingerprint or facial recognition. You can also manage app permissions and control how your data is used by tapping on “Settings,” then selecting “Privacy & Security.”
- Wireless options: Access the wireless settings by tapping on “Settings” and selecting “Wi-Fi.” From there, you can manage Wi-Fi networks, enable or disable Bluetooth, and customize other wireless settings.
These are just a few examples of the many settings you can adjust on your Kindle Fire to make it your own. Feel free to explore the Settings menu to discover additional customization options based on your preferences.
Remember to save your changes after adjusting each setting by tapping the “Save” or “OK” button.
Once you’ve customized your device settings, you’re ready to move on to the next step: adding content and apps to your Kindle Fire.
Step 7: Adding Content and Apps to your Kindle Fire
One of the great benefits of owning a Kindle Fire is the ability to access a wide range of digital content and apps. Here’s how you can add content and apps to your Kindle Fire:
- eBooks: To add eBooks to your Kindle Fire, you can browse the Kindle Store directly from your device. Open the Amazon app, tap on “Store,” and navigate to the “Books” section. Search for a specific title or browse through the different categories. Once you find a book you wish to purchase or download, tap on it, and then tap on the purchase or download button. The book will be automatically added to your Kindle Fire’s library.
- Audiobooks: If you enjoy listening to audiobooks, you can access a vast selection through Amazon’s Audible service. Open the Amazon app, tap on “Store,” and select “Audiobooks.” Explore the different genres and titles, and when you find an audiobook you want, tap on it to either purchase it or add it to your Audible library if you’re an Audible subscriber.
- Music: To add music to your Kindle Fire, you can either transfer your own music files from your computer or stream music through popular services like Amazon Music or Spotify. You can also purchase and download music directly from the Amazon app by tapping on “Store,” then selecting “Music” and browsing through the available options.
- Apps: The Amazon Appstore offers a wide range of apps and games specifically designed for Kindle Fire. Open the Amazon app, tap on “Store,” and select “Apps & Games.” Explore the different categories or search for a specific app. When you find an app you want, tap on it, and then tap on the “Get” or “Buy” button to download and install it on your device.
Remember to connect to Wi-Fi before downloading content and apps to ensure smooth and fast downloads. Once downloaded, you can access your content and apps from the corresponding libraries on your Kindle Fire’s home screen.
With a world of entertainment and productivity at your fingertips, enjoy exploring and adding the content and apps that suit your interests and needs.
Now that you have added content and apps to your Kindle Fire, you’re ready to enjoy all the features and benefits it has to offer.
Step 8: Enjoying Your Kindle Fire Without a Credit Card
Now that you have set up your Kindle Fire without a credit card, you can fully enjoy all its features and functionalities. Here’s how you can make the most out of your device without relying on a credit card:
1. Free Content: Take advantage of the vast selection of free content available for Kindle Fire users. This includes free e-books, audiobooks, apps, and games. Visit the Amazon app store and browse through the free section to discover a multitude of options to enjoy without any cost.
2. Gift Cards: Consider purchasing Amazon gift cards to add credit to your account. Gift cards can be purchased online or at various retail locations. Once you have obtained a gift card, you can redeem it on your Amazon account and use the available credit to make purchases on your Kindle Fire.
3. Kindle Unlimited: Kindle Unlimited is a subscription service offered by Amazon that allows you to access a vast library of e-books, audiobooks, and magazines for a monthly fee. With a Kindle Unlimited subscription, you can enjoy a wide range of content without the need for individual purchases.
4. Borrow Books: Take advantage of Amazon’s Kindle Owners’ Lending Library. If you are an Amazon Prime member, you have access to a selection of books that you can borrow for free. This library includes popular titles and bestsellers, giving you the opportunity to enjoy the latest releases without the need for a credit card.
5. Parental Controls: If you’re using the Kindle Fire for your children, make use of the parental control features to manage and control purchases. By configuring these settings, you can ensure that your children can enjoy the device without making unauthorized purchases.
By utilizing these strategies, you can make the most of your Kindle Fire without the need for a credit card. Whether you’re reading your favorite books, listening to audiobooks, exploring new apps, or enjoying multimedia content, you can do it all while staying within your preferred payment methods.
Remember to keep your Kindle Fire up to date with the latest software updates to access new features and enhancements that Amazon releases regularly. Enjoy your device and all the entertainment it offers!
Conclusion
Congratulations! You have successfully set up your Kindle Fire without the need for a credit card. By following the steps outlined in this guide, you have created an Amazon account, connected to Wi-Fi, set up alternative payment methods, registered your device, customized the settings, and added content and apps to your Kindle Fire. You can now enjoy all the features and benefits of your Kindle Fire without any limitations.
Remember, even without a credit card, you can still access a vast selection of free content, including e-books, audiobooks, apps, and games. Additionally, gift cards and subscription services like Kindle Unlimited offer excellent avenues for expanding your digital library.
Continue exploring the Amazon app store to discover new content, and make use of the customization options to tailor your Kindle Fire to your preferences. Whether you’re an avid reader, a movie enthusiast, a music lover, or a productivity seeker, your Kindle Fire has the capabilities to cater to your needs.
Lastly, keep your Kindle Fire updated with the latest software version to ensure optimal performance and access to new features released by Amazon. Regularly check for software updates in the device settings to stay up to date.
Enjoy your Kindle Fire to the fullest and immerse yourself in the world of digital entertainment, productivity, and learning. Let your curiosity guide you as you explore all the possibilities that your Kindle Fire has to offer.
What's Hot
Latest Articles
Related Post
By: • Finance
By: • Finance
By: • Finance

By: • Finance
By: • Finance

By: • Finance

By: • Finance
By: • Finance

By: • Finance

By: • Finance

By: • Finance

By: • Finance

By: • Finance

By: • Finance

By: • Finance