
Finance
How Do I Add A Credit Card To Apple Pay
Published: October 25, 2023
Learn how to easily add a credit card to Apple Pay for seamless and secure mobile payments. Simplify your finances with this step-by-step guide.
(Many of the links in this article redirect to a specific reviewed product. Your purchase of these products through affiliate links helps to generate commission for LiveWell, at no extra cost. Learn more)
Table of Contents
- Introduction
- Step 1: Open the Wallet App
- Step 2: Tap on the “Plus” Sign
- Step 3: Choose “Add a Credit or Debit Card”
- Step 4: Position Your Credit Card in the Frame
- Step 5: Enter the Card Details Manually
- Step 6: Verify Your Card
- Step 7: Accept Terms and Conditions
- Step 8: Select “Next” to Complete the Adding Process
- Conclusion
Introduction
Apple Pay, the digital wallet service introduced by Apple, allows users to make secure and convenient payments using their Apple devices. With Apple Pay, you can add your credit cards to your iPhone, iPad, Apple Watch, or Mac and easily make payments at supported merchants.
Adding a credit card to Apple Pay is a straightforward process that can be done in just a few simple steps. Once you’ve added your credit card, you can use Apple Pay to make purchases in-store, online, or within apps, without having to physically present your credit card.
Apple Pay offers a secure way to make payments, thanks to its use of tokenization. When you add your credit card to Apple Pay, your card details are replaced with a unique device account number. This means that your actual card number is never stored on your device or Apple servers, reducing the risk of fraud.
In this article, we’ll guide you through the process of adding a credit card to Apple Pay. Whether you’re using an iPhone, iPad, or Mac, you’ll find the steps easy to follow. So, let’s get started and learn how to add a credit card to Apple Pay!
Step 1: Open the Wallet App
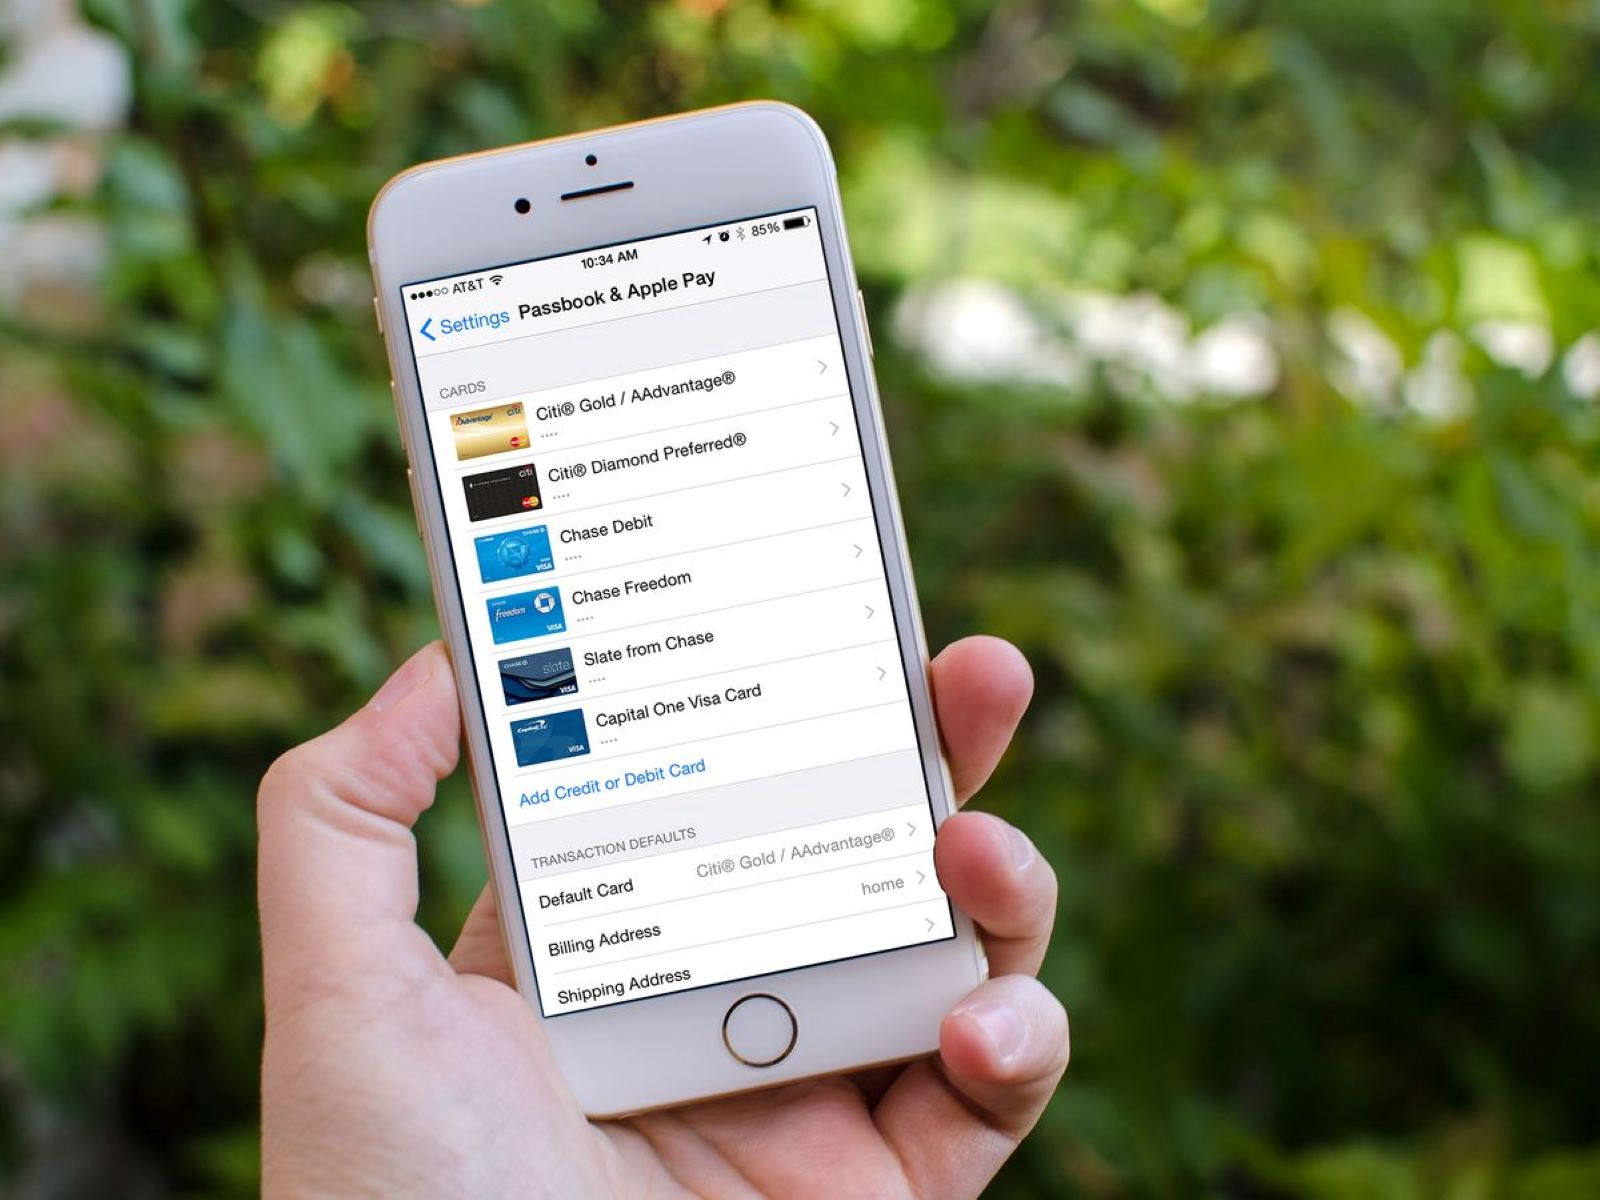
The first step to adding a credit card to Apple Pay is to open the Wallet app on your device. The Wallet app is a pre-installed application on iPhone, iPad, and iPod touch devices, and it allows you to manage your Apple Pay cards.
To open the Wallet app, simply locate the app on your device’s home screen. The Wallet app icon resembles a white wallet on a blue background. Tap on the icon to launch the app.
If you’re using an iPhone with Face ID, you can also access the Wallet app by double-clicking the side button and authenticating with Face ID when prompted. For older iPhone models with Touch ID, you can double-click the home button and use Touch ID to open the Wallet app.
Once the Wallet app is open, you’ll see any existing cards you’ve already added to Apple Pay. If this is your first time using Apple Pay, the app may prompt you to set it up before allowing you to add a new card. Follow the on-screen instructions to proceed.
Now that you have the Wallet app open, you’re ready to move on to the next step and add your credit card to Apple Pay. Hang on, we’re halfway there!
Step 2: Tap on the “Plus” Sign
Once you have the Wallet app open on your device, the next step is to tap on the “plus” sign icon to add a new credit card to Apple Pay.
To locate the “plus” sign, look for the option that says “Add” or “Add Credit or Debit Card.” This option is typically displayed at the top-right or bottom-right corner of the screen, depending on your device.
When you tap on the “plus” sign, the Wallet app will prompt you to choose the type of card you want to add. You will see options such as “Credit or Debit Card” or “Apple Card.” Select the appropriate option for the credit card you want to add.
If you’re adding a credit card from a supported bank, the Wallet app may automatically detect your card details when using your device’s camera. In this case, you can hold your credit card within the frame displayed on the screen, and the app will scan and capture the information.
However, if your card details are not detected automatically or you prefer to enter them manually, you can choose the option to enter the card details manually. This option allows you to manually input your card number, expiration date, and security code.
Once you have tapped on the “plus” sign and selected the appropriate option, you’re ready to move on to the next step and input your credit card details. Stay with us as we progress through the process of adding a credit card to Apple Pay!
Step 3: Choose “Add a Credit or Debit Card”
After tapping on the “plus” sign in the Wallet app, the next step is to choose the option to “Add a Credit or Debit Card.” This selection will allow you to proceed with adding your credit card to Apple Pay.
When you select this option, the Wallet app will present you with different methods to add your credit card. These methods can include scanning your physical card with your device’s camera or manually entering the card details.
If your device supports card scanning, you can position your credit card within the frame displayed on the screen. The Wallet app will use your device’s camera to capture the card details such as the card number and expiration date automatically. You may also need to enter the card’s security code manually.
If your device does not support card scanning or if you prefer to enter the details manually, you can choose the option to manually input the card information. Tap on the “Enter Card Details Manually” option and proceed to the next step.
By choosing to add a credit or debit card in the Wallet app, you are just a few steps away from being able to use Apple Pay with your card. Get ready to enter your card details as we move on to the next step of the process!
Step 4: Position Your Credit Card in the Frame
If you have chosen to add your credit card to Apple Pay by scanning it using your device’s camera, the next step is to position your physical credit card within the frame displayed on the screen.
When prompted, hold your credit card in a way that allows the camera to clearly capture the card’s details. Make sure that the card number, expiration date, and your name on the card are visible within the frame.
It’s important to ensure that you have good lighting and that there are no obstructions or glare on your card that could affect the scanning process. Position the card steadily and keep it within the frame until the scanning process is complete.
Once the Wallet app successfully scans your card, it will display the card’s details on the screen. This typically includes the cardholder’s name, the card issuer, the last four digits of the card number, and the card’s expiration date. Take a moment to verify that the information displayed matches your credit card.
If the scanned details are accurate, proceed to the next step. If there are any mistakes or inaccuracies, you can tap on the “Enter Card Details Manually” option to input the information manually. This ensures that your Apple Pay account is associated with the correct card details.
With your credit card successfully scanned and verified, we’re almost done adding the card to Apple Pay. The next step involves entering any missing card details manually. Stay with us as we guide you through the process!
Step 5: Enter the Card Details Manually
If you have chosen to add your credit card to Apple Pay by manually entering the card details, the next step is to input the required information into the Wallet app.
The required card details typically include the card number, expiration date, and the card’s security code (usually a three-digit number found on the back of the card). Some cards may also require additional information such as the cardholder’s name or billing address.
Tap on the appropriate fields in the Wallet app to enter the card number, expiration date, security code, and any other necessary details. Take care to accurately input the information, as any errors may prevent the card from being added successfully.
If you’re unsure about any specific information, refer to your physical credit card for accurate details. Double-check the digits and verify that the expiration date is entered correctly.
Keep in mind that the process of entering card details manually may vary slightly depending on the device you are using. However, the overall steps and required information remain the same.
After entering the card details, take a moment to review the information you’ve inputted. Ensure that all the details are correct and match your physical credit card. If any changes are needed, tap on the respective fields to make corrections.
Once you are satisfied with the accuracy of the entered card details, you’re ready to move on to the next step, which involves verifying the card. Stay with us as we guide you through the process of adding your credit card to Apple Pay!
Step 6: Verify Your Card
After entering your credit card details into the Wallet app, the next step is to verify your card. Verification is necessary to confirm that you are the rightful cardholder and to ensure the security of your Apple Pay account.
The verification process for your card may vary depending on your card issuer. However, it typically involves one of the following methods:
- Text Message or Email: In some cases, your card issuer may send you a verification code either via text message or email. The code will be sent to the mobile number or email address associated with your card. Enter the verification code when prompted in the Wallet app to complete the verification process.
- Phone Call: Alternatively, your card issuer may require you to make a phone call to verify your card. After entering your card details in the Wallet app, follow the on-screen instructions to contact the card issuer’s customer service. Provide any necessary information and answer any security questions to complete the verification process.
- In-App Confirmation: In some cases, your card issuer may have a dedicated app that you need to verify your card through. Once you’ve entered your card details in the Wallet app, it will redirect you to the card issuer’s app for verification. Follow the instructions within the app to confirm your card.
Follow the prompted instructions in the Wallet app to complete the verification process for your specific card. It’s important to carry out this step as it ensures that your Apple Pay account is secure and only accessible by you.
Once you’ve successfully verified your card, you’re almost finished adding it to Apple Pay. The next step involves accepting the terms and conditions. Stay with us as we guide you through the final steps of the process!
Step 7: Accept Terms and Conditions
After verifying your card, the next step in adding a credit card to Apple Pay is to review and accept the terms and conditions. These terms outline the responsibilities and obligations of both Apple and the card issuer when using Apple Pay.
The terms and conditions are typically presented in a pop-up window or as a separate screen within the Wallet app. Take the time to read through the terms carefully to understand the agreement and any associated fees or policies.
If you agree to the terms and conditions, you can proceed by tapping on the “Accept” or “Agree” button. This action indicates your consent to the terms and signifies that you are willing to use Apple Pay with your credit card.
Keep in mind that failing to accept the terms and conditions may prevent you from adding your credit card to Apple Pay. It’s important to review and understand the terms to ensure a smooth and compliant user experience.
By accepting the terms and conditions, you’re one step closer to completing the process of adding your credit card to Apple Pay. The final step involves selecting “Next” to finalize the adding process. Stay with us as we walk you through the final step of this exciting journey!
Step 8: Select “Next” to Complete the Adding Process
Congratulations! You’re nearing the end of the process to add your credit card to Apple Pay. The final step is to select the “Next” button to complete the adding process.
After accepting the terms and conditions, the Wallet app will display a confirmation screen summarizing the card details you’ve entered and verified. Take a moment to review the information once again to ensure its accuracy.
If everything looks correct, tap on the “Next” button to proceed. The Wallet app will then begin the process of securely transmitting your card details to your card issuer. This allows your card issuer to verify and add your credit card to Apple Pay on your Apple device.
The time for the adding process to complete may vary depending on your card issuer and network connectivity. In some cases, the adding process may be immediate, while in others, it may take a few minutes for the process to finalize.
Once your credit card has been successfully added to Apple Pay, the Wallet app will display a confirmation message indicating that the card is now ready for use. You may also receive a notification from your card issuer confirming the successful addition of your card.
With the adding process completed, you’re now ready to start using your credit card with Apple Pay! You can make secure and convenient payments at supported merchants, both in-store and online, using your Apple device.
Remember to keep your Apple Pay device secure, enable biometric authentication features like Face ID or Touch ID, and use Apple Pay responsibly for a seamless and secure payment experience.
Now you’re all set to enjoy the benefits of Apple Pay with your added credit card. Happy spending!
Conclusion
Adding a credit card to Apple Pay is a simple and convenient process that allows you to make secure and contactless payments using your Apple device. By following the steps outlined in this guide, you can easily add your credit card to Apple Pay and start enjoying the benefits of this digital wallet service.
Remember, when adding your credit card to Apple Pay, your card information is tokenized, meaning that your actual card number is replaced with a unique device account number. This adds an extra layer of security and reduces the risk of fraud.
Whether you choose to scan your card using your device’s camera or enter the details manually, make sure to verify your card and accept the terms and conditions. These steps help ensure the security of your Apple Pay account and compliance with the card issuer’s policies.
Once your credit card is added to Apple Pay, you can conveniently make payments in-store, online, or within apps without the need to physically present your card. Apple Pay provides a seamless and secure payment experience, allowing you to make transactions with just a touch or a glance.
Now that you have successfully added your credit card to Apple Pay, don’t forget to explore other features and benefits offered by the app. You can manage your cards, view transaction history, and even use Apple Pay Cash to send and receive money from friends and family.
Keep in mind that not all merchants or service providers accept Apple Pay, so it’s always a good idea to check for the Apple Pay logo or contactless payment support when making a purchase. Enjoy the convenience and security that Apple Pay brings to your everyday transactions!
What's Hot
Latest Articles
Related Post
By: • Finance

By: • Finance

By: • Finance

By: • Finance

By: • Finance

By: • Finance

By: • Finance

By: • Finance
By: • Finance

By: • Finance


By: • Finance

By: • Finance

By: • Finance

By: • Finance