Home>Finance>How To Record Employer-Paid Health Insurance In Quickbooks Online


Finance
How To Record Employer-Paid Health Insurance In Quickbooks Online
Published: October 29, 2023
Learn how to accurately record employer-paid health insurance in Quickbooks Online and manage your finances effectively.
(Many of the links in this article redirect to a specific reviewed product. Your purchase of these products through affiliate links helps to generate commission for LiveWell, at no extra cost. Learn more)
Table of Contents
- Introduction
- Step 1: Setting up Employer-Paid Health Insurance as an Expense Account
- Step 2: Creating an Expense Transaction for Employer-Paid Health Insurance
- Step 3: Recording Payments for Employer-Paid Health Insurance
- Step 4: Running Reports and Analyzing Employer-Paid Health Insurance Expenses
- Conclusion
Introduction
Employer-paid health insurance is a valuable benefit that many companies offer to their employees. It provides coverage for medical expenses, including doctor visits, hospital stays, and prescription medications. As an employer, it is important to accurately record and track these expenses in your financial records. QuickBooks Online is a widely used accounting software that can help you manage your company’s finances, including recording employer-paid health insurance.
In this article, we will guide you through the process of recording employer-paid health insurance in QuickBooks Online. We will cover setting up the expense account, creating expense transactions for health insurance payments, recording payments, and running reports to analyze your health insurance expenses. By following these steps, you can ensure that your financial records are accurate and up-to-date, allowing you to effectively manage your company’s finances.
Before we delve into the steps, it’s important to note that you should consult with a financial advisor or accountant to ensure that you correctly record and account for employer-paid health insurance according to the specific regulations and requirements in your country and industry.
Now, let’s get started with the first step: setting up the employer-paid health insurance as an expense account.
Step 1: Setting up Employer-Paid Health Insurance as an Expense Account
Before you can start recording employer-paid health insurance expenses, you need to create an expense account in QuickBooks Online specifically for this purpose. This will help you track and categorize these expenses separately from other types of expenses.
Follow these steps to set up the expense account:
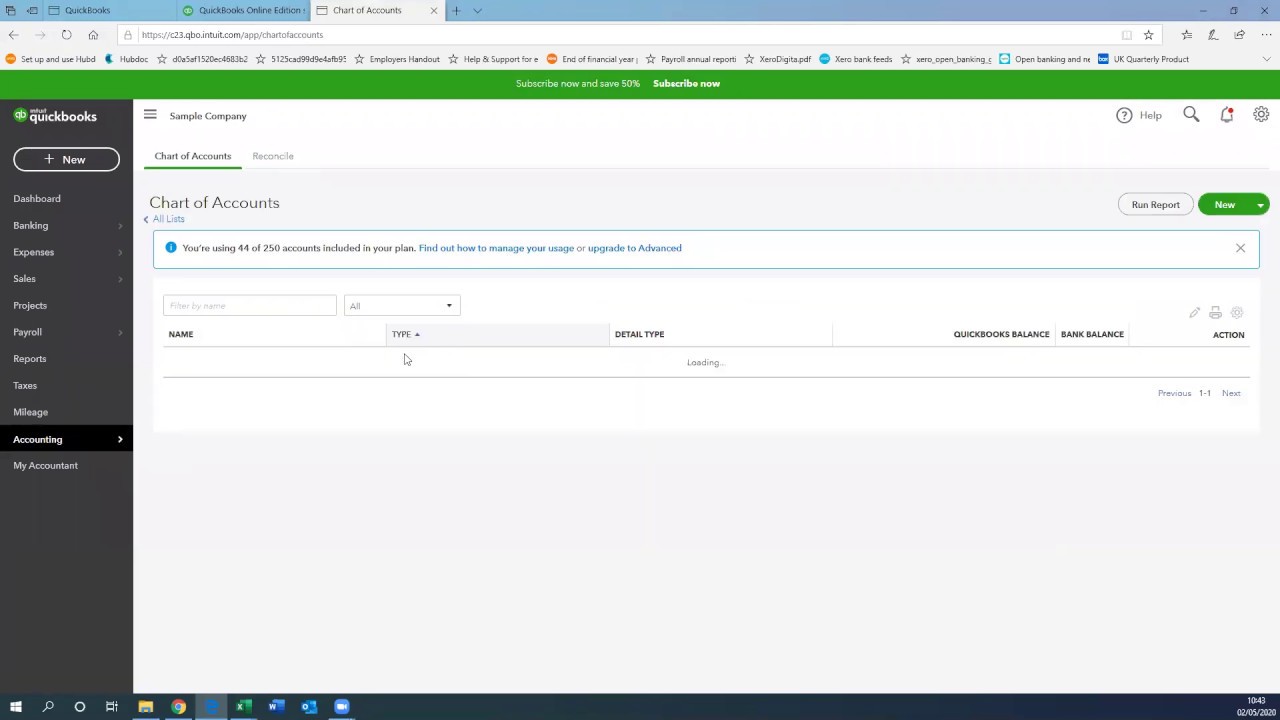
- Log in to your QuickBooks Online account and navigate to the Chart of Accounts.
- Click on “New” to create a new account.
- Select “Expense” as the account type.
- Enter a name for the account, such as “Employer-Paid Health Insurance”.
- Specify any other details or sub-accounts if necessary.
- Save the account.
Once you have set up the expense account for employer-paid health insurance, you are ready to move on to the next step: creating an expense transaction for the health insurance payments.
Step 2: Creating an Expense Transaction for Employer-Paid Health Insurance
Now that you have set up the expense account for employer-paid health insurance, you can start recording the actual expenses incurred. QuickBooks Online allows you to easily create expense transactions for health insurance payments and associate them with the appropriate accounts and vendors.
Follow these steps to create an expense transaction:
- From the QuickBooks Online dashboard, click on the “+” icon and select “Expense” from the dropdown menu.
- In the “Choose a payee” field, enter the name of the insurance provider or vendor.
- Select the appropriate expense account you created for employer-paid health insurance.
- Enter the date of the payment.
- Provide a brief description of the expense, such as “January health insurance premium”.
- Enter the amount of the payment.
- Save the expense transaction.
You can repeat these steps for each health insurance payment that your company makes. It’s important to accurately record the date, amount, and description of each transaction to maintain proper financial records.
Now that you have recorded the expense transactions, the next step is to record the payments made for employer-paid health insurance.
Step 3: Recording Payments for Employer-Paid Health Insurance
Once you have created expense transactions for employer-paid health insurance in QuickBooks Online, you need to record the actual payments made to the insurance provider. This step ensures that your records accurately reflect the cash flow of your company.
Follow these steps to record the payments:
- From the QuickBooks Online dashboard, click on the “+” icon and select “Check” from the dropdown menu.
- In the “Choose a payee” field, enter the name of the insurance provider or vendor.
- In the “Bank Account” field, select the account from which the payment was made.
- Choose the appropriate date of the payment.
- Specify the amount of the payment.
- In the “Account” column, select the expense account you created for employer-paid health insurance.
- Save the check.
By recording the payments and associating them with the expense account, you ensure that your financial records accurately reflect the cash outflow for employer-paid health insurance.
Once you have successfully recorded the payments, you can move on to the final step: running reports and analyzing the employer-paid health insurance expenses.
Step 4: Running Reports and Analyzing Employer-Paid Health Insurance Expenses
After recording employer-paid health insurance expenses and payments in QuickBooks Online, you can generate reports to analyze and gain insights into your company’s health insurance costs. These reports provide valuable information that can help you make informed financial decisions and better manage your business.
Follow these steps to run reports and analyze employer-paid health insurance expenses:
- From the QuickBooks Online dashboard, navigate to the “Reports” tab.
- Search for the “Expense” category and select “Expenses by Vendor Detail” or “Expenses by Account”.
- Customize the report by selecting the appropriate date range and filters.
- Ensure that the expense account for employer-paid health insurance is included in the report.
- Run the report to view the detailed expenses and payments related to health insurance.
- Analyze the report to identify trends, spot any discrepancies, and monitor overall health insurance expenses.
- Consider comparing the data with previous periods or industry benchmarks to gain further insights.
By regularly running and analyzing these reports, you can assess the impact of employer-paid health insurance on your company’s financial health. This information can help you make informed decisions about cost management, budgeting, and employee benefit offerings.
Remember, it’s always a good practice to consult with a financial advisor or accountant to ensure you correctly interpret and utilize the reports in line with your business goals and regulations.
With this final step, you have successfully recorded and analyzed employer-paid health insurance expenses in QuickBooks Online.
Conclusion
Recording and tracking employer-paid health insurance expenses is an important aspect of managing your company’s finances. QuickBooks Online provides a user-friendly platform for accurately recording and analyzing these expenses, allowing you to maintain organized financial records and make informed business decisions.
In this article, we have covered the step-by-step process of recording employer-paid health insurance in QuickBooks Online. From setting up the expense account to creating expense transactions, recording payments, and running reports, you now have a clear understanding of how to manage this aspect of your company’s finances.
Remember to consult with a financial advisor or accountant to ensure that you comply with the specific regulations and requirements in your country and industry. They can provide valuable guidance tailored to your unique situation.
By diligently recording and analyzing employer-paid health insurance expenses, you can gain insights into your company’s financial health, make informed decisions, and effectively manage your business. QuickBooks Online simplifies the process, enabling you to focus on growing your company while maintaining accurate and up-to-date financial records.
Take the time to implement these steps in QuickBooks Online and ensure that your employer-paid health insurance expenses are properly recorded and accounted for. By doing so, you will have a clearer picture of your company’s financial standing and be better equipped to navigate the complexities of managing employee benefits in the future.


