Home>Finance>How To Record A Credit Card Payment In Quickbooks Online

Finance
How To Record A Credit Card Payment In Quickbooks Online
Modified: February 21, 2024
Learn how to record credit card payments in Quickbooks Online and manage your financial transactions effortlessly. Simplify your finance management with our step-by-step guide.
(Many of the links in this article redirect to a specific reviewed product. Your purchase of these products through affiliate links helps to generate commission for LiveWell, at no extra cost. Learn more)
Table of Contents
- Introduction
- Step 1: Accessing the Credit Card Register
- Step 2: Entering Credit Card Payment Transaction
- Step 3: Choosing the Credit Card Account
- Step 4: Entering Payment Details
- Step 5: Allocating the Payment to Specific Expenses
- Step 6: Entering Customer Payments
- Step 7: Finalizing the Credit Card Payment Transaction
- Conclusion
Introduction
Welcome to the world of QuickBooks Online, the go-to accounting software for businesses of all sizes. In this article, we will guide you through the process of recording a credit card payment in QuickBooks Online. Keeping track of credit card transactions and payments is crucial for maintaining accurate financial records.
Whether you are a business owner or an accounting professional, QuickBooks Online offers a user-friendly interface and comprehensive features to streamline your financial management processes.
Tracking credit card payments in QuickBooks Online allows you to maintain an accurate record of your expenses, better manage your cash flow, and reconcile your accounts with ease. By following the step-by-step instructions provided in this article, you will learn how to enter credit card payments and allocate them to specific expenses.
Before we dive into the process, it’s important to note that you should have your credit card account set up in QuickBooks Online. If you haven’t done so already, you can easily add a credit card account by navigating to the Chart of Accounts and selecting “New.” Once your credit card account is set up, you are ready to start recording your credit card payments.
Now, let’s get started with the step-by-step process of recording a credit card payment in QuickBooks Online.
Step 1: Accessing the Credit Card Register
The first step in recording a credit card payment in QuickBooks Online is to access the credit card register. The credit card register is where you can view and manage all the transactions associated with your credit card account.
To access the credit card register, follow these steps:
- Login to your QuickBooks Online account and navigate to the dashboard.
- From the dashboard, select “Banking” from the left navigation menu.
- In the Banking tab, you will see a list of all your connected bank and credit card accounts. Locate and click on the credit card account for which you want to record a payment.
- This will take you to the credit card register, where you can view all the transactions associated with the selected credit card account.
Once you have accessed the credit card register, you are ready to proceed to the next step of entering the credit card payment transaction.
It’s worth mentioning that QuickBooks Online allows you to connect your bank and credit card accounts for automatic syncing. This feature saves time and improves accuracy by importing your transactions directly into QuickBooks Online. If you have not connected your credit card account yet, you can do so by selecting “Connect account” or “Add account” in the Banking tab and following the prompts to connect your credit card account.
Now that you have accessed the credit card register, you’re ready to move forward and enter the credit card payment transaction in QuickBooks Online.
Step 2: Entering Credit Card Payment Transaction
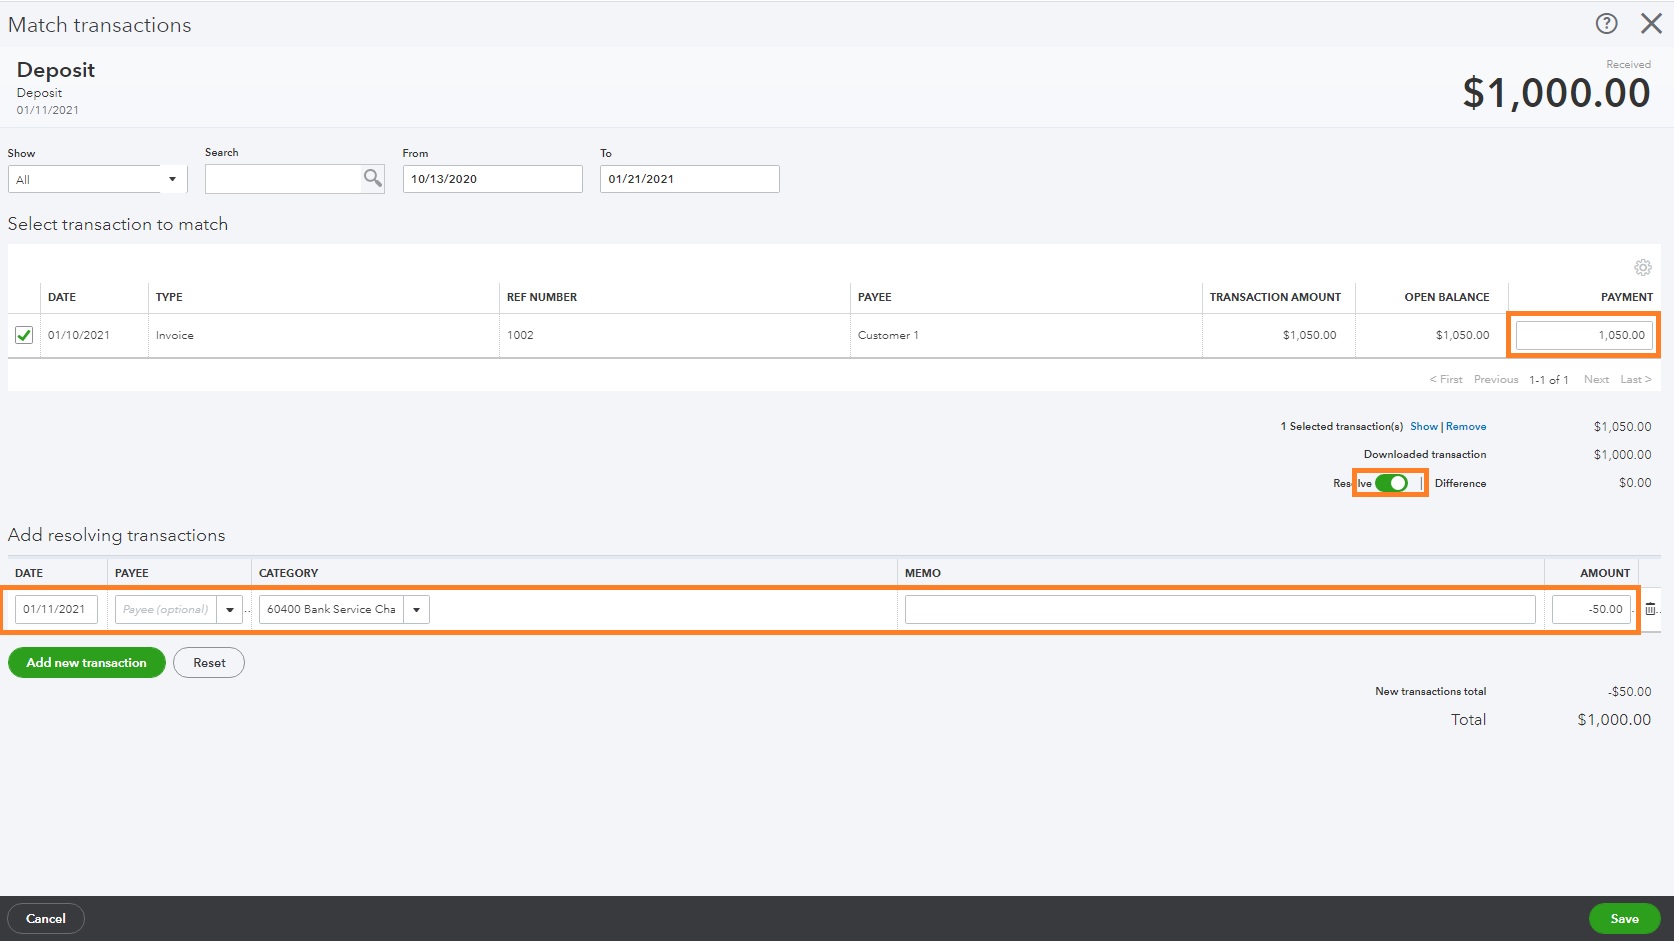
After accessing the credit card register in QuickBooks Online, the next step is to enter the credit card payment transaction. This involves recording the payment details, such as the payment amount, date, and payment method.
Here’s how you can enter a credit card payment transaction in QuickBooks Online:
- In the credit card register, click on the “Add transaction” or “+” button.
- From the drop-down menu, select “Expense.”
- In the “Payee” field, select the vendor or payee to whom the credit card payment is being made.
- Choose the appropriate “Payment method” from the drop-down menu. This could be a check, credit card, electronic transfer, or any other method that applies.
- Enter the payment date in the “Date” field. It should reflect the date on which the credit card payment was made.
- In the “Amount” field, enter the payment amount.
- If applicable, you can also enter a memo or additional details in the “Memo” field.
Once you have filled in all the necessary information, you are ready to proceed to the next step of choosing the credit card account for the payment transaction.
It’s important to ensure the accuracy of the payment details, such as the payment amount and date. This helps maintain precise financial records and facilitates easy reconciliation of your credit card accounts.
Now that you have entered the credit card payment transaction details, let’s move on to the next step of choosing the credit card account.
Step 3: Choosing the Credit Card Account
Once you have entered the payment details in the credit card payment transaction, the next step is to choose the appropriate credit card account in QuickBooks Online. Selecting the correct credit card account ensures that the payment is recorded accurately and reflected in the correct account.
Here are the steps to choose the credit card account for the payment transaction:
- In the credit card payment transaction window, locate the “Account” field.
- Click on the drop-down menu and select the relevant credit card account from the list.
QuickBooks Online allows you to have multiple credit card accounts set up if you have more than one credit card for your business expenses. It’s essential to choose the correct account based on the credit card used for the payment.
If you haven’t set up the credit card account in QuickBooks Online yet, you can do so by going to the Chart of Accounts and selecting “New.” Follow the prompts to add a new credit card account and provide the necessary details.
Ensuring that you select the accurate credit card account guarantees that the payment is recorded in the appropriate financial statement and aids in reconciling your credit card transactions and balances effectively.
Now that you have chosen the credit card account for the payment transaction, we can proceed to the next step of entering the payment details for specific expenses.
Step 4: Entering Payment Details
After choosing the credit card account for the payment transaction, the next step is to enter the payment details in QuickBooks Online. This involves allocating the payment to specific expenses to ensure accurate tracking and categorization of your credit card payments.
Follow these steps to enter the payment details:
- In the credit card payment transaction window, locate the “Category” field.
- Click on the drop-down menu and select the appropriate expense or account category for the payment.
- If the payment needs to be allocated to multiple expenses, you can click on the “+” or “Add a line” button to add additional categories.
- Specify the amount for each expense category. QuickBooks Online will automatically calculate the remaining balance for you.
Entering the payment details accurately is crucial for proper expense tracking and financial reporting. By allocating the payment to specific expense categories, you can easily monitor and analyze your business’s spending patterns.
If you need to split the payment among multiple expense categories, QuickBooks Online provides the flexibility to do so. This makes it convenient for recording credit card payments that cover various business-related expenses.
After entering the payment details, you’re ready to move on to the next step of entering customer payments if applicable to your situation.
Step 5: Allocating the Payment to Specific Expenses
Once you have entered the payment details for your credit card payment transaction in QuickBooks Online, the next step is to allocate the payment to specific expenses. Allocating the payment ensures that the expenses are accurately reflected in your financial records and helps you track your business’s spending.
Here’s how you can allocate the payment to specific expenses:
- Review the payment details that you have entered, including the payment amount and expense categories.
- Ensure that the payment amount matches the total of the allocated amounts for each expense category.
- Double-check the expense categories to ensure they accurately reflect the nature of the expenses that were paid for with the credit card.
- If necessary, make any adjustments to the allocated amounts or expense categories by editing the payment transaction.
By allocating the payment to specific expenses, you can effectively track your business’s cash flow and understand how your credit card is being used for different spending categories.
In addition, allocating the payment correctly enables you to generate accurate financial reports, such as profit and loss statements or expense breakdowns by category. These reports provide valuable insights into your business’s financial health and help you make informed decisions.
Now that you have successfully allocated the credit card payment to specific expenses, we can move on to the next step of entering customer payments if applicable to your situation.
Step 6: Entering Customer Payments
In certain scenarios, you may need to record customer payments made via credit card in QuickBooks Online. This step is relevant if you receive payments from customers using their credit cards, such as for products or services rendered.
Here’s how to enter customer payments made through credit cards in QuickBooks Online:
- In the credit card payment transaction window, locate the “Customer” field.
- Click on the drop-down menu and select the customer who made the payment.
- If the customer’s name is not listed, you can click on the “+” or “Add a new customer” button to add their information.
- Enter the payment amount in the “Amount” field.
- If applicable, you can enter a memo or additional details in the “Memo” field.
By entering customer payments accurately, you can keep track of accounts receivable and ensure proper credit is given for payments made by customers.
In addition, QuickBooks Online provides you with the ability to reconcile your customer invoices with the corresponding credit card payments, improving the accuracy of your financial records.
If you have multiple customer payments to record, you can simply repeat these steps for each payment transaction.
Now that you have successfully entered the customer payment details for credit card transactions, we can proceed to the final step of finalizing the credit card payment transaction in QuickBooks Online.
Step 7: Finalizing the Credit Card Payment Transaction
As we wrap up the process of recording a credit card payment in QuickBooks Online, the final step involves finalizing the payment transaction to ensure accuracy and completeness in your financial records.
Here’s how you can finalize the credit card payment transaction:
- Review all the entered details, including the payment amount, payment method, expense categories, and customer payments (if applicable).
- Ensure that all the information is accurate and matches the actual credit card payment made.
- If necessary, make any edits or adjustments to the payment transaction by selecting the “Edit” or “Delete” option.
- Once you are satisfied that all the information is correct, save and close the credit card payment transaction.
By finalizing the credit card payment transaction, you are confirming the accuracy of the recorded information and ensuring that your financial records are up to date.
After finalizing the transaction, you can access the credit card register to review and reconcile your credit card transactions with your actual credit card statements. This step helps maintain the accuracy of your financial records and ensures that all credit card transactions are accounted for.
It’s worth noting that QuickBooks Online offers additional features and functionalities to help you manage your credit card transactions effectively. You can categorize expenses, create reports, and reconcile your credit card accounts on a regular basis to ensure your financial records are always accurate and up to date.
Concluding the process of recording a credit card payment in QuickBooks Online, you can now confidently manage and track your credit card transactions with ease and efficiency.
Remember, maintaining accurate financial records is vital for understanding your business’s cash flow, making informed financial decisions, and complying with accounting regulations.
Now that you have completed the steps to record a credit card payment in QuickBooks Online, you can focus on managing your finances efficiently and effectively.
Conclusion
Recording credit card payments in QuickBooks Online is essential for accurate financial management and tracking. By following the step-by-step process outlined in this article, you can efficiently record credit card payments, allocate them to specific expenses, and manage customer payments if applicable.
QuickBooks Online provides a user-friendly interface that simplifies the process of recording credit card payments. By accessing the credit card register, entering payment details, choosing the correct credit card account, and allocating payments to specific expenses, you can ensure accurate and organized financial records.
Entering customer payments made via credit card allows for better tracking of accounts receivable and facilitates the reconciliation of customer invoices with credit card payments.
It is crucial to review and finalize credit card payment transactions, ensuring the accuracy of entered details before saving and closing the transaction. Regularly reconciling your credit card accounts within QuickBooks Online helps maintain the accuracy of your financial records and ensures that all transactions are properly accounted for.
By utilizing the features and functionalities of QuickBooks Online, you can streamline your credit card payment recording process and gain valuable insights into your business’s spending habits.
Remember, accurate and up-to-date financial records are not only important for managing your business effectively but also for complying with tax regulations and making well-informed financial decisions.
With the knowledge gained from this article, you have the tools to confidently record credit card payments in QuickBooks Online, improving your financial management processes and facilitating better decision-making for your business.
So go ahead, streamline your credit card payment recording process in QuickBooks Online, and take control of your financial management today.
