Finance
How To Get Rid Of Credit Card On ITunes
Published: October 24, 2023
Learn how to remove your credit card from iTunes and manage your finances more effectively. Follow our step-by-step guide to take control of your finances today!
(Many of the links in this article redirect to a specific reviewed product. Your purchase of these products through affiliate links helps to generate commission for LiveWell, at no extra cost. Learn more)
Table of Contents
Introduction
Having a credit card linked to your iTunes account can make purchasing apps, music, and other content quick and convenient. However, there may come a time when you no longer want to have a credit card associated with your iTunes account.
Whether you want to remove your credit card for security reasons, to switch to a different payment method, or simply because you no longer use iTunes regularly, the process of getting rid of a credit card from your iTunes account is relatively straightforward.
In this article, we will guide you through the steps to remove a credit card from your iTunes account. By following these easy steps, you can unburden yourself from the need to manage a credit card linked to your iTunes account and regain control over your payment options.
Before we dive into the steps, it’s important to note that removing a credit card from your iTunes account does not cancel any subscriptions or purchases you may have made in the past. It simply removes the credit card as a payment method, allowing you to use a different form of payment, such as gift cards or PayPal, for future iTunes purchases.
Now, let’s get started on removing that credit card from your iTunes account!
Step 1: Open iTunes
The first step to removing a credit card from your iTunes account is to open the iTunes application on your device. Simply locate the iTunes icon on your desktop or in your applications folder and click on it to launch the program.
If you’re using a Mac, you can find iTunes in the Applications folder or in your Dock. For Windows users, look for iTunes in the Start menu or on the desktop if you’ve chosen to create a shortcut.
Once you’ve opened iTunes, you will be presented with the familiar iTunes interface, where you can access your music, movies, and other content. Take a moment to familiarize yourself with the layout if you’re new to iTunes.
It’s important to note that you will need to sign in to your iTunes account in order to proceed with removing your credit card. If you aren’t already signed in, click on the “Sign In” button located at the top right corner of the iTunes window. Enter your Apple ID and password and click “Sign In”.
If you don’t have an Apple ID, you will need to create one in order to use iTunes. Simply click on “Account” and then “Create Apple ID” to begin the registration process.
Once you’re signed in, you’re ready to move on to the next step: accessing your account settings.
Step 2: Go to Account Settings
After opening iTunes and signing in to your account, the next step is to navigate to your account settings. This is where you can manage your payment information and make changes to your iTunes account.
To access your account settings, look for the “Account” menu located at the top of the iTunes window. Click on it, and a drop-down menu will appear. From this menu, select the “View My Account” option.
Alternatively, you can press the “Ctrl” key and the “B” key on your keyboard simultaneously. This will open a window where you can sign in to your iTunes account and access your account settings directly.
Once you’ve clicked on “View My Account,” you may be prompted to enter your Apple ID password again for security purposes. Enter your password and click “View Account” to proceed.
After successfully logging in, you will be taken to the “Account Information” page. Here you can view and edit various details and settings related to your iTunes account, including your payment information.
It’s important to note that if you have multiple Apple IDs associated with different countries or regions, you may need to switch to the appropriate account before proceeding to the next step. You can do this by clicking on your Apple ID located at the top of the “Account Information” page and selecting the desired account from the drop-down menu.
Now that you’re in your account settings, let’s move on to the next step: selecting your payment information.
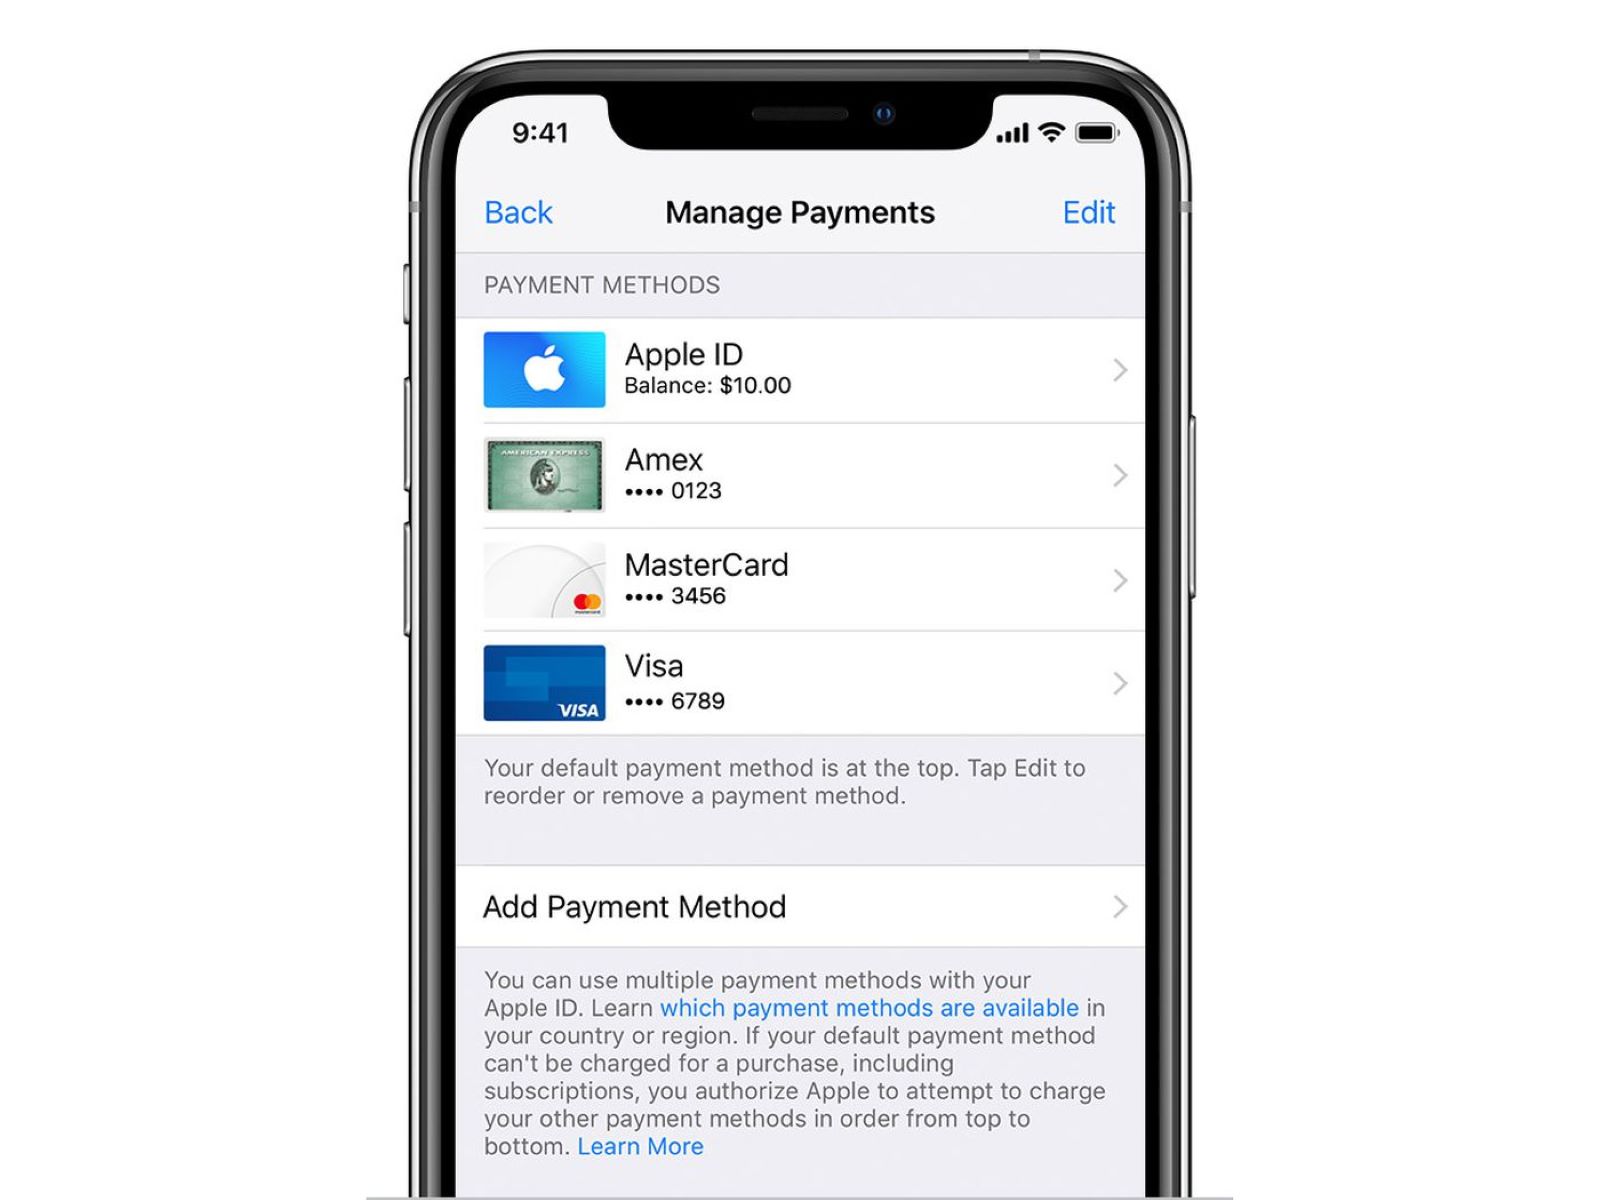
Step 3: Select Payment Information
Once you’re on the “Account Information” page in iTunes, the next step is to locate and select your payment information. This is where you can view and modify the credit card details associated with your iTunes account.
Scroll down the page until you find the section titled “Payment Type.” In this section, you will see the credit card currently linked to your iTunes account, along with the last four digits of the card number and the expiration date.
Next to the listed credit card information, you will see a “Edit” or “Manage” button. Click on this button to proceed with removing the credit card from your iTunes account.
If you don’t see the credit card information listed or the Edit/Manage button, it’s possible that you don’t have a credit card associated with your iTunes account. In that case, you can skip to the next step.
After clicking on the Edit/Manage button, you may be prompted to enter your Apple ID password or use Touch ID/Face ID for verification. Provide the necessary information to continue.
Once you’ve successfully verified your identity, you will be taken to a new page where you can make changes to your payment information. Here, you can add or remove credit cards, as well as update or change your billing address.
If you have multiple credit cards linked to your account, you can select the credit card you wish to remove by clicking on it.
Now that you’ve accessed your payment information, let’s proceed to the next step: editing the payment method.
Step 4: Edit Payment Method
After selecting your payment information in iTunes, the next step is to edit the payment method. This step allows you to remove the credit card from your iTunes account and choose an alternative payment option.
On the payment information page, look for the option to “Edit” or “Change” the payment method. This option may be located next to the credit card details or within the settings menu.
Click on the “Edit” or “Change” button, and a new page will appear where you can modify your payment method.
Here, you will see a list of available payment methods. Look for the option that allows you to remove the credit card linked to your iTunes account. This option may be labeled as “None” or “No Payment Method.”
Select the “None” or “No Payment Method” option to remove the credit card from your iTunes account. If you wish to link a new form of payment, such as a gift card or PayPal, you can do so at this stage as well.
Keep in mind that if you have any active subscriptions that require a payment method, you will need to update your payment information before removing the credit card. Failure to do so may result in the cancellation of your subscriptions.
Once you’ve made the necessary changes to your payment method, click on the “Save” or “Done” button to apply the modifications.
Congratulations! You have successfully edited the payment method in your iTunes account. Now, let’s proceed to the next step: removing the credit card.
Step 5: Remove Credit Card
Now that you have edited the payment method in your iTunes account, the next step is to remove the credit card completely. This final step ensures that the credit card details are no longer associated with your iTunes account.
On the payment information page, you should see an option to remove the credit card. This option may be labeled as “Remove” or depicted by a trash bin icon.
Click on the “Remove” option or select the trash bin icon, and a confirmation window will appear asking if you are sure you want to remove the credit card from your iTunes account.
Review the information to ensure you are removing the correct credit card, as this action cannot be undone. If you’re certain, click on “Remove” to proceed.
Once you’ve confirmed the removal, the credit card will be deleted from your iTunes account. You will no longer see the card details on the payment information page.
It’s important to note that while the credit card information is removed, any past purchases or subscriptions you made with that card will still remain in your iTunes account. Removing the credit card only affects future payments.
Congratulations! You have successfully removed the credit card from your iTunes account. Now you can make future purchases using alternative payment methods.
Before we conclude, let’s move on to the final step: confirming the changes made to your iTunes account.
Step 6: Confirm Changes
After removing the credit card from your iTunes account, it’s important to take a moment to confirm the changes you’ve made. This step ensures that the credit card has been successfully removed and that your iTunes account reflects the updated payment method.
Go back to the main account settings page in iTunes, where you initially accessed your payment information. Take a moment to review the payment section and make sure that you no longer see the credit card details listed.
If the credit card information is no longer displayed, it confirms that the removal process was successful. You have successfully removed the credit card from your iTunes account.
It’s always a good idea to double-check and ensure that your iTunes account reflects the changes you intended to make. This helps to avoid any future issues or unauthorized charges associated with the previously linked credit card.
Additionally, if you added a new payment method during the process, such as a PayPal account or a gift card, make sure it is displaying correctly and associated with your iTunes account.
Now that you have confirmed the changes, you can proceed to use your iTunes account with confidence, knowing that your credit card information is no longer linked.
Remember, if you ever decide to add a credit card back to your iTunes account in the future, you can follow a similar process but select “Add Payment Method” instead. This will allow you to enter new credit card information and link it to your iTunes account.
Congratulations! You have successfully removed the credit card and confirmed the changes made to your iTunes account. You are now free to enjoy your iTunes experience without the worry of a credit card linked to your account.
If you have any questions or need further assistance, feel free to consult the iTunes support documentation or reach out to their customer service for guidance.
Thank you for following this step-by-step guide, and we hope you find it helpful in managing your iTunes payment methods.
Conclusion
Removing a credit card from your iTunes account can provide you with more control over your payment options and ensure the security of your financial information. By following the simple steps outlined in this guide, you can easily remove a credit card from your iTunes account and choose an alternative payment method.
Start by opening iTunes and accessing your account settings. From there, select your payment information and edit the payment method. Remove the credit card from your account, confirming the changes made.
Remember, removing a credit card does not cancel any subscriptions or previous purchases you’ve made. It simply removes the card as a payment method for future transactions in iTunes.
By following the steps above, you can regain control over your payment options and enjoy a hassle-free iTunes experience. Whether you prefer to use gift cards, PayPal, or other payment methods, removing a credit card from your iTunes account gives you the flexibility to choose what works best for you.
If you ever decide to add a credit card back to your account or make changes to your payment information in the future, you can always refer back to this guide for easy-to-follow instructions.
We hope this guide has been helpful in guiding you through the process of removing a credit card from your iTunes account. If you have any further questions or need additional assistance, don’t hesitate to reach out to iTunes customer support for personalized guidance.
Thank you for taking the time to read this article, and we wish you a seamless and enjoyable iTunes experience!
What's Hot
Latest Articles
Related Post

By: • Finance

By: • Finance

By: • Finance


By: • Finance
By: • Finance

By: • Finance

By: • Finance

By: • Finance

By: • Finance


By: Sunny • Finance

By: • Finance