
Finance
How To Set Up Quickbooks For Small Business
Published: November 25, 2023
Learn how to set up Quickbooks for your small business and streamline your finance management. Increase efficiency and accuracy with our step-by-step guide.
(Many of the links in this article redirect to a specific reviewed product. Your purchase of these products through affiliate links helps to generate commission for LiveWell, at no extra cost. Learn more)
Table of Contents
- Introduction
- Step 1: Creating a QuickBooks Account
- Step 2: Setting Up Company Information
- Step 3: Customizing Chart of Accounts
- Step 4: Adding Products and Services
- Step 5: Adding Customers and Vendors
- Step 6: Setting Up Sales and Expense Categories
- Step 7: Setting Up Tax Preferences
- Step 8: Entering Opening Balances
- Step 9: Connecting Bank Accounts
- Step 10: Setting Up Payroll (optional)
- Conclusion
Introduction
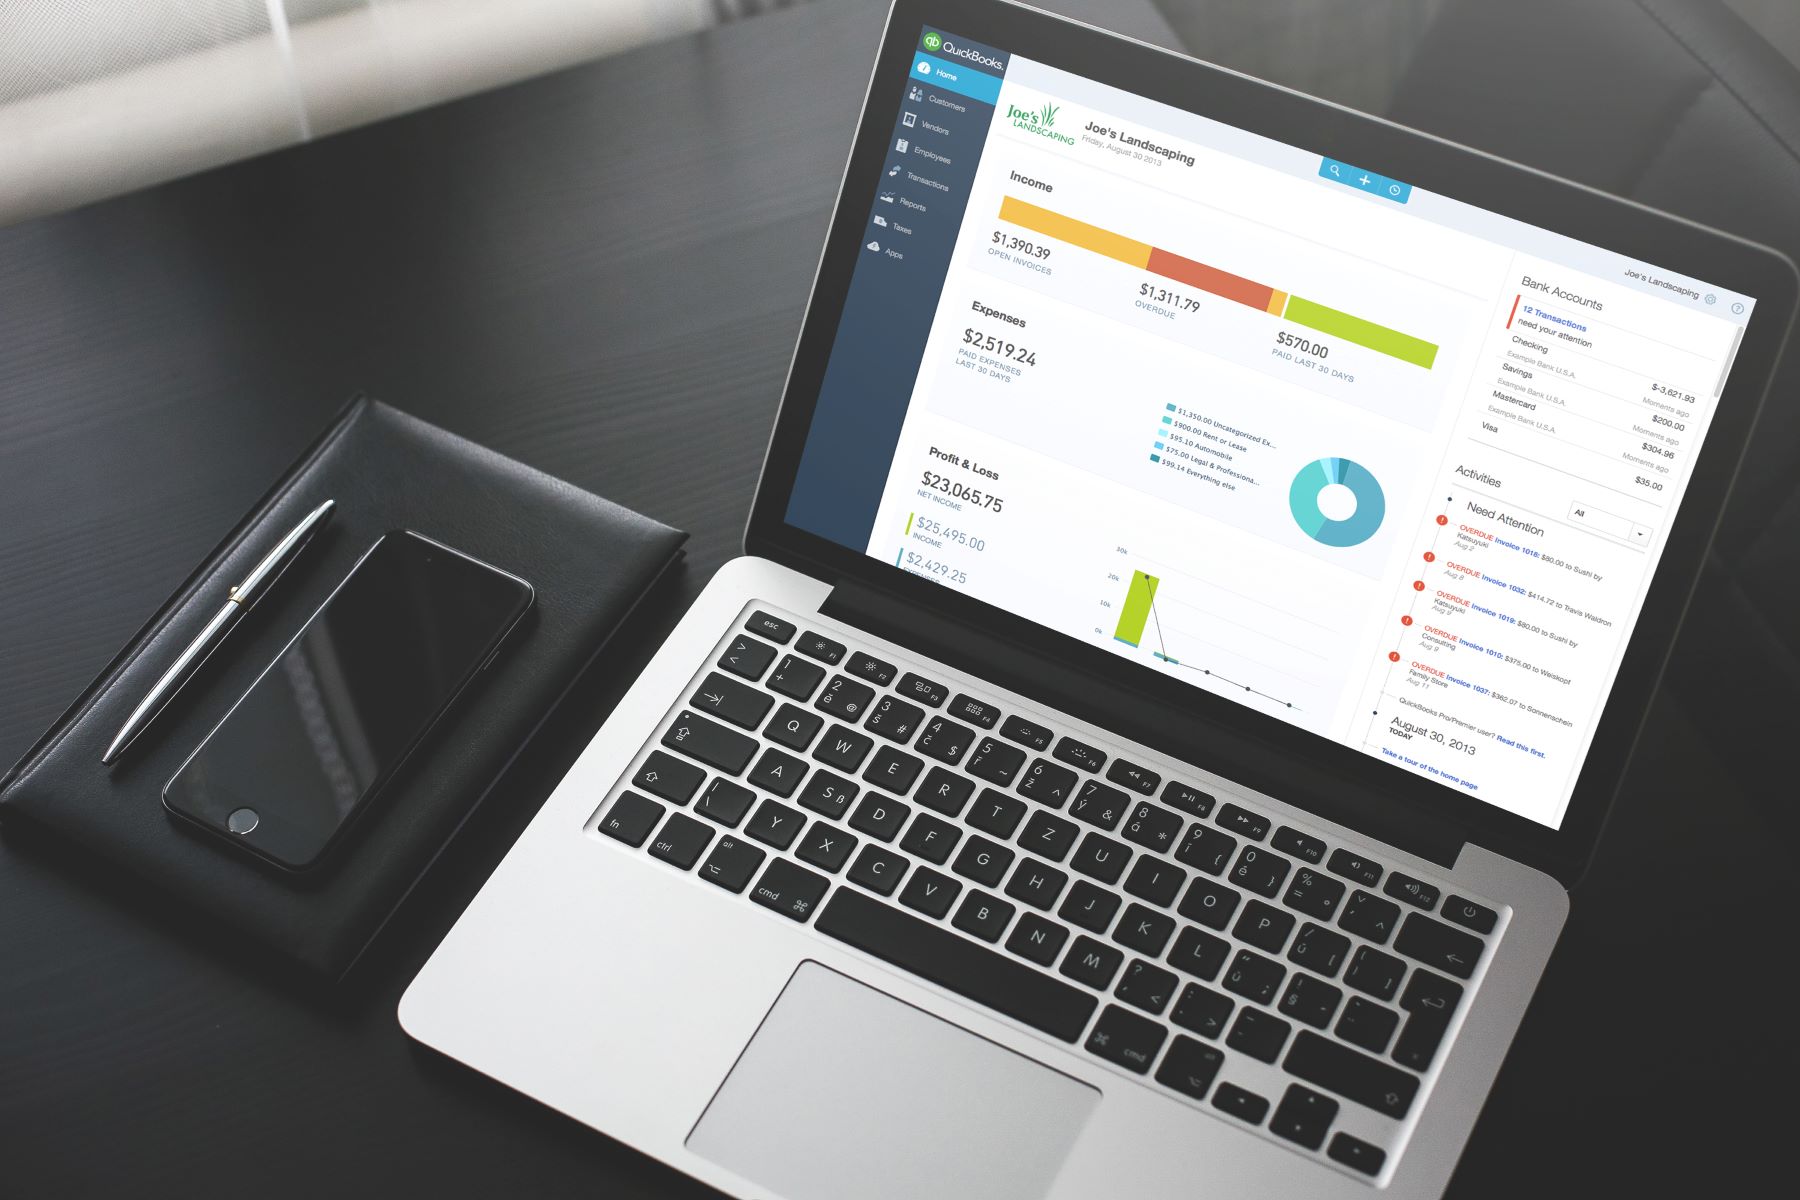
Welcome to the world of small business finance! As a small business owner, managing your finances effectively is crucial for the success and growth of your venture. One powerful tool that can simplify this process is QuickBooks. QuickBooks is an accounting software that helps you track income and expenses, manage invoices, and generate financial reports.
In this article, we will guide you through the process of setting up QuickBooks for your small business. Whether you’re just starting out or looking to transition from traditional bookkeeping methods, QuickBooks can streamline your financial management tasks and provide you with accurate and up-to-date insights into your business’s financial health.
Setting up QuickBooks may seem daunting at first, but with the right guidance, you’ll be up and running in no time. We’ll walk you through each step, from creating a QuickBooks account all the way to connecting your bank accounts and setting up payroll.
Before we dive in, it’s important to note that while QuickBooks is user-friendly, it’s always a good idea to have a basic understanding of accounting principles. Having a solid foundation will help you utilize QuickBooks to its full potential and make informed financial decisions for your business.
Now, let’s get started with the first step: creating a QuickBooks account!
Step 1: Creating a QuickBooks Account
The first step in setting up QuickBooks for your small business is creating a QuickBooks account. This involves signing up for a subscription and providing some basic business information.
Here’s a step-by-step guide to help you through the process:
- Go to the QuickBooks website and click on the “Sign Up” or “Get Started” button. You’ll be prompted to choose which version of QuickBooks is right for your business. QuickBooks offers various plans designed for different types and sizes of businesses.
- Select the plan that best suits your needs and click on the “Buy Now” or “Subscribe” button. You may have the option to start with a free trial. Take advantage of this to explore the software before committing.
- Fill in your business information, including your business name, address, industry type, and federal tax ID number (if applicable). Double-check that the information is accurate, as it will be used for your financial reports.
- Choose a username and password to create your QuickBooks account. Make sure to select a strong password to secure your financial data.
- Review the terms of service and privacy policy, and then click on the “Create Account” or “Sign Up” button to complete the registration process.
Once your QuickBooks account is created, you’ll have access to the QuickBooks dashboard, where you can start setting up your company and customizing the software to suit your business needs.
Congratulations! You have successfully completed the first step of setting up QuickBooks for your small business. In the next step, we’ll guide you through the process of setting up your company information.
Step 2: Setting Up Company Information
After creating your QuickBooks account, the next step in setting up QuickBooks for your small business is to input your company information. This includes details such as your company name, address, logo, and fiscal year.
Follow these steps to set up your company information:
- Log in to your QuickBooks account and navigate to the QuickBooks dashboard.
- Click on the “Gear” icon in the upper right corner, then select “Account and Settings” from the drop-down menu.
- On the left-hand side, click on “Company” and then select “Company Information.”
- In the “Company Name” field, enter your business name as you want it to appear on your financial documents and reports.
- Provide your business address and contact information in the respective fields. This information will be used for invoices, statements, and other customer-facing documents.
- If you have a company logo, click on the “Upload Logo” button and follow the prompts to add your logo to your QuickBooks account.
- Specify your fiscal year by selecting the month your fiscal year starts from the drop-down menu. If you’re unsure, consult with your accountant or refer to your official business documents.
- Take a moment to review and confirm that all the information entered is accurate.
- Click on the “Save” or “Done” button to save your company information.
By setting up your company information in QuickBooks, you ensure that your financial documents are professional-looking and accurately reflect your business identity. It also allows QuickBooks to generate reports and insights tailored to your specific business needs.
Great job! You’ve successfully completed the second step of setting up QuickBooks for your small business. In the next step, we’ll show you how to customize your Chart of Accounts.
Step 3: Customizing Chart of Accounts
The Chart of Accounts is a crucial component of your QuickBooks setup. It organizes your business’s financial transactions into categories, making it easier to track income, expenses, assets, and liabilities. Customizing your Chart of Accounts allows you to tailor it to your specific business needs and industry.
Follow these steps to customize your Chart of Accounts:
- From the QuickBooks dashboard, click on the “Gear” icon in the upper right corner and select “Chart of Accounts” from the drop-down menu.
- You’ll see a list of default accounts based on the industry you selected during the setup process. Review the list and identify any accounts that are not applicable to your business.
- To add a new account, click on the “New” button. Choose the appropriate account type from the drop-down menu, such as “Bank,” “Expense,” “Income,” “Asset,” or “Liability.”
- Provide a name for the new account. Be specific and use descriptive terms that accurately represent the purpose of the account.
- Optional: If necessary, you can designate the account as a sub-account by checking the “Is sub-account” box and selecting the parent account from the drop-down menu.
- Once you’re finished adding the account details, click on the “Save and Close” button.
- To edit an existing account, locate the account in the Chart of Accounts list and click on the dropdown arrow next to the “Action” column. From there, select “Edit” and make the necessary changes.
- If you have accounts that you no longer need, you can make them inactive by selecting “Make inactive” from the action dropdown. This will hide them from your list of active accounts, but you can still access them for historical reporting purposes if needed.
- Repeat the steps above to customize and tailor your Chart of Accounts to fit your business’s unique needs and structure.
By customizing your Chart of Accounts, you can ensure that your financial transactions are accurately categorized, making it easier to generate reports and analyze your business’s financial performance.
Well done! You’ve now completed the third step of setting up QuickBooks for your small business. In the next step, we’ll cover how to add products and services to your QuickBooks account.
Step 4: Adding Products and Services
Adding your products and services to QuickBooks is an essential step in setting up your small business’s financial records. By entering detailed information about what you sell, you’ll be able to easily track inventory, generate sales reports, and accurately invoice your customers.
Follow these steps to add products and services to your QuickBooks account:
- From the QuickBooks dashboard, click on the “Sales” tab in the left-hand navigation menu.
- Click on the “Products and Services” tab to access the product and service list.
- Click on the “New” button to start adding a new product or service.
- Choose whether you want to add a product or a service. If you offer both, you can create separate entries for each or combine them into one if applicable.
- Provide a name for the product or service. Be specific and use descriptive terms that accurately represent what you offer.
- You can also add additional information such as a description, SKU (stock keeping unit), price, cost, and income account.
- If you track inventory, specify the starting quantity and cost of the item. This allows QuickBooks to keep track of stock levels and generate useful inventory reports.
- Click on the “Save and Close” button to add the product or service to your list.
- Repeat the process to add all your products and services to QuickBooks.
With your products and services added to QuickBooks, you can now easily create invoices for your customers, track sales, and monitor inventory levels. This information will also be useful when generating financial reports and analyzing the profitability of your offerings.
Congratulations! You’ve successfully completed the fourth step of setting up QuickBooks for your small business. In the next step, we’ll guide you through the process of adding customers and vendors to your QuickBooks account.
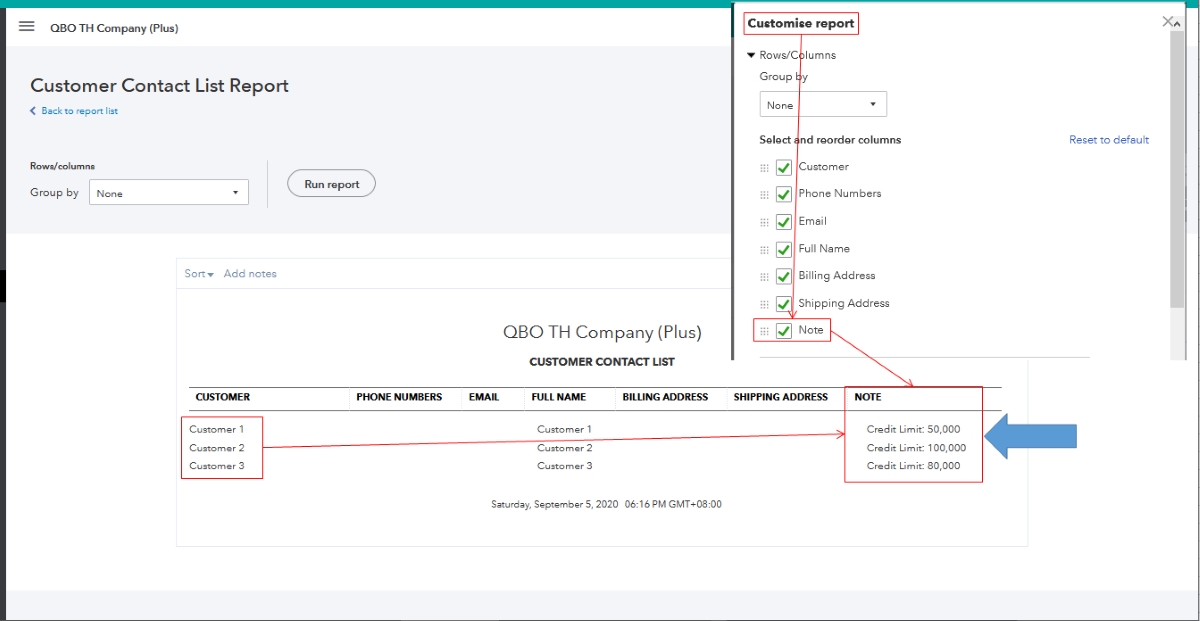
Step 5: Adding Customers and Vendors
Adding your customers and vendors to QuickBooks allows you to easily manage your relationships and track transactions with them. By entering their information into the system, you can generate invoices, track payments, and access important contact details whenever needed.
Follow these steps to add customers and vendors to your QuickBooks account:
- From the QuickBooks dashboard, click on the “Sales” or “Expenses” tab in the left-hand navigation menu, depending on whether you’re adding a customer or a vendor.
- Click on the “Customers” or “Vendors” tab to access the respective list.
- Click on the “New” button to start adding a new customer or vendor.
- Enter the relevant information for the customer or vendor, such as their name, address, contact details, and payment terms.
- You can also add additional details like a contact person, alternate contact information, and any notes that may be important for your records.
- For customers, you can specify their preferred method of contact and add a payment method if you have recurring payment arrangements.
- For vendors, you can provide their tax ID number, vendor type, and account number for reference.
- Click on the “Save and Close” button to add the customer or vendor to your list.
- Repeat the process to add all your customers and vendors to QuickBooks.
With your customers and vendors added to QuickBooks, you can easily generate invoices, track payments, and manage your relationships. This information will be essential when it comes to generating financial reports, analyzing sales patterns, and maintaining accurate records of your transactions.
Well done! You’ve successfully completed the fifth step of setting up QuickBooks for your small business. In the next step, we’ll cover how to set up sales and expense categories in QuickBooks.
Step 6: Setting Up Sales and Expense Categories
Setting up sales and expense categories in QuickBooks is essential for properly tracking and categorizing your income and expenses. By organizing your revenue and costs into specific categories, you can generate accurate financial reports and gain valuable insights into your business’s financial performance.
Follow these steps to set up sales and expense categories in QuickBooks:
- From the QuickBooks dashboard, click on the “Accounting” tab in the left-hand navigation menu.
- Select “Chart of Accounts” to access your list of accounts.
- Review your existing accounts and identify any sales-related accounts (e.g., Sales Revenue) and expense-related accounts (e.g., Advertising Expense).
- To add a new sales category, click on the “New” button.
- Choose the appropriate account type, such as “Income” for sales or “Expense” for costs.
- Enter a name for the category that accurately represents the type of sales or expense. For example, you might have categories like “Product Sales,” “Service Revenue,” or “Marketing Expenses.”
- Specify whether the category is a sub-account by selecting the appropriate parent account from the drop-down menu.
- Save the new category by clicking on the “Save and Close” button.
- You can repeat these steps to add additional sales and expense categories as necessary.
By setting up sales and expense categories in QuickBooks, you’ll be able to easily allocate income and expenses to specific categories, enabling you to analyze your business performance more effectively. This will also facilitate the generation of accurate financial statements and give you a clearer picture of your business’s profitability.
Great job! You’ve successfully completed the sixth step of setting up QuickBooks for your small business. In the next step, we’ll cover how to set up tax preferences in QuickBooks.
Step 7: Setting Up Tax Preferences
Setting up tax preferences in QuickBooks is crucial for accurately calculating and tracking your tax liabilities. By configuring your tax settings properly, you can ensure that your sales tax, payroll tax, and other tax obligations are handled correctly within the software.
Follow these steps to set up tax preferences in QuickBooks:
- From the QuickBooks dashboard, click on the “Taxes” tab in the left-hand navigation menu.
- Click on the “Sales Tax” or “Payroll Tax” tab, depending on the type of tax you need to set up.
- For Sales Tax: Click on the “Set up sales tax” button.
- For Payroll Tax: Click on the “Set up payroll tax” button.
- Follow the prompts and fill in the necessary information, such as your tax agency name, tax ID number, and tax rates. It’s crucial to have accurate and up-to-date tax information.
- Choose whether you want to set up automated sales tax calculation and how frequently you want to file your sales tax returns.
- Save your preferences by clicking on the “Save” or “Done” button.
- If you have multiple tax jurisdictions or complex tax requirements, you may need to consult with a tax professional to ensure that your tax preferences are set up correctly.
By setting up tax preferences in QuickBooks, you’ll be able to streamline your tax calculations, avoid errors, and stay compliant with your tax obligations. QuickBooks can automate tax calculations, saving you time and effort when it comes to filing and reporting taxes.
Fantastic! You’ve successfully completed the seventh step of setting up QuickBooks for your small business. In the next step, we’ll cover how to enter opening balances in QuickBooks.
Step 8: Entering Opening Balances
Entering opening balances in QuickBooks is an important step to ensure that your financial records accurately reflect the state of your business at the beginning of your accounting period. This includes recording outstanding invoices, unpaid bills, bank balances, and other financial transactions that occurred before starting to use QuickBooks.
Follow these steps to enter opening balances in QuickBooks:
- From the QuickBooks dashboard, click on the “Accounting” tab in the left-hand navigation menu.
- Select “Chart of Accounts” to access the list of accounts.
- Locate and click on the account for which you need to enter an opening balance.
- In the account details page, click on the “Edit” button.
- Enter the correct opening balance for the account. This can be the outstanding balance on an unpaid invoice, the current balance in a bank account, or the amount owed on an outstanding bill.
- Save the changes by clicking on the “Save and Close” button.
- Repeat these steps for other accounts that require opening balances.
It’s important to note that entering opening balances should be done carefully and accurately. Reconciling your accounts and reviewing previous financial statements can help ensure that the opening balances entered in QuickBooks are correct.
By entering opening balances in QuickBooks, you establish a starting point for your financial records, allowing you to track transactions accurately and generate precise financial reports. This helps maintain the integrity of your financial data and ensures that your business’s financial position is accurately reflected in QuickBooks.
Well done! You’ve successfully completed the eighth step of setting up QuickBooks for your small business. In the next step, we’ll guide you through connecting your bank accounts to QuickBooks.
Step 9: Connecting Bank Accounts
Connecting your bank accounts to QuickBooks allows you to streamline your bookkeeping process by automatically importing your bank transactions into the software. This not only saves time but also helps ensure the accuracy of your financial records.
Follow these steps to connect your bank accounts to QuickBooks:
- From the QuickBooks dashboard, click on the “Banking” tab in the left-hand navigation menu.
- Click on the “Connect Account” button to start the process of linking your bank account.
- Search for your bank by typing its name in the search box, or select it from the list of popular banks.
- Enter your bank’s login credentials (username and password) in the secure login window. QuickBooks will encrypt and protect your login information.
- Select the account(s) you want to connect to QuickBooks. This may include your checking account, savings account, credit card accounts, and any other accounts you want to track in QuickBooks.
- Authorize QuickBooks to access your bank account information by following the prompts and accepting any terms and conditions.
- Wait for QuickBooks to establish the connection with your bank. This may take a few minutes as it retrieves your transaction history.
- Review the imported bank transactions in QuickBooks and match them with the corresponding entries in your books.
- Repeat the process for each bank account you want to connect to QuickBooks.
By connecting your bank accounts to QuickBooks, you’ll have real-time access to your financial transactions, enabling you to reconcile accounts more efficiently and easily track your income and expenses.
Congratulations! You’ve successfully completed the ninth step of setting up QuickBooks for your small business. In the next step, we’ll cover how to set up payroll in QuickBooks (optional).
Step 10: Setting Up Payroll (optional)
If you have employees and want to automate your payroll process, QuickBooks offers an integrated payroll system that can help simplify your payroll management. Setting up payroll in QuickBooks allows you to efficiently calculate employee wages, withhold taxes, and generate pay stubs and tax forms.
Follow these steps to set up payroll in QuickBooks:
- From the QuickBooks dashboard, click on the “Employees” tab in the left-hand navigation menu.
- Click on the “Payroll Setup” or “Get Started” button to begin the payroll setup process.
- Follow the on-screen prompts to provide the necessary information about your business, such as your business type, federal and state tax IDs, and your payroll tax filing frequency.
- Enter your employees’ information, including their personal details, withholding allowances, and pay rates.
- Set up your payroll schedule and payment method, whether it’s a direct deposit or printing physical paychecks.
- Configure your payroll tax settings by specifying the appropriate tax rates and tax agencies.
- Review and finalize your payroll setup by double-checking the details and ensuring that everything is accurate.
- Once your payroll is set up, you can start processing payroll by entering hours worked, bonuses, and other earnings for each employee.
- QuickBooks will automatically calculate the net pay, withhold taxes, and generate pay stubs for each employee.
- After running payroll, you can print paychecks or initiate direct deposits for your employees.
Setting up payroll in QuickBooks can save you time and help ensure accuracy in managing your employee wages and payroll taxes. QuickBooks will handle the necessary calculations and generate the required forms, such as W-2s and 1099s, making it easier for you to comply with payroll tax obligations.
Good job! You’ve successfully completed the tenth and final step of setting up QuickBooks for your small business. By following these steps, you’ve laid a solid foundation for using QuickBooks to manage your finances effectively.
Remember, while QuickBooks is a powerful tool, it’s always a good idea to consult with an accountant or financial professional to ensure that you are using the software to its full potential and complying with all applicable accounting and tax regulations.
Now, go ahead and explore the various features of QuickBooks to streamline your financial management and gain valuable insights into the financial health of your small business.
Conclusion
Congratulations on completing the setup process for QuickBooks in your small business! By following the steps outlined in this guide, you’ve taken a significant step towards streamlining your financial management and gaining better control over your business’s finances.
QuickBooks provides a robust platform for tracking income and expenses, managing invoices, generating financial reports, and automating tasks like payroll. With your QuickBooks account set up and customized to fit your business needs, you’ll be able to save time, make informed financial decisions, and stay on top of your financial obligations.
Remember, as you move forward with using QuickBooks, it’s important to stay engaged with the software and regularly review your financial information. This includes reconciling accounts, regularly updating your records, and keeping track of any changes that may affect your business’s financial health.
Additionally, consider taking advantage of the various resources offered by QuickBooks, such as tutorials and customer support, to enhance your understanding of the software’s capabilities and features. This will enable you to leverage QuickBooks to its full potential and gain deeper insights into your business’s financial performance.
Lastly, while QuickBooks is a powerful tool, it’s always beneficial to seek guidance from a certified accountant or financial professional when necessary. They can provide expert advice tailored to your specific business needs, ensuring that you are utilizing QuickBooks effectively and meeting all accounting and tax requirements.
By setting up QuickBooks for your small business, you’ve taken an important step towards achieving financial success. With accurate financial records, real-time insights, and streamlined processes, you’ll be well-equipped to make informed decisions, seize opportunities, and navigate the ever-changing landscape of small business finance.
Embrace the power of QuickBooks and watch as it becomes an invaluable companion on your journey to financial success. Good luck!
What's Hot
Latest Articles
Related Post

By: • Finance

By: • Finance
By: • Finance

By: • Finance
By: • Finance

By: • Finance
By: • Finance

By: • Finance

By: • Finance

By: • Finance

By: • Finance

By: • Finance

By: • Finance

By: • Finance

By: • Finance